This article was co-authored by wikiHow Staff. Our trained team of editors and researchers validate articles for accuracy and comprehensiveness. wikiHow's Content Management Team carefully monitors the work from our editorial staff to ensure that each article is backed by trusted research and meets our high quality standards.
The wikiHow Video Team also followed the article's instructions and verified that they work.
This article has been viewed 107,100 times.
Learn more...
Whipped cream is best served right away, especially if it’s homemade. But if you’ve made too much of it or if you’re enjoying it at a later time, storing it properly is essential to keeping it fluffy and fresh. Store it in the refrigerator or freezer until you’re ready to dive in!
Steps
Storing Whipped Cream in the Refrigerator
-
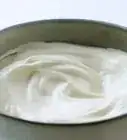
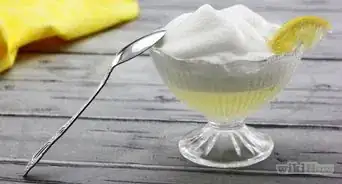
1Transfer the whipped cream in an airtight container. A plastic tupperware container is perfect for storing homemade whipped cream. However, if you have store-bought whipped cream, it’s best to leave it in its original container.[1]
- Inspect the lid when it’s closed to make sure it’s completely sealed. If the lid is damaged or loose, spoon the whipped cream into an airtight container.
-
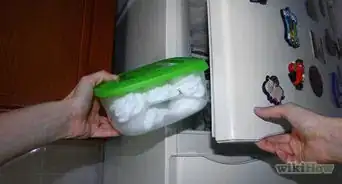
2Place the container near the back of your refrigerator. Store the container of whipped cream on a shelf towards the back, not in the refrigerator door. The temperature is cooler in the back of the refrigerator and warmer in the refrigerator door.[2]
- Store it underneath other chilled items to get the coolest temperature, preserving its peaks and texture.
- Whipped cream will last 5 to 7 days when it’s continually refrigerated. If you take it out to use some of it, the change in temperature might cause the remaining whipped cream to deflate and go bad faster.
Advertisement -
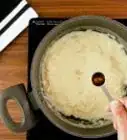
3Add gelatin to homemade whipped cream to stabilize its peaks. Combine 1/4 teaspoon (1.42 grams) of unflavored gelatin powder and 1⁄4 cup (59 mL) of cold water in a small saucepan. Wait 4 minutes for the gelatin to absorb all of the water. Heat the mixture over low heat until the gelatin is fully dissolved, stirring it occasionally. Incorporate the gelatin after you’ve whipped the cream to soft peaks then remix it until soft peaks re-form.[3]
- Store stabilized whipped cream in the refrigerator in a sealed container for up to 3 or 4 days.
- Make sure the gelatin isn’t hot when you add it into the whipped cream—let it cool for about 10 minutes while you’re whipping the cream.
-
4Smell and look at the whipped cream to tell if it’s still good. Expired whipped cream won’t taste good and might make you sick. If you’re unsure, look for the following signs that your whipped cream has gone bad:[4]
- Any part of the whipped cream has separated into a liquid
- An off-putting or sour odor
- A pasty consistency
- Any yellowing (for store-bought whipped cream)


Freezing Whipped Cream
-
1Line a baking sheet with parchment paper. Choose a baking sheet large enough to accommodate all of the whipped cream. Also make sure there’s room in your freezer to place the baking sheet flat onto a shelf.[5]
- Parchment paper will help you remove the frozen molds from the baking sheet.
-
2Dollop spoonfuls of whipped cream onto the parchment paper. Make sure the dollops have at least 1.5 inches (3.8 cm) to 2 inches (5.1 cm) of space between them because the whipped cream will expand as it freezes. Try to make each mound into sizes that you think you’ll use for other things.[6]
- For instance, to place frozen molds on top of hot cocoa or coffee drinks, make them small enough to fit inside of a mug.
- If you know you’ll be using them to top desserts, use large or small dollops depending on the size of each serving.
-
3Let the molds freeze overnight or until they’re frozen solid. Leave the molds in the freezer overnight until they’re hard (which should take about 3 or more hours). Then transfer them to a freezer bag or into a large airtight container. They’ll stay good for 3 to 4 months.[7]
- Slightly lift the parchment paper near each mold and peel it back to prevent breaking them.
-
4Pipe decorative swirls of whipped cream for a flashy look. Spoon the whipped cream into a piping bag and attach a piping tip to the pointed end of the bag. Squeeze the bag to pipe out swirly designs onto the parchment paper and place the baking sheet in the freezer overnight or until each mold is frozen solid. Remove them from the parchment paper and store them in a sealed container for up to 3 to 4 months.[8]
- You can also store them in a freezer-safe plastic zipper bag. Just be careful not to place anything on top of the molds!
- Wrap each decorative mold separately in plastic wrap or zipper bags and store them on a separate shelf if you’re worried about breaking them.
-
5Remove the molds from the freezer 15 to 20 minutes before using them. If you’re putting the molds on top of pie, cake, or other treats, thaw them out for 15 to 20 minutes before you serve dessert. Place the frozen molds on top of each serving of pie or cake to maintain the shape of the molds.[9]
- If you’re using the molds to top hot chocolate or coffee, you don’t need to thaw them out—just plop the frozen mold right into the mug and let the hot water take care of it!


Warnings
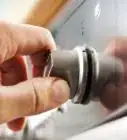
- Do not freeze store-bought whipped cream in an aerosol can. Spray out molds and freeze it if you’re not going to use it before the expiration date on the can.[11]⧼thumbs_response⧽


References
- ↑ http://www.eatbydate.com/dairy/milk/whipped-cream/
- ↑ http://www.eatbydate.com/dairy/milk/whipped-cream/
- ↑ https://www.thekitchn.com/the-easy-way-to-make-fresh-whipped-cream-last-longer-132094
- ↑ https://oureverydaylife.com/whipped-cream-bad-39478.html
- ↑ https://www.simplyrecipes.com/recipes/how_to_freeze_whipped_cream/
- ↑ https://www.simplyrecipes.com/recipes/how_to_freeze_whipped_cream/
- ↑ https://www.simplyrecipes.com/recipes/how_to_freeze_whipped_cream/
- ↑ https://www.simplyrecipes.com/recipes/how_to_freeze_whipped_cream/
- ↑ https://www.simplyrecipes.com/recipes/how_to_freeze_whipped_cream/
About This Article