This article was co-authored by wikiHow staff writer, Hunter Rising. Hunter Rising is a wikiHow Staff Writer based in Los Angeles. He has more than three years of experience writing for and working with wikiHow. Hunter holds a BFA in Entertainment Design from the University of Wisconsin - Stout and a Minor in English Writing.
There are 20 references cited in this article, which can be found at the bottom of the page.
This article has been viewed 13,252 times.
Learn more...
Intelligent dance music, or IDM, is a popular genre of music made popular by artists like Aphex Twin, Autechre, and Squarepusher.[1] IDM uses glitchy and syncopated beats with simple melodies to make songs that are interesting to listen to and easy to dance along with. If you want to try producing your own IDM songs, you can easily compose them at home with music software. Since IDM is an experimental genre, play around with different rhythms and sounds until you find something you like. When you’re finished, you can share your song with the world!
Steps
Getting Studio Equipment
-
1Download a digital audio workstation for your computer. Digital audio workstations, or DAWs, are programs where you can play and record music without any other special equipment. There are many DAWs to choose from no matter what operating system your computer uses. Some popular options include Garageband, Logic, FL Studios, Pro Tools, and Ableton. If you have a Mac, Garageband is free and great for starting out. Otherwise, FL Studios is one of the most affordable options and works on Windows or Mac. Try out a few of the programs so you can test them out and see what interface you prefer.[2]
- Some DAWs are free while others can cost up to $200–300 USD. Download trial versions before buying them so you can familiarize yourself with the program.
- Choosing a DAW all comes down to personal preference, so pick the one you feel most comfortable using.
-
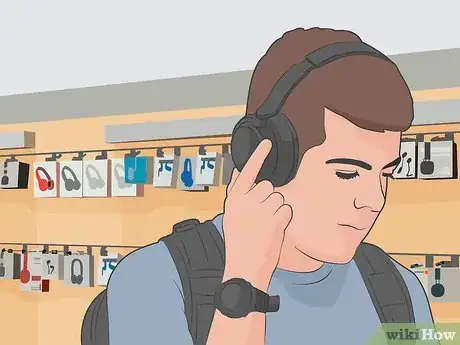
2Buy studio headphones to hear the most accurate sound. Look for over-ear headphones that completely cover your ears so they block out other audio. Make sure the headphones are studio-quality, or else the sound may be slightly distorted and could affect your overall mix. Whenever you’re working on your music, wear your headphones rather than using your computer speakers.[3]
- You can get studio headphones for around $100 USD.
- It’s okay if you use regular headphones or earbuds when you make music if you can’t afford to get ones that are studio-quality.
- You may also use studio monitors, though the acoustics in your room may make the audio sound muddy.
Advertisement -
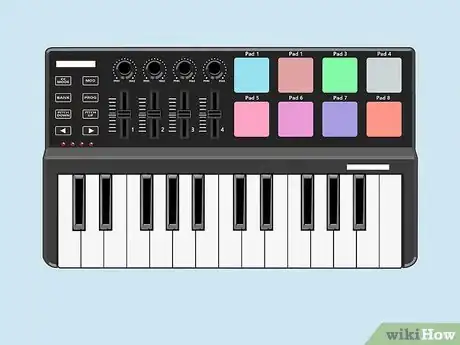
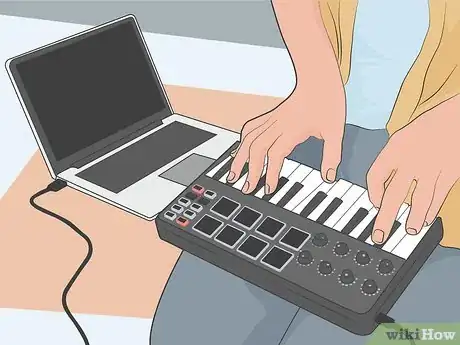
3Get a MIDI keyboard if you want to play your music physically. MIDI keyboards connect directly to your computer so you can play and record them live. Many DAWs also have different software instruments, so you can use the keyboard to play synthesizers, guitars, and even drums. Look for a keyboard that has around 30 keys so you can play in multiple octaves without changing any settings.[4]
- If you don’t have a MIDI keyboard, you will have to manually click and drag notes into the song rather than playing them.
Creating the Drum Beat
-
1Place snare hits on the 2nd and 4th beats of each measure. Create a drum software instrument in your DAW and open the piano roll, which is where you can drag and drop notes to make your beat. Find a snare drum sound you like on the piano roll notes and place a hit on every 2nd and 4th beat. Continue adding snare hits throughout the entirety of the project.[5]
- This will help keep a constant and familiar rhythm for the listener to come back to throughout the song. You may add more snare drum sounds in between these notes later on to make the beat sound more complex.
- Your DAW will have multiple software instruments to choose from, so experiment with the different sounds to see which drum set you like best.
-
2Make a consistent bass drum pattern to keep the beat. You can add the bass drum to the existing software instrument or you can create a separate track for it. You can make your bass drum pattern on the beat or make it off-rhythm to make them seem more unpredictable and interesting. Experiment with a bass pattern in the first measure of the song until you find one you like. Then, repeat that pattern throughout the rest of the song.[6]
- You don’t need to make the bass drum pattern too complex right away. If you’re stuck, try adding the drum to the 1st and 3rd beat of each measure for a simple starting point.
- IDM songs don’t have set structures and usually loop the same sections, so you won’t change the beat for different verses, choruses, or bridges.
-
3Add quick, syncopated hi-hat cymbals to make a glitchy rhythm. Look for a hi-hat sample in your software instruments and create a new track with the one that sounds best for your song. Add random 1/8th or 1/16th notes throughout each measure to make a clicking pattern for the track. Play around with different patterns of notes until you’re happy with the overall beat. You can even change and adjust the hi-hat pattern between every snare hit to make a shifting, inconsistent rhythm that makes your track sound more experimental.[7]
- For example, you can put hi-hat notes on beat for the first measure and switch to putting them off-beat in the next one.
- It’s okay to have a random hi-hat pattern since your snare and bass drum have a consistent groove.
-
4Put bass and snare fills randomly throughout the beat. Drum fills are added notes that create more interesting patterns without changing the core rhythm you’ve already composed. Try adding in 16th or 32nd notes to the piano roll for your snare and bass drum in between the beats you’ve made. Vary the pattern and note lengths in each of your fills so your song doesn’t sound as predictable. You can add as few or as many fills in the pattern as you want, so keep adding them until you’re happy with the overall beat.[8]
- You can try incorporating other drum noises, such as toms, rimshots, and cymbals to add more variety to the song.
-
5Try putting samples of beeps and white noise in time with the drums. Look online for samples of white noise, voices, sound effects, and beeping noises to include in your track to make it sound more experimental. Place the sound effects randomly throughout your song so they line up with either a snare or bass drum hit. Experiment with different combinations and layers of sound until you find something you’re happy with.[9]
- Make sure you use samples and sound effects that are free to use so you don’t steal another artist’s work.
- Sound effects also add ambient noise to your track to make it sound fuller.
- Try putting a sound effect by itself in the last third of your song. without any other instruments to make it stand out. For example, “Parallel Jalebi” by Four Tet uses a solo female voice sample before reintroducing the drum beat.[10]
Writing the Melodies
-
1Make chords with piano or synthesizer pads as backing noise. Since IDM is an experimental genre, there aren’t any standard chords for each song. Try out different piano and synthesizer software instruments to find the sounds that you like the most and fit the mood you’re trying to capture in your music. Make a separate track for the instrument you chose and drop the notes into the project. If you want to make music that has a lighter, happier feeling, choose a major progression for your chords. If you want something that sounds more ominous or sad, pick a minor chord progression instead.[11]
- If you’re using a MIDI keyboard, you can press the Record button and play the chords live.
- Some DAWs have plug-ins that help you pick chord progressions for your music. Look for a menu labeled “Plug-Ins” on your DAW to see if there’s one available.
- Most IDM songs use the same chords and loops throughout the entire track with minor variations. For example, you may keep the same chords but change the instrument halfway through the song.
-
2Experiment with different synthesizer or piano lines for the main melody. Think about the mood you want to capture with your IDM music and try out a few of the virtual piano and synth leads to see what sounds the best to you. Make a new software instrument track in your project for your melody. Use the notes from your chords when you’re making your melody so the sounds don’t clash or sound out of tune. Play the beat and chords in the background so you can try out different tempos and arrangements for your melody to see what fits the best.[12]
- Since the drums and bass usually have a heavier sound, try to keep your melody light. Listen to “Emerald Rush” by Jon Hopkins to get ideas of how to balance a light melody with harsher background tones.[13]
- Once you find a melody, try playing it through different software instruments throughout the song to add variety. Many times in IDM, you’ll keep the notes of the melody the same for the entire song with minor variations to the notes here and there.
- There’s a lot of trial and error when you’re writing music, so don’t get discouraged if you have trouble coming up with something right away. Keep practicing and playing until you find something that clicks into place.
-
3Create bass lines using the root notes from your chords. Look for a bass tone in your software instruments and create a new track for it. Check which notes you’re using for each of your chords and use them for your bass, or else the track may have dissonance. You can have simple patterns of notes held for entire measures, or you can experiment with a variety of patterns and syncopation to add more layers to the song. Try out a lot of different patterns and note progressions to see what fits the mood of your song the best.[14]
- You can include multiple bass tracks to make them sound fuller and punchier in the final mix.
- Try opening your song with just the bass line and drums before you introduce your melody. Listen to a song like “LesAlpx” by Floating Points for inspiration.[15]
-
4Layer pulsing synth hits in the background to add more interest to the track. Find a synthesizer sound that’s different than the one you used for your melody so the sounds don’t compete. Add a new track to your project and drop notes on every 1/8th or 16th beat so it makes a constant pulse through the song. Try using the same notes from your chords in higher and lower octaves to fill out your track.[16]
- These are good sounds to add halfway or three-quarters of the way through your song.
- If you want to make the pulse more unpredictable, try putting some of the notes slightly off-beat to syncopate the rhythm.
Finalizing and Sharing Your Music
-
1Put reverb on your instruments for added ambient noise. Click on an individual instrument track and look for a menu or button labeled “Effects”. Select the Reverb option from the effects rack to open up the adjustment. As you increase the reverb, sounds will echo and take longer to fade out. If you want your instruments to have a short, staccato sound, turn the reverb down to dampen them.[17]
- Some DAWs also let you simulate different shaped rooms, which will change how the sound echoes and fades in your song.
- You can usually make adjustments for each individual note in the track so you can have a lot of reverb on one note and very little on the next.
-
2Add modulation to the instruments to make them sound glitchier. Modulation refers to adjusting the pitch and effects on an instrument to make them have varying sounds. Open an instrument track and look for a Modulation button. Click on the notes you want to modulate and adjust the levels to change how they sound. More modulation will usually make the instrument sound more glitchy and experimental while less modulation maintains the base note without effects.[18]
- You can add multiple modulations to a single note so it wavers back and forth.
- There isn’t a right way to adjust the modulation, so just keep adjusting it until you’re happy with how it sounds in the overall song.
-
3Pan the instruments between the speakers so they sound balanced. Keeping all of the instruments in the center can make the audio sound muddy and it won’t stand out as much. Look for the Pan button for each instrument track and adjust them slightly to the left or right. As you pan the instrument over to one side, it will be less audible on the other side. Experiment with setting the instruments between the speakers to see what gives you the fullest sound.[19]
- You can have instruments pan between different notes as well so you hear them on separate sides.
-
4Adjust the track volume levels so they aren’t overpowering one another. Look for the mixer on your DAW, which usually has a bunch of sliders or buttons that control the volume of each instrument. Play your song through your headphones and slowly raise or lower the levels of your instruments so they’re balanced. Make sure none of the instruments overpower one another, or else you won’t be able to clearly hear the work you put into them.[20]
- It may take a while to find the perfect mix for your song. When your adjustments only give your song a different sound rather than improving it, then finish your mix.
-
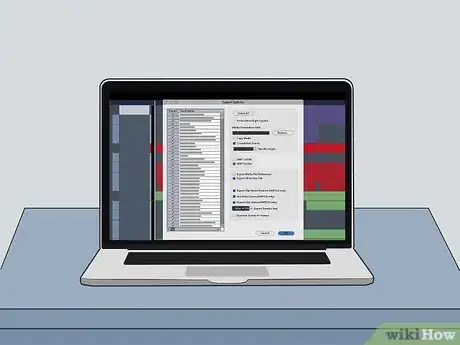
5Export your song as an MP3 or WAV file. Select the Export menu on your DAW so you can process and share your song file with other people. If you plan on uploading the song online or using it in a video, opt for an MP3 since it’s a smaller file size. Otherwise, choose a WAV file since it will have the truest sound and won’t be compressed.[21]
-
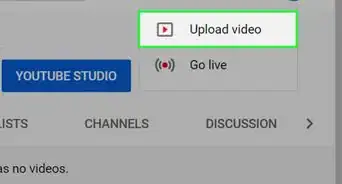
6Upload your music online so others can listen to it. If you don’t want to pay money and just want to share your music, upload the song to sites like Soundcloud, Youtube, or Bandcamp. If you want other people to stream your music on popular apps like Spotify or Apple Music, then pay for an online distributor and submit your music.[22]
- Post about your music on social media so your friends and family can listen to it as well!
Warnings
- Avoid using melodies or samples of other songs that are copyrighted so you don’t steal another artist’s content.⧼thumbs_response⧽
Things You’ll Need
- Computer
- DAW software
- Headphones
- Studio monitors
- MIDI controller (optional)
References
- ↑ https://pitchfork.com/features/pitchfork-essentials/9702-emotional-intelligence-a-guide-to-melodic-idm/
- ↑ https://youtu.be/zLV1pkxOTo8?t=41
- ↑ https://youtu.be/XLXSqan3Jcs?t=287
- ↑ https://youtu.be/2JBOgJ0lTJo?t=133
- ↑ https://youtu.be/oCboIn9nrWU?t=250
- ↑ https://youtu.be/0-mYvIBCOas?t=60
- ↑ https://youtu.be/1Yv1HSl_oA4?t=132
- ↑ https://youtu.be/1Yv1HSl_oA4?t=71
- ↑ https://youtu.be/1Yv1HSl_oA4?t=190
- ↑ https://medium.com/@neilagarwal/intelligent-dance-music-idm-a714df8844e2
- ↑ https://youtu.be/YfIStsGwCVQ?t=273
- ↑ https://youtu.be/tLliYyuupsQ?t=715
- ↑ https://medium.com/@neilagarwal/intelligent-dance-music-idm-a714df8844e2
- ↑ https://youtu.be/tLliYyuupsQ?t=226
- ↑ https://medium.com/@neilagarwal/intelligent-dance-music-idm-a714df8844e2
- ↑ https://youtu.be/tLliYyuupsQ?t=453
- ↑ https://www.waves.com/epic-glitch-idm-production-tips-glitch-mob
- ↑ https://youtu.be/VezxgCxCDvs?t=331
- ↑ https://www.waves.com/epic-glitch-idm-production-tips-glitch-mob
- ↑ https://www.waves.com/epic-glitch-idm-production-tips-glitch-mob
- ↑ https://www.premiumbeat.com/blog/when-to-use-wav-files-when-to-use-mp3-files-what-is-the-difference-between-the-two-formats/
- ↑ https://blog.sonicbids.com/the-top-10-digital-platforms-to-upload-share-and-promote-your-music

