This article was co-authored by wikiHow staff writer, Savannah Vold. Savannah Vold graduated from the University of California at Santa Barbara in 2020, earning her B.A. in English with a specialization in Literature and Culture of Information. Passionate about accessibility and fostering a love for the arts, she started her literary, arts, and culture-based website, The Executant. At wikiHow, Savannah feels fortunate to learn about new and exciting topics daily and is driven to empower anyone, anywhere, by providing accurate and engaging knowledge.
The wikiHow Video Team also followed the article's instructions and verified that they work.
Learn more...
Shiny, lustrous metallic gold? If only you could create something that beautiful using colored pencils. Oh wait, you actually can! You only need 4 colored pencil shades to create a golden hue that will put the real thing to shame. In this article, we’ll teach you just what pencil shades you need, how to find your perfect golden gradient, and how to apply your new skills to create a lustrous, glowing gold shade that will make your artwork pop.
Things You Should Know
- Gold is not one single color. Instead, it contains various shades of white, yellow, light brown, and dark brown.
- Layer strips of connecting white, yellow, light brown, and dark brown colored pencil shades to create a reflective, multidimensional gold gradient.
- Apply your gold gradient to the object you’re drawing by starting at one side of the object and repeating the gradient until the object is filled in.
- Ensure a hyper realistic gold sheen by blending your gold gradients using a q-tip or your finger.
Steps
Mixing Gold Colored Pencil
-
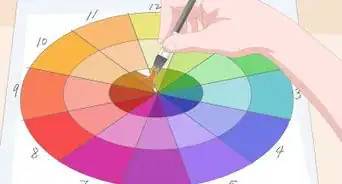
1Mix white, yellow, light brown, and dark brown colored pencils to make gold. Gold is created by mixing warm brown and bright yellow shades together.[1] To create a gold hue using colored pencils, you’ll need a gradient of white, yellow, light brown, and dark brown pencils.
- You can play around with different pencil shades to make your ideal hue. Gold is an incredibly versatile shade made up of multiple colors, so you have plenty of options to choose from, like dull gold and bright gold.
- For dull gold, select black, grey, brown, and dark yellow colored pencil shades.
- For bright gold, choose white, light yellow, yellow, and light brown shades.
-
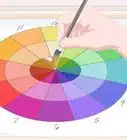
2Use your colored pencils to create a gradient like the one above. While you could just mix your 4 shades together to make a solid gold color, realistic gold is actually made up of highlights and shadows since it’s reflective. To capture this in your drawing, you’ll want to make a gradient that’s made up of your 4 shades. Practice making a gradient like the one above—then you can incorporate it into your drawing once you get the hang of it.[2]Advertisement
-
3Blend your shades together using a q-tip. After experimenting with gradients, use a q-tip or your finger to lightly blend the shades together to achieve a seamless, hyper-realistic sheen.[3] Make sure to wipe off your finger on a paper towel or use a new q-tip between blending your gradient lines.
- If you don’t alternate your q-tips or wipe off your finger when blending your color gradients, you might drag the darker colors into the lighter ones, resulting in a less realistic blend.

Drawing Realistic Gold
-
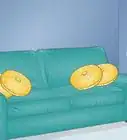
1Apply a gold gradient to part of the object you’re coloring. Start at one side of the object, like we did in the vase above. Don’t worry about filling in the whole object yet—you’ll add more gradients as you go.
-
2Add another gradient next to the first one, reversing the order of the colors. Once you’ve reached the middle of the object you’re filling in, reverse the color order starting with your second lightest shade, and work your way backward until you reach the opposite edge of the object, finishing with your darkest pencil shade.[4] Depending on the various shades you’ve chosen, your pattern should look something like this:
- Dark brown, light brown, yellow, white, yellow, light brown, dark brown, and so on, layering these shades until you fill your desired section entirely.
-
3Lightly blend your gradient layers together. Using a q-tip or your finger, lightly shade the color gradients in your art piece as you did on your practice gradient sheet to ensure a super realistic gold finish.[5] Don’t press down too hard when shading with your colored pencils, as the pigment colors will become more difficult to blend, and we don’t want it to look blocky.
-
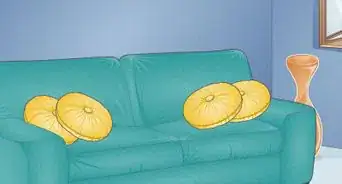
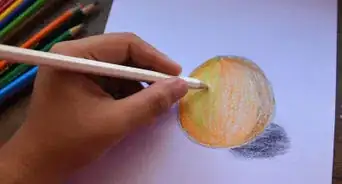
4Go back in with a white colored pencil to enhance your gold’s gleam. To create a gold shade that nearly glints off the page, grab your white colored pencil and further shade in the lightest parts of your chosen object to add even more luster, like in the vase above. You can apply more pressure as you shade to saturate the white pigment on the page.[6]
- By going back in with your white pencil after blending, you’re creating more contrast in the gold gradient, resulting in the illusion of a shinier finish—magic!

References
- ↑ https://artincontext.org/what-colors-make-gold/
- ↑ https://sarahrenaeclark.com/how-to-blend-colored-pencils-best-method-beginners/?v=7516fd43adaa
- ↑ https://www.carrie-lewis.com/3-methods-blending-colored-pencil/
- ↑ https://sarahrenaeclark.com/how-to-blend-colored-pencils-best-method-beginners/?v=7516fd43adaa
- ↑ https://www.carrie-lewis.com/3-methods-blending-colored-pencil/
- ↑ https://www.carrie-lewis.com/making-bright-whites-pop-with-colored-pencils/
About This Article