This article was co-authored by Bryan Villella. Bryan Villella is the Lead Firearms Instructor and Owner of Don't Be A Sitting Duck in Kissimmee, Florida. Bryan has nine years of professional experience and is an NRA and Florida State Certified “K” Instructor. He leads certified training courses necessary to get licensed through the state to work in the private security field. He prioritizes safety and building comfortable environments for people to learn skills safely.
wikiHow marks an article as reader-approved once it receives enough positive feedback. In this case, several readers have written to tell us that this article was helpful to them, earning it our reader-approved status.
This article has been viewed 422,363 times.
Properly maintaining a handgun is an obvious step for any gun owner, and it is absolutely necessary for optimal safety and effectiveness! Performing maintenance is the owner's best chance to inspect the pistol and its components for excessive wear or internal breakage. Improperly maintained or unmaintained firearms become increasingly less reliable. Lack of reliability could have detrimental consequences if you get a malfunction when you use the handgun under any circumstances.
Finally, if done properly and consistently, the entire cleaning process boosts your safe gun-handling techniques that will serve you well in all situations. Make sure you read your owner's manual for proper disassembly and reassembly of your gun's particular make and model.
Steps
Safely Unload Your Handgun
-
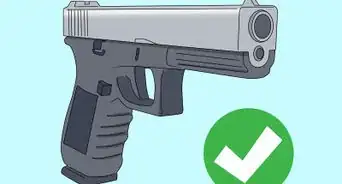
1Handle your firearm safely. Always keep the muzzle pointed in a safe direction, treat the firearm as if it is loaded, and keep your finger off the trigger.[1]
-
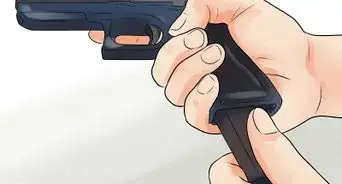
2Eject the magazine.[2]Advertisement
-
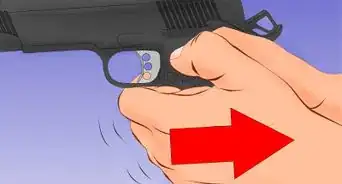
3Empty the chamber.
- Pull the slide back and visually and physically (stick your finger in there) check that there aren't any cartridges in the magazine well or in the chamber.
- Be double-sure your firearm is unloaded. You do not want an unexpected boom while stripping your firearm.
-
4Make sure to remove all ammunition from the area, ideally to another room while cleaning the weapon.
Field Strip the Handgun
-
1Dismantle the firearm safely. On many modern designs, this is a relatively simple process. De-cock the hammer (or striker), pull the take down tabs. After a pull toward the rear of the frame, the slide should be able to move freely off the front of the handgun.
- The actual process may vary greatly depending on the model of firearm you are field stripping.
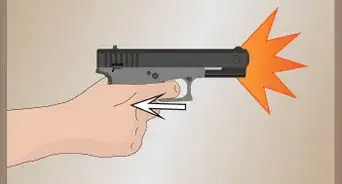
- Glock & Steyr users: Be triple-sure your firearm is unloaded as you must pull the trigger on the firearm to initiate the field stripping process.
-
2Identify the parts you are cleaning. There are four major pieces to every semi-automatic handgun (though they may be attached in different ways).[3]
- Frame: this is the stock (or "grip") of the handgun. The trigger assembly is usually embedded in the frame, and the magazine well is located inside of the stock.
- Slide: the piece of metal on top of the firearm; it keeps the chamber sealed, compensates for recoil (on many semi-autos), and houses the firing pin (and a few other components). If you have a polymer frame, this is where 70% (or more) of the gun's weight is.
- Barrel: the barrel assembly is the barrel and the chamber. Be cautious with the muzzle-end of the barrel and the beginning of the rifling (inside the barrel), as these are the two most important things to affect accuracy and can easily affect it adversely, if damaged.
- Guide rod and recoil spring: often these are one piece. The guide rod guides the slide as it recoils and the recoil spring pulls the slide back into place after a round is fired.
Clean the Handgun
-
1Wipe down all components using some cloth rags, but a lint-free wipe is not necessary.
- Remove as much as you can of the thick, caked-on carbon buildup created by the friction of use and burning powder. Also wipe off any old oil and all unburnt powder buildup.
- Wipe the inside of the magazine well, the ejector, guide rails, and the area around the chamber. You will find certain areas turn the rags/patches black (clean these areas more).
- On this step, precision is not required; wipe it quickly.
-
2Apply solvent (preferably designed to be safe to continually contact your skin, like M-Pro 7) on all possibly dirty components.
- Most handgun manufacturers design components (even the polymer) to be safely used with any solvent, but be sure there aren't types of solvents the manufacturer warns against.
- A liberal amount of solvent is not necessary.
-
3Let the solvent sit for a couple minutes. Make sure any area with dirt, carbon buildup, or unburnt powder has solvent on it, soaking in.
-
4Scrub the whole gun with a brush (without metal bristles; use something like a toothbrush). This works in the solvent and loosens up the buildup on the gun. Try to get into all the nooks and crannies.[4]
-
5Wipe the gun clean with lint-free cloth (you can buy pre-cut cloth, but a clean old cotton shirt or socks also work). Get everywhere you put the solvent (should be pretty much everywhere) and wipe it until it wipes clean.
-
6Wipe down the whole gun (inside and out) with a solvent-soaked lint-free cloth again, and look again for any areas turning the cloth dark, and clean them.
-
7Use the pick to get off any thick chunks of carbon or powder buildup, or buildup in tight parts of the gun.
- The most common area with carbon deposits is in the chamber. Buildup occurs in the corners of the pieces of metal.
-
8Use a bore brush to break any buildup free from the barrel.[5]
- Run the full length of the barrel at least five times (more if you have shot a lot since the last cleaning).
- Be sure not to reverse direction with the brush in the barrel. Instead, push it all the way through, then all the way back (letting the bristles change direction outside of the barrel).
-
9Swab the barrel with a cloth soaked with solvent. Repeat with clean cloths (still soaked in solvent) until a cloth comes out clean. Then swab it with an oil-soaked cloth, this coat of oil will protect your barrel from oxidation (rusting).[6]
- If rust is present in small amounts, you may be able to remove it with a little bit of gun cleaner or gun oil and a good abrasive brush, using these items to scrub it clean. However, if its eating at the metal, the gun will likely need a clean followed by a refinish.
-
10Oil all the components requiring lubrication. Often the manual for the gun will have specific areas needing oil, but a quick look at where the gun is wearing will give you a good indication of where to apply oil.[7]
-
11After a thorough cleaning, the next step in maintaining your firearm is to properly lubricate it. Lubrication is as important, if not more so than cleaning. In order to keep your firearms from malfunctioning, proper lubrication is essential and proper oiling protects metal parts from corrosion. Lots of people use Rem Oil, but there are other more effective options out there. When deciding on what type of lubrication to use it is good to understand what you are trying to accomplish. The main goals are to prevent wear and corrosion. Knowing what conditions cause these help us in deciding what to use to keep our firearms running smoothly. Firearms produce high momentary forces when they are fired. These high forces can often cause an oil layer between two parts to be squeezed out resulting in grinding which causes wear. To prevent this from happening companies add microscopic solids to oil that provide "boundary protection". Basically it is harder to squeeze out microscopic solids than it is to squeeze out a liquid. The products that provide this boundary protection are known as "anti-wear" or "extreme pressure" (AW/EP) additives, so look for them in firearm oils like Lubrikit FMO 350-AW oil. This oil is great at penetrating into tight spaces but is thick enough to stay where you put it and provides the necessary boundary protection.
- A tip, When oiling a part, put on a layer covering the entire part just thick enough to leave a distinct fingerprint after you touch it.
- Oil all the components requiring lubrication. Often the manual for the gun will have specific areas needing oil, but a quick look at where the gun is wearing will give you a good indication of where to apply oil.
- Be sure to oil the areas around rotating parts, such as the base of a hammer or trigger assembly.
- Try to keep oil away from the openings into the firing pin housing (oil is a collector of dirt and powder buildup, and buildup around your firing pin can prevent it from firing).
-
12After oiling your firearm, a light grease should be used on its sliding parts. The use of grease has been discussed frequently online but since it is a newer concept, many have not tried it. Acknowledged gunsmiths are recommending its use, especially on the frame rails of automatic pistols.
- Grease is better on sliding parts since these types of parts tend to shed oil quickly. As the parts slide back and forth the oil is pushed out of the way leaving the metal exposed. Grease was designed to stay in place and good ones like Lubriplate SFL-0 keep sliding parts covered. The staying power of grease keeps the parts protected even after continuous use.
- You want to make sure your grease has a base that is safe for the metals you are using them on. Grease bases like aluminum and lithium are best(chlorinated compounds are not acceptable).
- Make sure the grease is thin enough so it won't inhibit the action of the weapon (usually NLGI #0 is best). Also look for good cold working characteristics, resistance to acids/alkalis and water (especially water), and preferably non-staining (black grease stains are not attractive on your shirt and pants).
- Don't forget to grease the guide rails and the grooves in which they ride on the frame and slide.
- Use a good anti-wear, anti-corrosion oil for general application and a light aluminum based grease on the sliding parts of your firearm and you will keep it running smoothly for generations.
Reassemble the Handgun
-
1Reassemble the pistol and make sure all parts are functioning properly.[8]
- A quick test for proper functionality is to rack the slide; make sure it goes completely back into battery (all the way forward). If it does not, the recoil spring may not be set properly.
- Ensure it is unloaded (see above), and pull the trigger, you should hear a click. Rack the slide again, or if the gun is a double-action, cock the hammer (or striker) again.
-
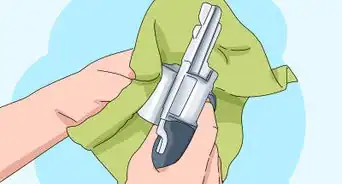
2Wipe down the whole gun and remove any excess oil.
-
3Swab the barrel with a dry cloth right before you intend to start shooting to remove any oil residue.
Community Q&A
-
QuestionHow long can I store a pistol without cleaning it if it has never been fired?
 Cnote3030Community AnswerAs long as you keep it in a dry safe, and as long as it was oiled before putting it away, it will last forever. Most any gun that's not a piece of junk will last a lifetime if you clean after every outing and store it correctly - which is in a safe, with no humidity, and oiled up.
Warnings
- Be sure the solvent is safe for your gun, and preferably, safe for continual contact with your skin.⧼thumbs_response⧽
- Always clean your gun in a well ventilated area, as fumes from solvents or oils can be unhealthy if inhaled.⧼thumbs_response⧽
- Wash your hands after handling the gun and cleaning supplies.⧼thumbs_response⧽
- Unless you are a dealer authorized armorer, never use power tools to speed up the cleaning process.⧼thumbs_response⧽
- Keep oil away from the openings into the firing pin housing (oil is a collector of dirt and powder buildup, and buildup around your firing pin can prevent it from firing).⧼thumbs_response⧽
- Keep oil and solvent away from your ammunition, The oil can penetrate the primer and cause the ammunition not to fire. In other cases solvent has caused rounds to fire.⧼thumbs_response⧽
Things You'll Need
- A dirty (used) handgun.
- Lint-free cloth (you can buy pre-cut cloth, but a clean old shirt or socks also work).
- Solvent (preferably designed to be safe to continually contact your skin, like M-Pro 7).
- Oil specifically designed for use with a firearm, such as Breakfree CLP.
- Pick (or other sharp, soft-metal object — such as an aluminum pick).
- Barrel brush for the caliber you are cleaning.
- Brush (without metal bristles, like a toothbrush)
- Standard Pipe Cleaners, useful in small orifices, or recesses where a brush and/or pick might not reach.
- Cotton swabs (such as "Q-Tips") work very well for this too.
References
- ↑ https://www.handgunsafetycourse.com/handgun/studyGuide/Unloading-Revolvers/601099_700077953/
- ↑ https://www.handgunsafetycourse.com/handgun/studyGuide/Unloading-Revolvers/601099_700077953/
- ↑ https://www.americanrifleman.org/articles/2011/5/6/how-to-clean-a-handgun/
- ↑ https://www.gunsandammo.com/editorial/ga-basics-how-to-clean-your-handgun/250077
- ↑ https://www.americanrifleman.org/articles/2011/5/6/how-to-clean-a-handgun/
- ↑ https://www.gunsandammo.com/editorial/ga-basics-how-to-clean-your-handgun/250077
- ↑ https://www.usconcealedcarry.com/blog/cleaning-your-glock-10-easy-steps/
- ↑ https://www.usconcealedcarry.com/blog/cleaning-your-glock-10-easy-steps/
-Step-1-Version-3.webp)
-Step-2-Version-3.webp)
-Step-3-Version-3.webp)
-Step-4-Version-3.webp)
-Step-5-Version-3.webp)
-Step-6-Version-3.webp)
-Step-7-Version-3.webp)
-Step-8-Version-3.webp)
-Step-9-Version-3.webp)
-Step-10-Version-3.webp)
-Step-11-Version-3.webp)
-Step-12-Version-3.webp)
-Step-13-Version-3.webp)
-Step-14-Version-3.webp)
-Step-15-Version-3.webp)
-Step-16-Version-3.webp)
-Step-17-Version-3.webp)
-Step-18-Version-3.webp)
-Step-19-Version-3.webp)
-Step-20-Version-3.webp)
-Step-21-Version-3.webp)



-With-a-Pistol-Step-18.webp)
