This article was co-authored by Michael Noble, PhD. Michael Noble is a professional concert pianist who received his PhD in Piano Performance from the Yale School of Music. He is a previous contemporary music fellow of the Belgian American Educational Foundation and has performed at Carnegie Hall and at other venues across the United States, Europe, and Asia.
There are 12 references cited in this article, which can be found at the bottom of the page.
This article has been viewed 62,059 times.
Mastering the piano takes even talented musicians many years of study, but you can learn the basics of playing this instrument in a relatively short period of time. Once you have these under your belt, you'll have to practice for these habits and techniques for them to become second nature. With a little time and effort, before you know it, you'll be playing with proper posture, hand position, and you'll be reading music, too.
Steps
Understanding the Keyboard and Finger Position
-
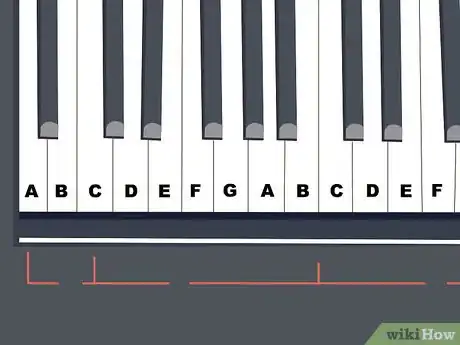
1Learn the keys on the keyboard. The 52 white keys on a piano keyboard are called according to the name of each key's associated note. Notes range from A to G ascendingly, so letters increase moving to the right on the keyboard (as in A → B → C) and decease moving to the left (as in C → B → A). Furthermore:[1]
- Once you reach the end or beginning of the note sequence, it repeats. So when moving to the right up the keyboard, G → A → B, whereas moving to the left yields A → G → F.
- The 36 black keys on the keyboard represent a half-step difference in tone between white key notes. A sharp (♯) is a half-step up, and a flat (♭) a half-step down. Therefore, the black key notes have two different possible names. For example, the black note between F and G could either be called both F♯ or G♭.[2]
- Easily locate the C note on your keyboard by finding the white key immediately to the left of a group of 2 black keys. The C key closest to the middle of your keyboard should be middle C, which is a central note for most beginner level songs.[3]
-
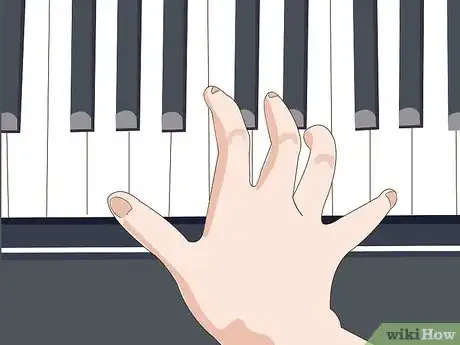
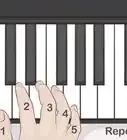
2Make sense of finger numbers. In many songs, you'll find small numbers above or below notes. These numbers indicate the recommended finger you should use to play the note. Very basic songs many have finger notation for each note, while more complex songs may have little finger notation. Each number represents a single finger:
- 1: represents your thumb
- 2: represents your index (pointer) finger
- 3: represents your middle finger
- 4: represents your ring finger
- 5: represents your pinky[4]
Advertisement -
3Practice finger notation so it is automatic. When first beginning, you may find it a little difficult to play a finger when you read its number. This is common, but by learning finger notation thoroughly, so it is automatic, you'll find playing easier.
- Many beginning students find scale drills an effective way of learning proper finger positioning.
- A scale is an uninterrupted run of notes, usually in 8 note increments, that moves up or down through a musical key.
- As many basic piano songs have a lot of finger notation to assist beginners, you may want to make use of these resources to practice.[5]
-
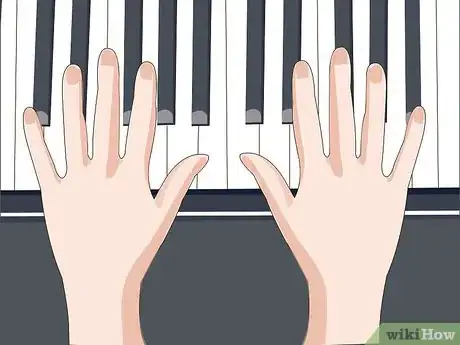
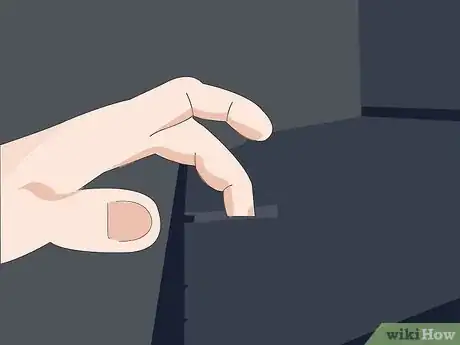
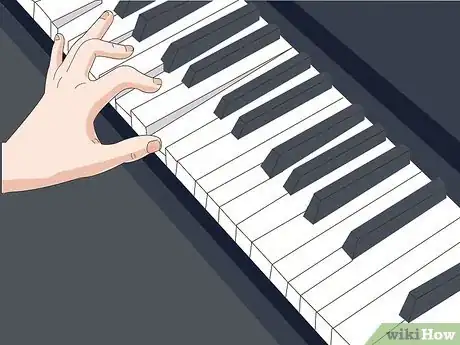
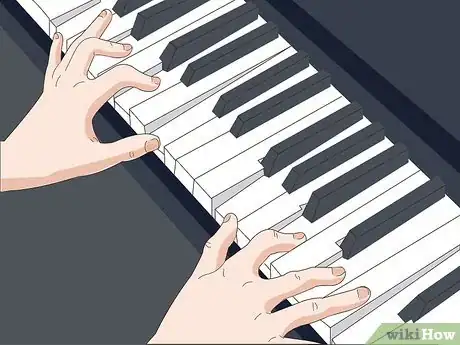
4Position your fingers and hands with proper technique. Keep your fingers slightly curved but firm so that when you press a key your finger does not bend backward at all. Your thumb and pinky fingers especially will want to lie flat, but keep these raised as well.[6]
- Try to keep your arms and shoulders relaxed as you play. This will enable you to use more of your entire body while playing and will help you achieve a better sound from the keyboard.
- As you press a key, you should feel the weight from your arm transferring down into the key through your fingers.
- Although you might think that the position of your fingers doesn't affect your playing much, the proper form will allow more freedom and nuance in your playing.[7]
Reading Music
-
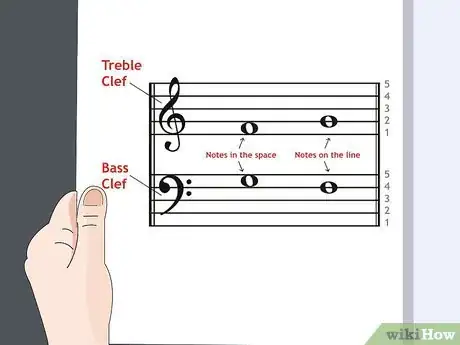
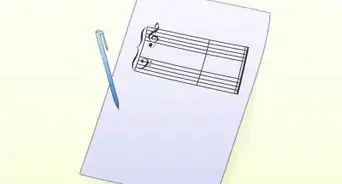
1Identify the staff, bass clef, and treble clef. In music, the staff refers to a set of 5 horizontal lines on which notes are written. Piano generally has 2 staffs, one for the treble clef and the other for the bass clef. The top staff normally indicates right-hand notes, and the bottom staff left hand notes.
- You can find the treble clef by looking to the far left of the staff. It will look similar to an "&" symbol and is also known as a G clef since its curlicue wraps around the G line on the staff. This clef is the upper of the 2 clefs.
- Find the bass clef on the left side of the staff. It will look like a backward "C" followed by a colon ( : ). It is the lower of the 2 clefs and known as the F clef since the 2 dots surround the F line on the staff.
- Notes that are especially high or low on the staff in either clef are represented by additional lines added to the staff, called ledger lines.
- In some cases, like when playing songs with only very high notes, you have 2 treble clefs or, for low songs, 2 bass clefs. In these cases, the bottom clef will represent your left hand.[8]
-
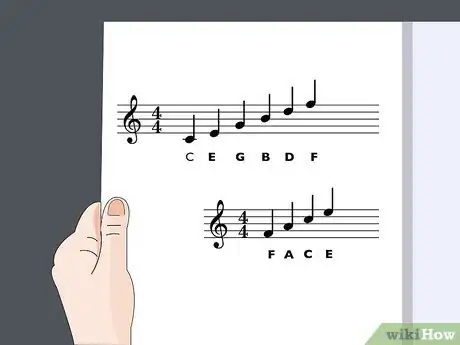
2Read the notes for each clef. Each line and space on the staff represents a single note on the keyboard. However, the way you read these lines and spaces will depend on whether you're in the treble or bass clef.
- Each bold letter in the following indicates the ascending order of notes for lines and spaces in the treble clef:
Lines: Every Good Boy Deserves Fudge.
Spaces: F A C E - Each bold letter in the following indicates the ascending order of notes for lines and spaces in the bass clef:
Lines: Good Boys Do Fine Always.
Spaces: All Cars Eat Gas.[9]
- Each bold letter in the following indicates the ascending order of notes for lines and spaces in the treble clef:
-
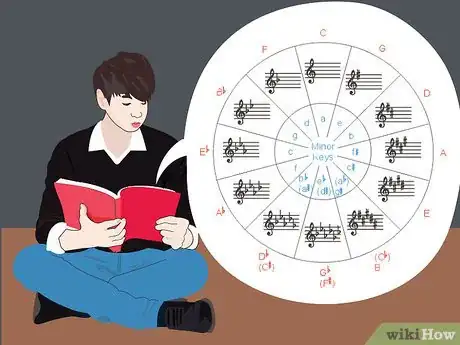
3Understand the key signature. There are 12 major and 12 minor keys in music. The key of your piece will be indicated by either sharp (♯) or flat (♭) symbols following the treble and bass clef in the staff, or it may have no symbol. These indicate that certain notes (or no notes) are always naturally played as either sharp or flat notes (black keys) in a song or certain part of a song.
- When there are no sharps or flats, the key is C major and all natural notes are played on white keys. The relative minor of C major is A.
- Generally, with each sharp/flat added to the key signature, a previously white key note becomes a black key note.
- Major keys: G (1 sharp), D (2 sharps), A (3), E (4), B (5), F# (6), C# (7), C♭ (7 flats), G♭ (6 flats), D♭ (5), A♭ (4), E♭ (3), B♭ (2), F♭ (1).
- Minor keys: E (1 sharp), B (2 sharps), F# (3), C# (4), G# (5), D# (6), E♭ (6 flats), B♭ (5 flats), F (4), C (3), G (2), D (1).[10]
-
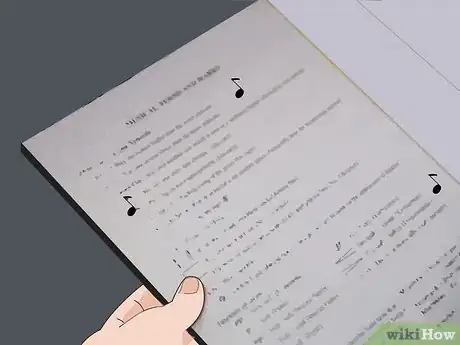
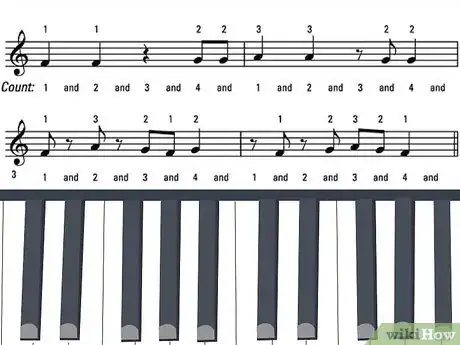
4Recognize the basics of rhythm. You may have noticed that certain notes have special shapes. These tell you how many beats you need to hold that note in a measure. A measure is indicated by a vertical line through the staff. The space between vertical staff lines (or a vertical line and the staff beginning or end) equals a single measure.[11] The following basic note rhythms express the main beats in a measure with numbers, same-beat broken rhythms with X's, and separates beats with plus signs (+).
- Sixteenth note: is held for a quarter of a beat (as in 1-x-x-x+2-x-x-x+3-x-x-x+4-x-x-x | 1-x-x-x...)
- Eighth note (♪): is held for half a beat (as in 1-x+2-x+3-x+4-x | 1-x+2-x...)
- Quarter note (♩): is held for 1 beat (as in 1+2+3+4 | 1+2...)
- Half note: is held for 2 beats (as in 1-2+3-4 | 1-2 + 3-4...)
- Whole note: is held for 4 beats (as in 1-2-3-4 | 1-2-3-4...)[12]
-
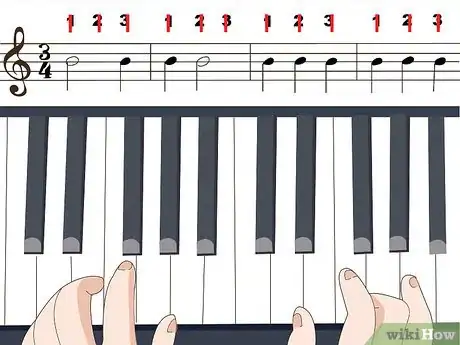
5Coordinate rhythm with the time signature. The time signature will be represented by a fraction following the clef of each staff. For most beginning level songs, this number will likely be 4/4. The top number indicates how many beats are in each measure, and the bottom number represents which note equals a full beat.
- As the top number lets you know beats per measure, each measure in 4/4 time gets 4 beats (as in 1+2+3+4 | 1+2+3+4...). In 3/4 time, you'll have 3 beats per measure (as in 1+2+3 | 1+2+3...), and so on.
- Add a 1 on top of the bottom number of the time signature to find which note equals a single beat. Normally, this will be 1/4, meaning that a quarter note stands for a whole beat.
- However, in cut time (2/2 time), this number is 1/2, so a half note equals a single beat, a whole note 2 beats, a quarter note half a beat, and so on. In this way, note rhythms can sometimes change.[13]
-
6Recognize rests. A rest is a pause in music. Much like musical notes, rests also have rhythm markings to help you determine how long or short to hold the rest. Rest rhythms follow the same pattern as notes, so the basic rests also include:
- Sixteenth rests: pause for a quarter of a beat
- Eighth rests: pause for a half of a beat
- Quarter rests: pause for 1 beat
- Half rests: pause for 2 beats
- Whole rests: pause for 4 beats[14]
-
7Gain a firm grasp on accidentals. An "accidental" is another name for sharp (♯), flat (♭), and natural (♮) symbols. When an accidental is written, all notes on that line/space for that measure are also changed, unless the sharp or flat is removed with a natural mark (♮). After a measure, all sharped, flatted, or natural notes return to normal.
- Natural marks can also remove the natural sharps or flats of the key you are in. For example, in the key of D major, the notes F and C are always sharped, even without an accidental.[15] Applying a natural to these notes would remove the sharp for a measure.
Making Music on a Keyboard
-
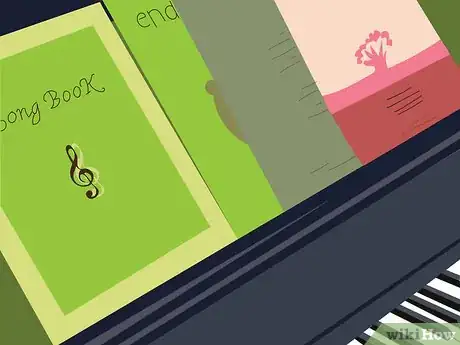
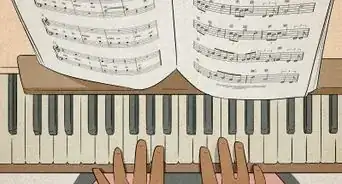
1Acquire appropriate music. If you are a true beginner, a beginning level practice book, lesson book series, or primer can provide you with simple songs that help you practice piano basics. These books often include liberal finger notation, which will help you master proper finger position.
- You can find basic piano materials at your local music store, book store, or through an online retailer.
- If you have some music experience, you may want to visit a music store to ask a knowledgeable representative about what book to start with.
- With enough time and dedication, even beginners can learn moderate to difficult songs. However, be mindful that difficult songs could be too difficult for your level and lead you to getting discouraged.[16]
-
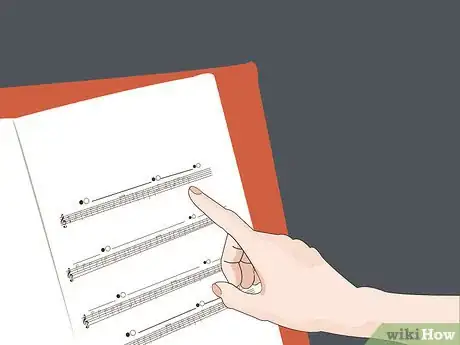
2Look through the music and highlight important features. When first learning a song, accidentals (like sharps (♯), flats (♭), and naturals (♮)) can take you by surprise. Highlight each of these in a different color so you don't miss them. Furthermore, you may want to:
- Circle or highlight fingering that looks difficult or is unusual. In particular, beginners often struggle with interval jumps (like from C to F).
- Write in the note names for notes written on ledger lines above or below the staff, as these can also be difficult to read.[17]
-
3Play new music one hand at a time. First, divide the music into manageable sections. This will be different for each person, though you might want to consider tackling your song 1 measure at a time or in musical phrases, which are 2-4 bars long. Then:
- Play through the right hand. Play slowly, with a steady rhythm, until you have completed the section you are working on.
- Practice this until you can play the notes smoothly to a steady beat. Repeat your single-handed play through with your left hand.
- Consider using a metronome, set to a slow tempo, to help you keep a steady beat. This can help you get a better feel for rhythm.[18]
- As your playing improves, increase the speed at which you play. As you increase your speed, you should start to hear the melody of the song come together.[19]
-
4Identify and isolate difficult runs and intervals. After your one-handed play through, you may have noticed certain parts of the song give you more difficulty than others. For example, there may be a large interval (like an 8-note jump) or a run of fast notes (like 10 eighth notes in a row), and so on. Isolate and practice these until you can play smoothly and without hesitation.
- Switch between hands when practicing so you don't tire out one hand more than the other.
- If you notice you consistently have trouble with certain parts of music, like with large interval jumps or runs, you may want to drill these. Drills can be found in most practice books or online.[20]
-
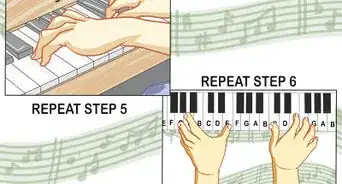
5Put both hands together. Much as you did when starting one hand at a time, start putting your left and right hands together slowly. Make it a goal to play left and right hand notes that fall on the beat together.
- As your hands become more familiar with the song and play it more fluidly, increase the speed until you are playing the song at a normal pace.
- More complex rhythms, like combinations of eighth and sixteenth notes, might take more time to come together.
- Some basic music books may teach treble and bass clefs one at a time to encourage mastering each hand before putting hands together.[21]
-
6Learn new songs and practice regularly. Learning new songs will challenge your ability to read music, which will help improve your sight reading ability. Beyond that, the more often you play the more familiar the keyboard will be beneath your fingers, which will lead to better playing.[22]
- Many songs, especially older ones, have become public domain. This means the song is free for everyone. Search for free public domain sheet music for songs online.
Playing with Proper Posture
-
1Adjust the piano bench to suit your height. Your piano bench should be positioned so that when sitting on the front half of it your elbows are a little in front of your body. Your arms should be level with or slightly sloping down toward the keys. Your feet should be flat on the floor.[23]
- For most benches, you'll find that you can adjust the height by turning a knob mechanism or pressing a spring release under or behind the bench.[24]
-
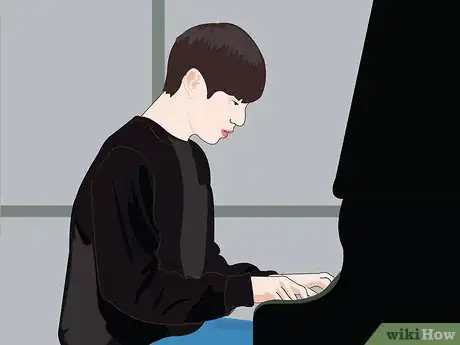
2Sit up straight when playing. Sit tall and with a slight inward lean to the piano when playing. This might seem unimportant, but your posture at the keyboard can greatly affect the sound you produce. A straight spine will allow you greater stability and poise. It also will enable you to more easily involve your upper body weight when playing, which will help you create a more dynamic sound.[25]
- Beyond the technical complications created by poor keyboard posture, slouching can also negatively impact your presence when playing.[26]
-
3Check your posture regularly. It can be difficult to notice poor posture in yourself. If you are teaching yourself piano, you might want to ask a friend or family member to check your posture from time to time. Make sure you let them know what to look for when it comes to proper piano posture.
- If you have a consistent posture problem, you might want to set up a full length mirror to the side of your bench. This way, periodically while playing, you can look over and check your own posture.[27]
Expert Q&A
-
QuestionCan you learn to play the piano at any age?
 Michael Noble, PhDMichael Noble is a professional concert pianist who received his PhD in Piano Performance from the Yale School of Music. He is a previous contemporary music fellow of the Belgian American Educational Foundation and has performed at Carnegie Hall and at other venues across the United States, Europe, and Asia.
Professional Pianist You absolutely can. Of course, it is usually easier when you are younger (between 4 and 14 is ideal).
 -
QuestionIs it easy to learn the piano?
 Michael Noble, PhDMichael Noble is a professional concert pianist who received his PhD in Piano Performance from the Yale School of Music. He is a previous contemporary music fellow of the Belgian American Educational Foundation and has performed at Carnegie Hall and at other venues across the United States, Europe, and Asia.
Professional Pianist Like anything worthwhile, it takes patience and dedication. I would say, a basic proficiency is not too difficult to attain, but mastery of the instrument takes a lifetime.
 -
QuestionHow long does it take to learn piano for adults?
 Michael Noble, PhDMichael Noble is a professional concert pianist who received his PhD in Piano Performance from the Yale School of Music. He is a previous contemporary music fellow of the Belgian American Educational Foundation and has performed at Carnegie Hall and at other venues across the United States, Europe, and Asia.
Professional Pianist This depends on what level the adult wants to attain and how assiduous the adult is in practicing.
References
- ↑ http://www.true-piano-lessons.com/how-to-play-the-piano.html
- ↑ http://www.musictheory.net/lessons/20
- ↑ http://www.true-piano-lessons.com/piano-fingering.html
- ↑ http://www.true-piano-lessons.com/piano-fingering.html
- ↑ http://www.true-piano-lessons.com/piano-fingering.html
- ↑ http://www.pianolessons.com/piano-lessons/proper-hand-posture.php
- ↑ http://www.true-piano-lessons.com/piano-fingering.html
- ↑ http://www.musicnotes.com/blog/2014/04/11/how-to-read-sheet-music/
- ↑ http://www.musicnotes.com/blog/2014/04/11/how-to-read-sheet-music/
- ↑ https://www.studybass.com/lessons/harmony/keys-in-music/
- ↑ http://www.musictheory.net/lessons/12
- ↑ http://readsheetmusic.info/basics_of_counting_rhythms.shtml
- ↑ http://readsheetmusic.info/basics_of_counting_rhythms.shtml
- ↑ http://readsheetmusic.info/basics_of_counting_rhythms.shtml
- ↑ https://www.basicmusictheory.com/d-major-key-signature
- ↑ http://www.true-piano-lessons.com/how-to-practice-piano.html
- ↑ http://www.musicnotes.com/blog/2014/04/11/how-to-read-sheet-music/
- ↑ http://www.true-piano-lessons.com/how-to-practice-piano.html
- ↑ http://www.true-piano-lessons.com/piano-fingering.html
- ↑ http://www.true-piano-lessons.com/how-to-practice-piano.html
- ↑ http://www.true-piano-lessons.com/free-piano-lessons.html
- ↑ http://www.true-piano-lessons.com/how-to-play-the-piano.html
- ↑ http://www.pianolessons.com/piano-lessons/proper-posture.php
- ↑ http://www.true-piano-lessons.com/piano-fingering.html
- ↑ http://www.pianolessons.com/piano-lessons/proper-posture.php
- ↑ http://www.true-piano-lessons.com/piano-fingering.html
- ↑ http://www.true-piano-lessons.com/piano-fingering.html
About This Article
Start learning how to play the piano by locating the middle C key, which is the white key immediately to the left of two black keys closest to the middle of the keyboard. Starting at middle C, practice various scales to get an idea of how your fingers are supposed to be positioned. As you’re learning where your fingers go, try to associate the fingerings with the notes on the page, which will help you learn how to read music. Finally, practice playing rhythms from songs to get a better idea of how the music sounds altogether. If you want to learn how to read sheet music or how to sit in the correct posture for piano playing, continue reading the article!
