This article was co-authored by wikiHow staff writer, Janice Tieperman. Janice is a professional and creative writer who has worked at wikiHow since 2019. With both a B.A. and M.A. in English from East Stroudsburg University, she has a passion for writing a wide variety of content for anyone and everyone. In her free time, you can find her working on a new crochet pattern, listening to true crime podcasts, or tackling a new creative writing project.
There are 8 references cited in this article, which can be found at the bottom of the page.
The wikiHow Video Team also followed the article's instructions and verified that they work.
This article has been viewed 14,439 times.
Learn more...
Ironing is an unfortunate necessity for many fabrics, but it can be an especially tricky task when you’re dealing with synthetic materials. Before you start, turn your fabric inside out and place it on a padded ironing board. Next, protect your garments and other fabric by draping a towel, pillowcase, or other buffer cloth over the surface of your synthetic material. Once you’ve set your iron to a low heating, you can smooth out any wrinkles from your synthetic items!
Steps
Assembling Your Synthetic Fabric
-
1Turn your fabric inside-out. Hold the synthetic material in both hands and carefully tuck the fabric inwards. If you’re ironing a garment, check that the inner seams are visible. If you’re working with a larger length of fabric, just flip the material over.[1]
- If you iron synthetic materials while they’re right-side-out, you might damage the surface of the fabric.
- If you’re working with a patterned piece of fabric, make sure that the pattern is face-down.
-
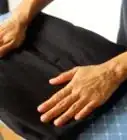
2Arrange the material into a smooth layer on the ironing board. Drape the garment or section of fabric over the length of your ironing board. Use both hands to smooth out any obvious wrinkles and folds in the material, so the fabric looks as flat as possible. If you’re working with a skirt, shirt, or another similar clothing item, arrange the ironing board between both layers of the garment.[2]
- If your synthetic fabric isn’t smooth on the ironing board, it will be more difficult to iron.
- If possible, use a padded ironing board.
Advertisement -
3Drape a towel over the fabric to serve as a buffer. Avoid potential glazing and burn marks by covering a section of your synthetic material with a towel or dish cloth. As you arrange the towel, check that both the edges and surface of the ironing board are completely covered with the buffer cloth. If your towel is small, you can iron your synthetic material in sections.[3]
- A pillow case can also work as a good buffer cloth.
- Check the care label instructions on your towel before using it as a buffer. Your buffer item should be able to withstand low iron heat.

Pressing and Smoothing the Fabric
-
1Check the care label if you’re ironing a garment. Look along the inside of a shirt, skirt, or other piece of clothing to find the washing, drying, and ironing instructions for the item. Specifically, be on the lookout for the symbol of an iron with 1 to 3 dots along the inside. Most synthetic fabrics will have an iron symbol with 1 dot, which means the material can be ironed at a low, cooler temperature.[4]
- An iron symbol with 2 dots means that the garment can be ironed with medium heat, while 3 dots represent high heat.
- Some clothing tags use the numbers 1, 2, and 3 instead of dots. Additionally, some tags specify the exact temperature for the iron.
-
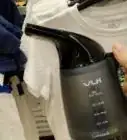
2Turn off your iron’s steam setting. While some synthetic fabrics need to be damp during the ironing process, none of them need any steam. If your synthetic item is made of acetate, iron the garment while it’s still damp from the washer. If your fabric is made with polyester or nylon, check that the material is mostly dry when you iron it. If the item is made of acrylics, check that it’s fully dry before you iron it.[5]
- Steam is generally used with thicker materials, like wool.
-
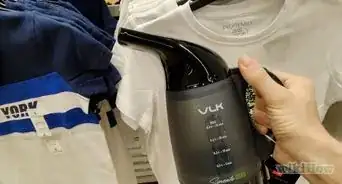
3Adjust your iron to a low heat setting. Use a knob, dial, or other control setting to adjust your iron to the lowest (or coolest) possible temperature. Next, check that any steam options are disabled, so you can apply an even amount of dry heat.[6]
- If the material is acrylic, nylon, or polyester, use a spray bottle to dampen the fabric as needed.
- If you use a high heat setting, you could cause long-term damage to your synthetic fabric.[7]
-
4Rub the iron over the buffer cloth in smooth, back and forth motions. Place the iron in a flat position over the synthetic material. Using gradual movements, guide the iron from left to right, working from edge-to-edge on the ironing board. As you work, focus on any areas that are especially wrinkled. Try to keep the iron moving constantly, so you don’t burn your synthetic fabric.[8]
- Always keep your iron on top of the buffer cloth, so the synthetic fabric doesn’t glaze or burn.
-
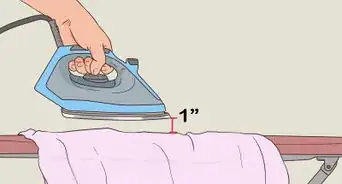
5Apply even amounts of heat along the length of fabric. Once you’ve ironed the entire surface of the buffer cloth, turn your iron at 90-degree angle. To create a smooth finish, move the iron in long, slow motions over the length of the ironing board. Work from top to bottom of the fabric, until you’ve ironed over the entire buffer cloth.[9]
- If you’re ironing a larger section of fabric or garment, adjust the fabric and buffer cloth as needed to iron the rest of the material.
-
6Hang up any ironed garments right away. Arrange your freshly ironed clothing on a hanger, so you can store the garment in your closet. If you’re ironing synthetic fabric for a sewing project, use the material right away.[10]
- If you don’t store your synthetic garments properly, they could wrinkle again.


Things You’ll Need
- Iron
- Ironing board
- Buffer cloth or towel
- Spray bottle (optional)


References
- ↑ https://www.persil.com/uk/laundry/laundry-tips/washing-tips/ironing-tips.html
- ↑ https://m.youtube.com/watch?v=zOqVfyRdglM&t=57s
- ↑ https://m.youtube.com/watch?v=zOqVfyRdglM&t=1m8s
- ↑ https://www.bobvila.com/articles/laundry-symbols-meaning/
- ↑ https://www.persil.com/uk/laundry/laundry-tips/washing-tips/ironing-tips.html
- ↑ https://www.persil.com/uk/laundry/laundry-tips/washing-tips/ironing-tips.html
- ↑ https://www.academia.edu/9545083/FABRIC_-_Care_and_Classification
- ↑ https://m.youtube.com/watch?v=zOqVfyRdglM&t=1m26s
- ↑ https://m.youtube.com/watch?v=zOqVfyRdglM&t=1m48s