wikiHow is a “wiki,” similar to Wikipedia, which means that many of our articles are co-written by multiple authors. To create this article, volunteer authors worked to edit and improve it over time.
This article has been viewed 27,340 times.
Learn more...
Debian sid is the permanent unstable development version of Debian. It is where the latest versions of programs being considered for inclusion in a Debian release are uploaded and tested. Because it has no official install media, and the few netboot images that are built often don't work, even people who are willing to risk using a development version may have trouble installing it.
Steps
Upgrade from Debian Stable
-
1Download and install the stable version of Debian, if you have not done so already.
-
2Open a terminal window or TTY console. Because this is a major upgrade, you should not attempt this with SSH unless you have physical access to the computer or an alternative method of gaining shell access.Advertisement
-
3Move/backup your existing sources lists. Use the following commands:
sudo mv /etc/apt/sources.list /etc/apt/sources.list.old sudo mv /etc/apt/sources.list.d /etc/apt/sources.list.d.old sudo mkdir /etc/apt/sources.list.d -
4Create a new sources.list. Run the command sudo sensible-editor /etc/apt/sources.list and add the following:
deb http://deb.debian.org/debian sid main contrib non-free deb-src http://deb.debian.org/debian sid main contrib non-free -
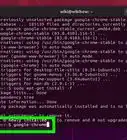
5Run sudo apt update and sudo apt dist-upgrade. apt will attempt to download new versions of any programs you have installed. You will very likely encounter dependency issues or broken packages, and you'll need to fix these manually. Sometimes, running sudo apt update --fix-missing and sudo apt install -f and then sudo apt dist-upgrade again will be enough; other times you may have to remove a package with dpkg -r to make the upgrade progress.
-
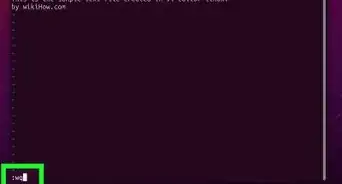
6Reboot your computer. This will load the latest kernel.


Use a cloud image
-
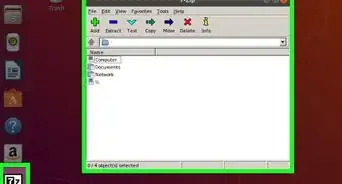
1Download and install balenaEtcher. It is a free, cross-platform tool for safely writing disk images to USB Flash drives.
-
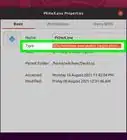
2Download the "nocloud" image for AMD64. It is located at http://cloud.debian.org/images/cloud/sid/daily/latest/debian-sid-nocloud-amd64-daily.raw
-
3Plug in your Flash drive, and then start balenaEtcher. Click Flash from file, and select the raw image.
-
4Click "Select target". Choose your Flash drive, and then click "Select."
-
5Click "Flash." balenaEtcher will begin writing the image to your Flash drive. You may see messages warning that the drive needs to be formatted. This is normal, as Windows doesn't support most Linux file systems.
-
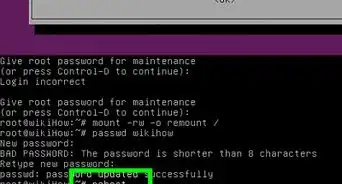
6Reboot your computer, with your Flash drive plugged in. You may need to tell your computer to boot from it, by pressing a specific key, or changing the boot order in your BIOS. After Debian finishes booting, log in. The default username is root; there is no password.
-
7(Optional) Create a swap file. The cloud image doesn't contain a swap file or partition. Adding one is a good idea if your computer doesn't have a lot of RAM, as it will prevent Debian from crashing under heavy load. If it is used, it will reduce the lifespan of your Flash drive, though. Use the following commands (as root, or with sudo):
fallocate -l 512M /swapfile chmod 600 /swapfile mkswap /swapfile swapon /swapfile sh -c 'echo /swapfile none swap sw 0 0 >> /etc/fstab'
Be careful when entering the last command. If you enter it incorrectly, you could overwrite your fstab file. If you are at all unsure, edit it with nano instead.


grml-debootstrap
-
1Download a recent Live version of Debian, Ubuntu, or most derivatives.
-
2Write the image to a CD, DVD, or a Flash drive. You can use balenaEtcher (mentioned previously) to write it to a Flash drive. Windows users can burn ISO images to CD/DVD by right-clicking the ISO image and selecting Burn disc image.
-
3Boot the computer from the CD/DVD/Flash drive. You may need to press a specific key or change the boot order in UEFI/BIOS setup to use a different boot device.
-
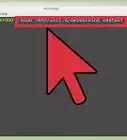
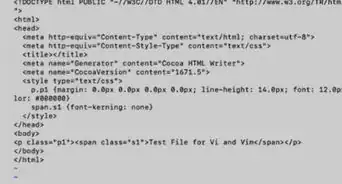
4Open a terminal window. You can do this in most desktops by pressing Alt+F2 and entering x-terminal-emulator.
-
5Check that you have the necessary repository components enabled. For distributions based directly on Debian, there should be a contrib in each line (excluding the CD). For Ubuntu-based distributions, there should be a universe in each line. You can edit this file by entering sudo nano /etc/apt/sources.list. When you have made the changes, press Ctrl+O to save, and then Ctrl+X to exit.
-
6Install GParted and grml-debootstrap. Enter the following commands:
sudo apt update sudo apt install gparted grml-debootstrap -
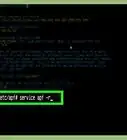
7Launch GParted. Enter sudo gparted into your terminal.
-
8Select your hard drive from the menu in the top right-hand corner. If you booted from a CD/DVD and you only have one hard drive, there should only be one listed. If you booted from a Flash drive, it will be listed as well.
-
9Create a partition table. Click the Device menu, and select Create partition table
- If you are using a computer with UEFI, choose gpt as the partition table type
- If you are using a computer with a legacy BIOS, or need to boot in legacy mode on a modern computer, choose msdos as the partition table type.
-
10Partition the hard drive (for UEFI computers). You will need to create at least three partitions. For each of these, go to the Partition menu, and select New. Adjust the size and type as follows:
- A FAT32 partition at the beginning of the drive. 100 MB is sufficient.
- A "linux-swap" partition second. At least 512 MB is a good idea, but you may need more.
- An ext4 partition for the remainder of the drive. You can create additional partitions, but you will have to set them up manually in order for Debian to use them.
When you have finished creating the partition layout, click the checkbox.
-
11Change the flags on the FAT32 partition (for UEFI computers). Right-click the FAT32 partition and select Manage flags. Check the box marked esp, then click Close.
-
12Partition the hard drive (for legacy BIOS computers). You will need to create at least two partitions. For each of these, go to the Partition menu, and select New. Adjust the size and type as follows:
- A "linux-swap" partition first. At least 512 MB is a good idea, but you may need more.
- An ext4 partition for the remainder of the drive. You can create additional partitions, but you will have to set them up manually in order for Debian to use them.
When you have finished creating the partition layout, click the checkbox.
-
13Write down the partition information. You will need to know where each type of partition is, so that you can accurately mount it later. For example:
/dev/sdX1 fat32 /dev/sdX2 swap /dev/sdX3 ext4
When you have written everything down, close GParted. -
14Edit the list of packages that will be installed. Enter sudo nano /etc/debootstrap/packages in your terminal and add network-manager to the bottom. You can add other packages here if you know the name. For example, if you want an Xfce desktop, add xfce4, lightdm, lightdm-gtk-greeter, and xserver-xorg.
-
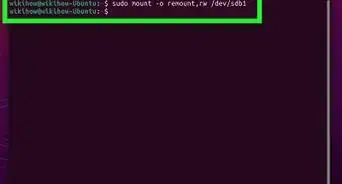
15Run grml-deboostrap. In your terminal, enter sudo grml-debootsrap -r sid -t /dev/sdX# --efi /dev/sdX# --grub /dev/sdX --hostname <hostname> --contrib --non-free
- -t /dev/sdX# should point to the ext4 partition.
- --efi /dev/sdX# should point to the FAT32 partition
- --grub /dev/sdX should be the drive, without any numbers after it.
- <hostname> should be what you want the name of the computer to be.
If you are installing on a computer with a legacy BIOS, you may omit the --efi /dev/sdX# parameter. Enter y or yes when warned about formatting and deleting data. -
16Enter a root password when prompted. grml-debootstrap will perform a couple more steps, and then announce that it is complete.
-
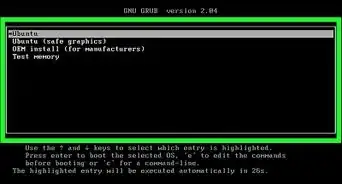
17Reboot your computer. Be sure to remove your CD/DVD/Flash drive or change the boot order in your BIOS, so that the hard drive is loaded. You should see the GRUB boot menu appear, and an option to boot Debian.


References
- Debian stable download page - i386 (32-bit) version
- Debian stable download page - AMD64 (64-bit) version
- Debian sid daily cloud image download page
- balenaEtcher download page
- grml-debootstrap man page