This article was co-authored by wikiHow staff writer, Christopher M. Osborne, PhD. Christopher Osborne has been a wikiHow Content Creator since 2015. He is also a historian who holds a PhD from The University of Notre Dame and has taught at universities in and around Pittsburgh, PA. His scholarly publications and presentations focus on his research interests in early American history, but Chris also enjoys the challenges and rewards of writing wikiHow articles on a wide range of subjects.
This article has been viewed 33,550 times.
Learn more...
Plastic worms are easy to attach to a wide range of hooks, work well in most fishing conditions, and are great for catching bass and several other popular fish. While you can hook plastic worms in a wide variety of ways, there are 2 very common options. One involves hooking the tip into the worm as part of either the “Texas” or “Carolina” rig setups. The other option leaves the worm dangling freely off both sides of the hook as part of the “wacky rig,” with or without a “drop shot” setup. So, choose your rig, pick your gear, and give plastic worms a try!
Steps
Adding the Worm to a Texas or Carolina Rig
-
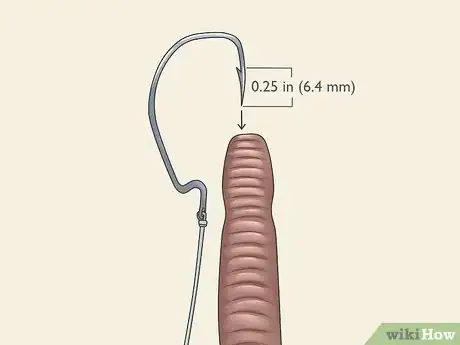
1Insert 0.25 in (6.4 mm) of the hook tip into the head of the worm. Carefully pierce the center of the top of the plastic worm with the sharp tip of the hook, then press the hook a bit deeper into the center of the worm’s body. Make sure you don’t hook your fingertip in the process![1]
- An offset hook, which has an L-shaped bend just below the hook eye, works well here because it allows the worm to dangle freely beside the hook’s shaft and tip.
-
2Feed the hook point out of the side of the plastic worm’s body. Hold the worm steady just beyond the tip of the inserted hook, then guide the hook tip out of the side of the worm. Aim for the hook point to emerge 0.25 in (6.4 mm) from the top of the worm’s head.[2]
- If the hook is embedded less than 0.25 in (6.4 mm) into the plastic worm’s body, it may tear free too easily. It’s not necessary to embed it more than 0.25–0.5 in (6.4–12.7 mm), however.
Advertisement -
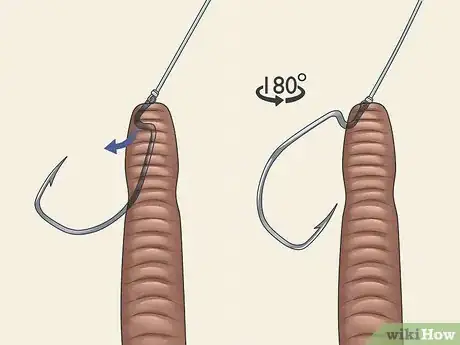
3Slide the plastic worm up the hook until its head touches the hook eye. Once you reach about mid-shaft on the hook, twist the hook 180 degrees so that the hook’s tip faces the worm’s body. Then, finish sliding the worm up the shaft until it’s at the hook eye—that is, the ring where you tie the fishing line.[3]
-
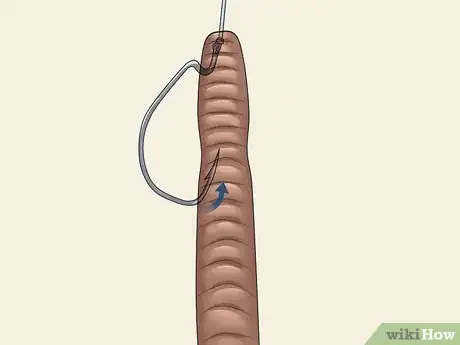
4Push the tip of the hook into the center of the plastic worm. Or, push the center of the worm onto the tip of the hook—it works either way! In any case, keep the hook’s tip embedded in the worm, rather than letting it poke out.[4]
- So, at this point, the section of the hook just below the hook eye should pass through the head of the worm, the hook shaft should run alongside the worm, and the hook tip should be embedded in the middle of the worm.
-
5Nudge the hook tip until it’s just below the surface of the worm. You should be able to see the position of the hook tip since most plastic worms are at least partially transparent. Carefully maneuver the hook tip so that it slightly bulges the outer surface of the worm without breaking through.[5]
- Keeping the hook tip embedded in the worm makes it less likely that you’ll snag the hook on weeds or other debris. At the same time, bringing the tip very close to the surface of the worm will make it easier to actually hook a fish.
- Embedding the hook within the worm makes this a “weedless” rig setup.
-
6Use this hook setup for either a Texas or Carolina rig.[6] For a Texas rig, thread a “bullet sinker”—a metal, bullet-shaped sinker—onto the end of the line before tying on the offset hook with the hooked worm. Once the rig is complete, the bullet sinker should touch or almost touch the top of the plastic worm’s head.[7]
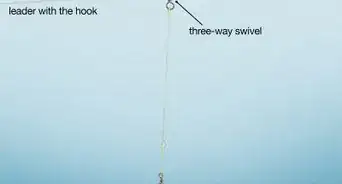
- The Carolina rig, on the other hand, separates the sinker and the hook. Slide your bullet sinker and a spacer bead onto the main line, then tie a barrel swivel onto the end of the line. Tie a 10–30 in (25–76 cm) leader line onto the other side of the barrel swivel, then tie your hooked worm to the end of the leader line.
Hooking a Wacky Rig and Optional Drop Shot
-
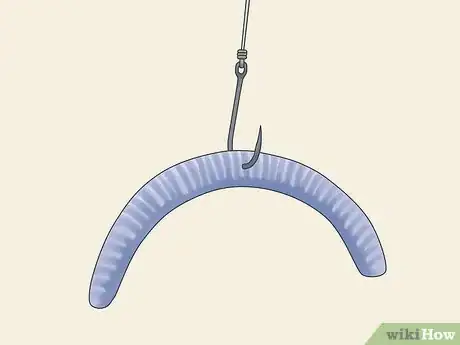
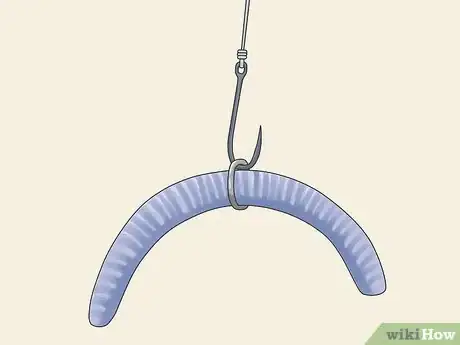
1Feed the tip of your chosen hook straight through the center of the plastic worm. Despite its “wacky” name, this is the way someone who has never baited a hook before would assume you do the job. Simply jab the tip of the hook straight in, through, and out of the middle of the worm, and let the top and bottom halves of the worm dangle freely to the sides. It’s an easy but quite useful way to hook a plastic worm![8] [9]
- You can set practically any type of hook wacky-style, but wide gap hooks (which have a wider diameter within the curve of the hook) may be a bit easier to set for a beginner.
-
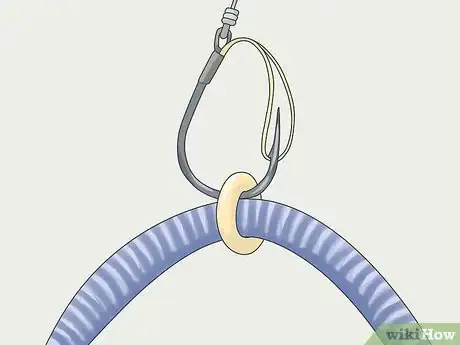
2Use O-rings instead to possibly increase the lifespan of your worm. Piercing the center of your worm with a hook can make it more susceptible to tearing apart, especially after you’ve hooked a few fish with it. As an alternative, you can slip an O-ring onto the worm and then guide the hook between the O-ring and the worm.[10]
- To put an O-ring on, buy an O-ring applicator—a device that looks a bit like a pen cut in half—from the same retailer. Feed half of the worm into the device, then slide a pre-loaded O-ring off the end of the device and onto the center of the worm. After that, slide the hook tip under the O-ring to set up your wacky rig.
- You can buy O-rings and the matching applicator at fishing supply retailers.
- Not all anglers think using O-rings is worth the trouble, especially if you’re using fairly inexpensive plastic worms anyway.[11]
-
3Add a weed guard, if desired, to protect the hook tip from snagging. Because the tip of the hook is exposed, the standard wacky rig may snag on weeds and other debris. To make it “weedless,” use a hook with an attached “weed guard”—a small wire that loops through the hook eye and latches over the hook tip. The weed guard is strong enough to prevent most snags on the hook but will give way when a fish bites the hook.[12]
- You can buy hooks that are pre-loaded with weed guards, buy pre-made weed guards, or make your own weed guards from wire or fishing line. If you buy weed guards, attach them according to the product instructions.
- Some fishing enthusiasts think weed guards make it harder to actually hook a fish. It’s really a matter of personal preference.
-
4Go sinker-free for the classic wacky rig setup. Generally, a wacky rig uses only the weight of the hook and the plastic worm as the sinker, meaning it sinks very slowly while the fake worm wiggles away in a “wacky” fashion. In this case, simply tie the line directly through the hook eye using your preferred knot.[13]
- The classic wacky rig setup is a good choice during or after spawning season when fish tend to hang out in shallower water and move more slowly.
-
5Add a sinker to utilize the “drop shot” setup. Use a palomar knot to secure the wacky-rigged hook at a chosen distance—for instance, 2 ft (61 cm)—from the end of the line. Then, tie a spherical “drop shot” weight to the end of the line.
- This setup suspends your bait and hook above the bottom of the body of water. Because you can adjust the height at which the bait is suspended, you can use the drop shot setup in a wide range of fishing scenarios, based on the depth at which your target fish are congregating.[14]
Choosing the Right Equipment
-
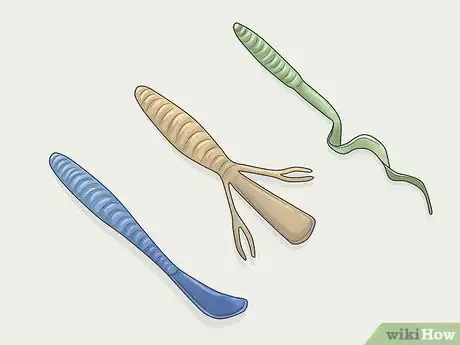
1Try different sizes and styles of plastic worms for bass and other fish. If you’re looking to catch bass, which is the target that plastic worms were originally designed for, try a 6–7 in (15–18 cm) worm with a dark color like purple or brown. For other types of fish, buy several different varieties and try them out—then stick with whatever type works best for you!
- Originally, plastic worms were fairly standardized at 6 in (15 cm) in length. Today, plastic worms range in length from about 4.5 in (11 cm) to 10 in (25 cm). They come in many colors, and some have appendages so they look more like salamanders or other forms of bait.
- Plastic worms are also weighted differently so that they’ll sink more or less readily on their own.
-
2Pick a hook and sinker combo that suits bass fishing or your preferred target. If you’re bass fishing, for instance, try an offset-shank hook sized at 3/0, along with a bullet sinker that weighs between 0.062–0.75 oz (1.8–21.3 g). However, since plastic worms are so adaptable, they can be used with most varieties of hooks and sinkers, or no sinker at all.
- As with choosing the best plastic worm for your needs, your hook and sinker choices should depend largely on your own fishing preferences and experiences.
-
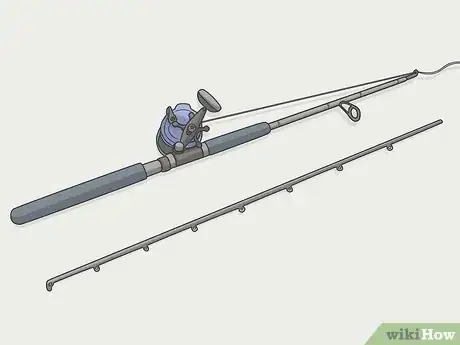
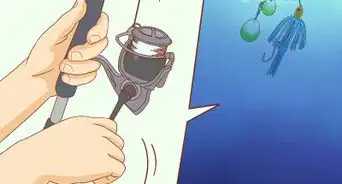
3Use a heavy action fishing rod and mid-range test line to catch bass. If you’re using your plastic worm to attract bass, pick out a 7 ft (2.1 m), heavy action fishing rod for the job. Many bass anglers use a test line in the 12–17 lb (5.4–7.7 kg) range to round out this setup.
- Always keep in mind that plastic worms are very adaptable for use with many types of tackle and for many types of fishing. Use what works best for you!
Community Q&A
-
QuestionWhy do you put the hook in the center of the plastic worm? How will the fish get caught if the hook is in the center?
 Community AnswerWhen you hook the worm through the middle, the worm can still wiggle at both ends. This is more likely to attract fish.
 -
QuestionAre hard baits better than rubber baits?
 Community AnswerNot necessarily. It seems to vary with the time of year. Some people think that soft, plastic baits are best.
Things You'll Need
Texas or Carolina Rig
- Hook
- Plastic worm
- Sinker or bullet sinker (optional)
Wacky Rig and Optional Drop Shot
- Hook
- Plastic worm
- O-ring (optional)
- Weed guard (optional)
- Spherical sinker (optional)
References
- ↑ https://www.bcfishingjournal.com/project/how-to-rig-plastic-baits/
- ↑ https://www.bcfishingjournal.com/project/how-to-rig-plastic-baits/
- ↑ https://www.bcfishingjournal.com/project/how-to-rig-plastic-baits/
- ↑ https://www.bcfishingjournal.com/project/how-to-rig-plastic-baits/
- ↑ https://www.bcfishingjournal.com/project/how-to-rig-plastic-baits/
- ↑ https://shopkarls.com/blog/how-to-rig-soft-plastics/
- ↑ https://www.bcfishingjournal.com/project/how-to-rig-plastic-baits/
- ↑ https://shopkarls.com/blog/how-to-rig-soft-plastics/
- ↑ https://www.bassfishingandcatching.com/wacky-worm-fishing.html
- ↑ https://www.bassfishingandcatching.com/wacky-worm-fishing.html
- ↑ https://www.bcfishingjournal.com/project/how-to-rig-plastic-baits/
- ↑ https://www.bassfishingandcatching.com/wacky-worm-fishing.html
- ↑ https://www.bassfishingandcatching.com/wacky-worm-fishing.html
- ↑ https://www.bassfishingandcatching.com/wacky-worm-fishing.html
