This article was co-authored by wikiHow staff writer, Janice Tieperman. Janice is a professional and creative writer who has worked at wikiHow since 2019. With both a B.A. and M.A. in English from East Stroudsburg University, she has a passion for writing a wide variety of content for anyone and everyone. In her free time, you can find her working on a new crochet pattern, listening to true crime podcasts, or tackling a new creative writing project.
There are 16 references cited in this article, which can be found at the bottom of the page.
The wikiHow Video Team also followed the article's instructions and verified that they work.
This article has been viewed 80,055 times.
Learn more...
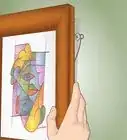
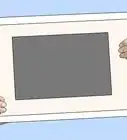
Prints can be a fun and stylish addition to your home, but displaying them can seem a little tricky. While it’s usually best to leave framing to a professional, you can try your hand at framing with a store-bought frame and some basic supplies, like a mat. You can display your prints with a custom mat to make them look really sleek, or give them an extra dimension by “floating” them in a frame. Play around with different framing styles until you find something that works well for your home and living space!
Steps
Getting the Right Supplies
-
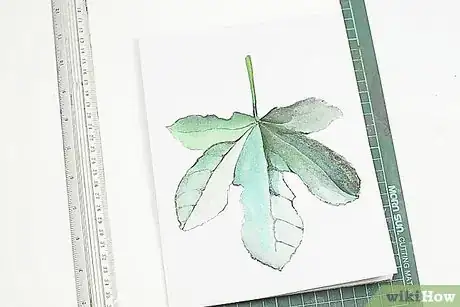
1Measure your print to get an idea of the dimensions. Take a ruler or measuring tape and see how long your print is. Jot down this measurement, then repeat the same process by measuring the height of your artwork. Keep these dimensions in mind so you don’t get a frame that’s too large or small for your print.[1]
- Most prints will probably fall under a standard size like 8 by 10 in (20 by 25 cm), but it doesn’t hurt to double-check.
-
2Get a frame that’s larger than your print. Look for a frame that’s a size or so larger than the print you have on hand. When you display your print with a mat, the mat takes up a lot of space within the frame, so give yourself several inches or centimeters of wiggle room to work with.[2]
- For instance, if your print is 11 by 14 in (28 by 36 cm), you may want to get a 16 by 20 in (41 by 51 cm) frame.
- You can buy a new frame for your print, or reuse a frame that you don’t currently have on display.
Advertisement -
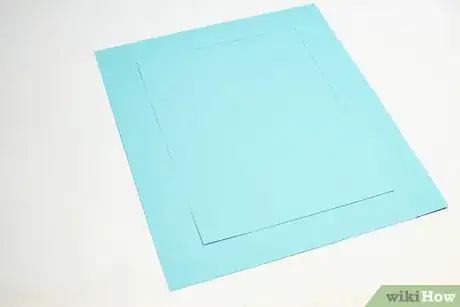
3Invest in a custom mat that fits around your print. Search online or in an art supply store for a mat that is larger than the dimensions of your print. Check that the dimensions of the mat can comfortably frame your print while providing a couple of inches or centimeters of white space around the side of your print.[3]
- For really exact cuts, trim your mat with an X-acto knife.
- Most prints are displayed with white mats, as this helps the print stand out more.
- For instance, you’d want to get a 16 by 20 in (41 by 51 cm) mat to frame your 11 by 14 in (28 by 36 cm) print.
Displaying with a Mat
-
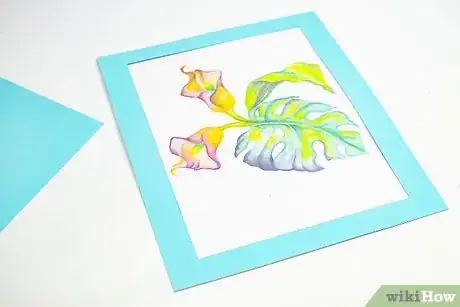
1Cut out the center of the custom mat so it frames your print. Mark the dimensions of your print on the mat, making sure that there are equally sized gaps along the right and left sides of the print, along with the top and bottom edges. Slice around this traced rectangle with a sliding cutter to get your custom print. You may want to draw a rough template of your mat on a separate sheet of paper so you can get an idea of which dimensions to mark and cut.[4]
- For instance, if you’re framing a 12 by 7 in (30 by 18 cm) print in a 16 by 20 in (41 by 51 cm) mat, there’d be 4 1⁄2 in (11 cm) of space to the right and left of the print and 4 in (10 cm) of space above and below the print.
-
2Tape the back of the print to the mat. Place the print face-down along the back of the mat, then secure it in place with several strips of acid-free tape. Place additional strips of tape as needed along the back edge of your print to hold it in place.[5]
- Acid-free tape won’t create any long-term damage to your print.
-
3Attach the mat and print it to the back of the frame with tape. Place 4 sections of acid-free tape along the back of the mat, then secure it to the front of the frame backing. If your frame is especially large, you may want to use several sections of tape to get the job done.[6]
- For instance, you may want to stick 4 sections of tape along the corners of the print, as well as 1-2 sections in the center of the print.
-
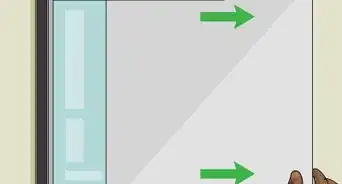
4Tape the back of the frame into place. Stack the mat and print on top of the frame backing, then place them face-down on the frame glass. Some frames may have screws or clamps that hold your frame in place—if your frame doesn’t have any of these mechanisms, use a couple of long strips of tape to hold the edges of the frame’s backing in place.[7]
- Thicker, more durable tape is best for this. You can ensure a smooth edge by creasing the center of the tape with a ruler.
Floating Your Print
-
1Trim the mat so it’s identical to the back portion of the frame. Place the frame on top of your mat and trace around it with a pencil. Cut out the rectangle with an X-acto knife so your mat fits into the frame snugly.[8]
- If you don’t have an X-acto knife, you can use a pair of scissors instead.
-
2Mark along the center of the mat where you’d like to put your print. Place your print in the middle of the trimmed mat so you have an idea of how you’d like it to look. Measure along the edges of your print with a ruler to ensure that it’s equidistant from all edges of the mat. As a finishing touch, lightly mark the border of your print with pencil.[9]
-
3Measure a section of foamcore that’s 1⁄4 in (0.64 cm) smaller than your print. Lightly trace the edge of your print along the section of foamcore as a starting point. Measure 1⁄4 in (0.64 cm) in from each edge and mark the new, smaller dimensions with a pencil.[10]
- You don’t want the foam to stick out from under the print, so it needs to be slightly smaller than the print itself.
- Foamcore is a thick, sturdy board that lifts your print and makes it look like it’s “floating” in the frame. You can find this online or at most craft stores.
-
4Cut out this smaller rectangle of foamcore with an X-acto knife. Place your foamcore on a sturdy work surface and drag your X-acto knife around the traced rectangle. Work in long, smooth cuts so your foamcore looks as sleek and seamless as possible.[11]
-
5Stick the print to the foamcore with several strips of mounting tape. Place at least 4 pieces of specialty tape along the back of the print so it adheres to the foam. Double-check that both the foam and the print look smooth, so your print looks really sleek when you go to hang it up.[12]
- Always use acid-free tape, which won’t damage your print over time.
-
6Secure the foamcore to the center of the mat with tape. Place a few strips of tape along the back of your foamcore-mounted print and stick it to the center of the mat that you previously marked. Lightly press the print into place so it stays put on the mat and doesn’t shift after you hang it up.[13]
-
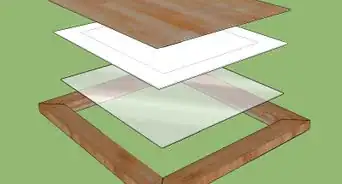
7Measure and trim 4 acrylic spacers that can go around the inside of the frame. Place an acrylic spacer along the inner edge of your picture frame, and mark where it meets the edge of the frame. Trim the acrylic spacer to size with wire cutters. Repeat this measuring, marking, and trimming process with 3 more acrylic spacers, then peel away the adhesive-covering tape along the bottom of the spacer. Press all 4 spacers into place along the inner perimeter of the frame.[14]
- Acrylic spacers look like thin, see-through sticks that stick to the sides of your frame. They help create a gap between the print and the frame so the print isn’t touching the glass. They have a piece of peel-away tape along the bottom that keeps the adhesive as sticky as possible.
- You can find acrylic spacers online or at most stores that sell framing supplies.
- Your spacers may be different sizes, depending on the size of your frame.
-
8Place the print in the frame on top of the acrylic spacers. Check if floating print is flush against all sides of the frame, and that the print is visible through the glass. Look at the print to ensure that it’s sitting on top of the acrylic spacers and not touching the frame glass.[15]
-
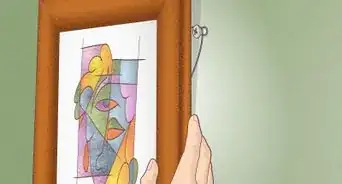
9Secure the back of the frame in place so you can display your print. Place the frame backing behind the floating print and hold it in place with the mechanisms on your frame. For some frames, you may need to use a couple strips of tape or a staple gun to secure your frame into place.[16]
- For instance, you can place a thick, 4 to 6 in (10 to 15 cm) strip of tape along each outer edge of your frame backing. Press along the center of the tape with a ruler so it creases and sticks evenly to the frame.
Community Q&A
-
Questioncan you put a Serio lithograph print under glass directly?
 Community AnswerNo.
 -
QuestionDo prints need glass on them?
 Community AnswerNo, you can just hang/put a print anywhere without glass. They shouldn't smudge or stain if they are dry.
 -
QuestionWhat type of tape is needed to attach print to mat?
 Community AnswerYou can use acid-free hingeing tape or acid-free masking tape on the back side of the matt board.
Things You’ll Need
Displaying with a Mat
- Ruler
- Pen or pencil
- Framing mat
- Mounting tape
- Scissors or X-acto knife
- Nail
Floating Your Print
- Ruler
- Pen or pencil
- Scissors or X-acto knife
- Framing mat
- Foamcore
- Wire cutters
- Mounting tape
- 4 acrylic spacers
References
- ↑ https://www.framations.com/measurecfm.html
- ↑ https://m.youtube.com/watch?v=Q_S4kmPPK4k&t=0m54s
- ↑ https://m.youtube.com/watch?v=Q_S4kmPPK4k&t=1m36s
- ↑ https://m.youtube.com/watch?v=mTI4sG6MPy4&t=1m28s
- ↑ https://m.youtube.com/watch?v=OiOJFkvAp5c&t=5m43s
- ↑ https://m.youtube.com/watch?v=OiOJFkvAp5c&t=6m2s
- ↑ https://m.youtube.com/watch?v=OiOJFkvAp5c&t=6m38s
- ↑ http://www.littlehousebigcity.com/home/2015/2/27/how-to-float-mount-pictures-in-a-frame
- ↑ http://www.littlehousebigcity.com/home/2015/2/27/how-to-float-mount-pictures-in-a-frame
- ↑ https://m.youtube.com/watch?v=nI1_AlavLV0&t=0m48s
- ↑ https://m.youtube.com/watch?v=nI1_AlavLV0&t=0m48s
- ↑ https://m.youtube.com/watch?v=nI1_AlavLV0&t=1m9s
- ↑ https://m.youtube.com/watch?v=nI1_AlavLV0&t=1m36s
- ↑ https://m.youtube.com/watch?v=nI1_AlavLV0&t=1m57s
- ↑ https://m.youtube.com/watch?v=nI1_AlavLV0&t=2m34s
- ↑ https://m.youtube.com/watch?v=nI1_AlavLV0&t=2m39s
- ↑ https://www.thesavvyheart.com/journal/2017/6/7/the-art-of-floating-matting-mounting-framed-pictures
- ↑ https://m.youtube.com/watch?v=OiOJFkvAp5c&t=6m20s


