This article was co-authored by wikiHow staff writer, Dan Hickey. Dan Hickey is a Writer and Humorist based in Chicago, Illinois. He has published pieces on a variety of online satire sites and has been a member of the wikiHow team since 2022. A former teaching artist at a community music school, Dan enjoys helping people learn new skills they never thought they could master. He graduated with a BM in Clarinet Performance from DePauw University in 2015 and an MM from DePaul University in 2017.
The wikiHow Video Team also followed the article's instructions and verified that they work.
This article has been viewed 3,209,412 times.
Learn more...
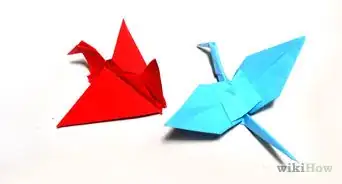
When most people think of origami, their mind jumps straight to the elegant paper crane. The idea of folding a paper crane yourself might seem intimidating at first, but the process is super straightforward and even first-time origami makers can make one in just a few minutes. In this article, we’ll show you how to make a traditional origami crane step-by-step (with visuals to help you bring your beautiful bird to life). All you need is a square of paper and a flat surface. Let’s get started!
Things You Should Know
- Use traditional origami paper in the shape of a square for the best results. Choose paper with a color or design you enjoy to make your paper crane pop.
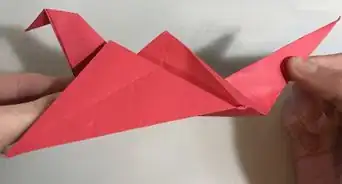
- Make all of your folds slowly and carefully. Line up corners or edges as perfectly to each other as you can for the sharpest looking crane.
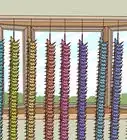
- Display your crane on a tabletop or shelf, give it as a gift, or make 999 more and string them together to make your own senbazuru!
Steps

Community Q&A
-
QuestionIs it harder to make a paper crane with writing paper?
 Community AnswerYes, normal writing paper is much harder to use than origami paper because the origami paper is lighter yet stronger, which makes it easier to fold and shape. Writing paper is flimsier and liable to tear.
 -
QuestionWhat is the meaning of the paper crane?
 Community AnswerTraditionally, it was believed that if one folded 1000 origami cranes, one's wish would come true. It has also become a symbol of hope and healing during challenging times. As a result, it has become popular to fold 1000 cranes (in Japanese, called “senbazuru”).
 -
QuestionWhat is the usual size for origami paper?
 Community AnswerIt usually is 6 or 7 inches. You can find big books of origami paper in craft stores. Origami paper is perfectly square.

References
- ↑ https://www.gathered.how/papercraft/origami/how-to-make-an-origami-crane/
- ↑ https://make-origami.com/paper-crane/
- ↑ https://make-origami.com/paper-crane/
- ↑ https://www.gathered.how/papercraft/origami/how-to-make-an-origami-crane/
- ↑ https://mcpl.info/sites/default/files/images/origami_crane_instructions_1.pdf
- ↑ https://make-origami.com/paper-crane/
- ↑ https://make-origami.com/paper-crane/
- ↑ https://mcpl.info/sites/default/files/images/origami_crane_instructions_1.pdf
- ↑ https://mcpl.info/sites/default/files/images/origami_crane_instructions_1.pdf
- ↑ https://mcpl.info/sites/default/files/images/origami_crane_instructions_1.pdf
- ↑ https://mcpl.info/sites/default/files/images/origami_crane_instructions_1.pdf
- ↑ https://mcpl.info/sites/default/files/images/origami_crane_instructions_1.pdf
- ↑ https://mcpl.info/sites/default/files/images/origami_crane_instructions_1.pdf
- ↑ https://www.gathered.how/papercraft/origami/how-to-make-an-origami-crane/
- ↑ https://mcpl.info/sites/default/files/images/origami_crane_instructions_1.pdf
About This Article

To fold an origami paper crane, start by folding a square piece of paper in half vertically, horizontally, and diagonally, unfolding after each fold. Then, fold the top corners to the bottom and press the sides in so the paper is folded up in a small diamond Next, grab the upper layer of the right side and fold the bottom edge to the center crease. Repeat this on the left side. Fold the top of the diamond down so the crease lies along the horizontal line created by the previous two triangles. Then, unfold the top corner and the previous two triangles to return to the small diamond shape you created. From there, fold the topmost layer of the bottom point all the way up so that the left and right flaps naturally fold in, creating a long, narrow diamond shape. Carefully, crease and flatten the paper.Flip the paper over, and repeat the process to create another long, skinny diamond. At this point, your paper should look like one tall, skinny diamond with two legs at the bottom. Next, grab the point on the upper layer of the right side and fold the bottom outside edge inwards towards the central line. Repeat on the left side. Fold the entire right flap over the central line, as if you were turning the page of a book. At this point, both flaps should be on the left-hand side. Turn the shaper over and repeat the process. Next, grab the upper layer of the bottom point and fold it up so the bottom tip touches the top points. Fold the right flap over to the left. Repeat on the other side. Then, fold wings down so you can just see the body. Finally, fold the tip of the head down and pull the wings out gently. If you want to learn more, like how to make your crane look larger and three-dimensional, keep reading the article!