This article was co-authored by Art Fricke. Art Fricke is a home renovation and repair specialist and the owner of Art Tile & Renovation based in Austin, Texas. With over 10 years of experience, he specializes in bathroom and kitchen renovations. Art focuses on a single contractor approach to customized renovation work, and performs projects such as installing custom tile showers, fixing tiled shower leaks, replacing cracked tiles, and installing floor and wall tile.
There are 13 references cited in this article, which can be found at the bottom of the page.
This article has been viewed 80,417 times.
Temperature fluctuations or a sagging subfloor can create gaps between a wall and the floor beneath it. Fortunately, you can easily fix the gap with the right caulk. Start by cleaning the area and removing any previous caulk that may be there. Then, you can load up your caulk gun, fill the gap, and smooth it out. Allow the caulk to dry and set, and you’re good to go! However, a gap between a floor and wall could be a sign of a deeper structural problem such as a settling foundation. It’s important that you check for signs of serious issues so you can address them before more damage occurs.
Steps
Cleaning
-
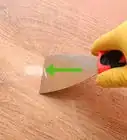
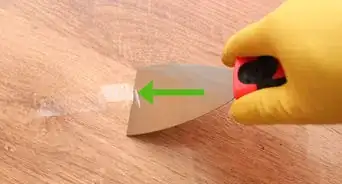
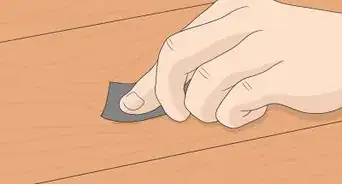
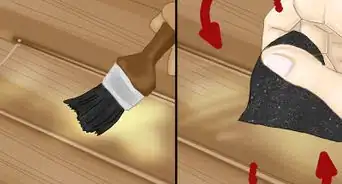
1Scrape off any old caulk from the gap, if necessary. If there’s any old or cracked caulk along the gap, take a utility knife or a putty knife and run the edge along it to scrape it off. Be careful not to strip or chip the paint on the walls. Continue scraping until all of the old caulk is removed.[1]
Tip: Use 180-grit sandpaper to scrub off any stubborn bits of caulk.
-
2Vacuum any dust and dirt from inside of the gap. Use the hose extension on a vacuum cleaner and insert the tip into the gap. Vacuum all along the gap to suck up any dust, dirt, debris, and pieces of caulk that may be there. Dirt and other contaminants will affect how well you can seal the gap, so work the hose attachment around it to remove as much as you can.[2]
- If you don’t have a vacuum or a hose attachment, use a damp cloth to scrub dirt and debris out of the gap.
Advertisement -
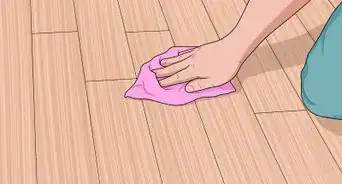
3Scrub the gap with rubbing alcohol to sanitize it. Fill a bowl with rubbing alcohol and dip a clean sponge, dip a clean sponge or cloth into it, and wring out the excess. Scrub the top and bottom of the gap to remove any loose debris, dirt, and stains, as well as to sanitize the area so mold doesn’t form when you seal it.[3]
- Rubbing alcohol can irritate your eyes and sinuses if you breathe in the fumes directly, so be sure to work in a well-ventilated area.
- If you don’t have rubbing alcohol, you can mix equal parts water and bleach as an alternative cleaning solution.
-
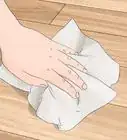
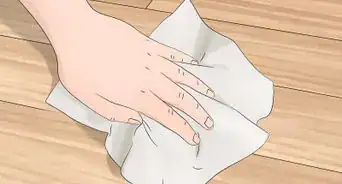
4Let the area around the gap dry completely. Run a clean, dry cloth over the area and wait a few hours for it to air dry. To speed up the drying process, aim a blow dryer set on low heat to dry the wall and floor near the gap. Touch the area with your finger to make sure it’s completely dry so moisture doesn’t get trapped when you seal the gap.[4]
- Moisture can cause bacteria and mold to develop in the wall.


Caulking
-
1Use silicone caulk to create a waterproof seal.[5] If you’re fixing a gap between a tile floor and wall, such as in a shower or a bathroom, go with a silicone caulk so you can create an airtight, waterproof seal. Look for silicone caulk at home improvement stores, hardware stores, and online.[6]
- Silicone caulk is generally clear in color.
- The waterproof seal will help prevent moisture from getting into your walls, which can lead to rot and mold.
- Silicone caulk cures through crystallization as it's exposed to oxygen. Some products are designed to cure quickly, and are water-ready in 30 minutes.[7]
-
2Choose latex caulk if you want it to match the color of the wall. If you’re fixing a gap between a floor and a painted wall, such as a bedroom or living room wall, use a latex caulk. Choose a color that closely resembles the paint of your wall so the gap isn’t noticeable. Look for latex caulk at department stores, home improvement stores, hardware stores, and online.[8]
- You could also choose a latex caulk that matches the color of your floor if you prefer.
- Latex caulk will create a tight seal but isn’t as waterproof as silicone.
- Latex caulks cure through an evaporation process.[9]
-
3Press the release trigger and pull back the rod on the caulk gun. Find the small metal trigger on the back of the handle of the caulk gun. Press the trigger and hold it down to release the steel rod. Then, pull the steel rod all the way back and release the trigger.[10]
- You may need to twist the steel rod in order to lock it into place.
- Look for caulking guns at home improvement stores, hardware stores, and online.
-
4Insert the caulk tube into the caulk gun with the nozzle facing away. Place the base of the caulk tube in the caulk gun so it’s flush against the back. Then, rest the nozzle end into position at the front of the gun. Push the metal rod back into place so it’s pressing against the back of the caulk tube to hold it securely.[11]
- Shake the caulk gun gently to make sure the caulk tube is secure.
-
5Cut the caulk tube to make an opening the size of your gap. Insert the sealed nozzle into the gap until it can’t go any further to find the width that the nozzle opening needs to be to fill it. Take a pair of scissors or a utility knife and cut the nozzle at a 45-degree angle where it made contact with both the wall and floor so it’s the size of the gap.[12]
- Cutting the nozzle at an angle helps you guide the caulk into the gap is it flows out of the tube.
-
6Push a long nail into the nozzle to pierce the seal. Stick a long nail or metal rod into the nozzle end of the caulk gun and push it through the internal seal. Keep the nozzle held upright and remove the nail or rod from the nozzle.[13]
- You could also use a long pin or piece of wire to penetrate the internal seal.
- Some caulk guns have a metal rod you can use to pierce the internal seal of the caulk tube.


Sealing
-
1Insert the tip of the caulk tube into the gap at a 45-degree angle. Hold the caulk gun near the gap and tilt it so it’s angled to keep the caulk from falling straight out of the nozzle when you squeeze the trigger. Stick the tip of the nozzle into the gap so it’s flush and even with it.[14]
- If you’re able to insert the tip of the nozzle more than about 1⁄4 inch (0.64 cm) deep, then cut the nozzle again so the opening is wider.
-
2Pull the trigger on the caulk gun to push the caulk out of the nozzle. Once the nozzle is in position, gently pull the trigger on the caulk gun to force the caulk out of the tube and into the nozzle. Continue tapping on the trigger until the caulk starts to flow out of the tip of the nozzle.[15]
- Don’t hold the trigger or too much caulk may flow out of the nozzle.
-
3Move the tube down the gap to fill it with caulk. As the caulk starts to flow out of the nozzle, keep lightly tapping on the trigger to keep the flow steady and consistent. Move the nozzle down the entire length of the gap to fill it with the caulk.[16]
- Keep the flow of caulk steady and even to form a smooth and consistent seal.
Tip: If too much caulk does flow out of the nozzle, immediately wipe it up with a clean cloth so it doesn’t have a chance to set.
-
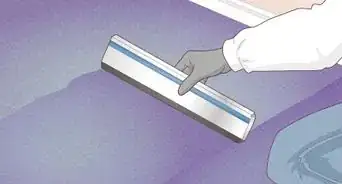
4Use a caulking tool to smooth the caulk in the gap. A caulking tool is a small plastic piece with straight corners and edges and is used to smooth the caulk to form an even layer. Once you’ve filled the gap with the caulk, run the caulking tool over it to remove any excess and form the caulk into a smooth and even layer.[17]
- A smooth layer of caulk will create a tighter and better seal.
- You can find caulking tools at home improvement stores, hardware stores, and online.
-
5Allow the caulk to dry for 24 hours. Leave the gap undisturbed for a full day so the caulk can dry and set to form a tight seal. If you fixed a gap in a bathroom or shower, don’t use the shower for a full day so the moisture won’t damage the caulk. Lightly touch the caulk with your fingers after 24 hours to make sure it’s dry.[18]
- If the caulk still isn’t dry, wait another 12 hours.


Identifying the Problem
-
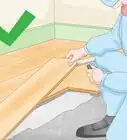
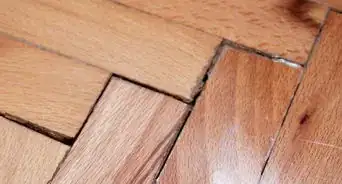
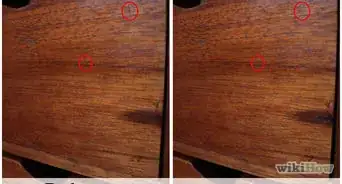
1Look for sloped or uneven floors for signs of foundation settlement. Check your the floor near the gap and look to see if it’s sloped or uneven. Sloped floors are a sign that the building’s foundation is settling and the structure is uneven. If your floors are uneven, contact a licensed building inspector to check the foundation and offer potential solutions.[19]
- The inspector may tell you that you need to hire a contractor to repair your foundation.
- Problems with the foundation could lead to serious structural damage if it’s not repaired.
- Look online for building inspectors in your area.
-
2Check the floor joists in your crawl space for moisture damage or rot. Locate the building’s crawlspace and look to see if there are wooden floor joists beneath the walls of the structure. If there are, look for cracks, splinters, and signs that the wood is damaged or rotting. Contact a building inspector to view the joists if you believe that they are damaged.[20]
- Damaged floor joists can cause the floor to move, which can create a gap between the floor and the wall above it.
- Look online for a building inspector you can hire to check your floor joists if you find signs of damage.
-
3Examine your walls for tiny pin holes caused by termites. Termites can eat through the walls and support structures of your home, causing it to settle and create gaps between the floors and walls. Look for small holes in your walls, a sure sign that you have a termite infestation. Contact a licensed exterminator as soon as possible to take care of the problem.[21]
- Other signs of termites include discolored or drooping drywall, buckling floor boards, and crumbling or damaged wood.
- Call a local exterminator to investigate your home if you believe you have a termite infestation.


Expert Q&A
Did you know you can get expert answers for this article?
Unlock expert answers by supporting wikiHow
-
QuestionHow can I fill in gaps between floor boards?
 Kevin TurnerKevin Turner is a handyman and the owner of Red Gator Maintenance, a handyman business based in Fresno, California. Working on handyman-related projects since the age of 12, Kevin specializes in a wide variety of home improvement projects such as (but not limited to) lighting/electrical, plumbing, deck staining, drywall repairs, cabinet installation, air conditioning, trash removal, and window, roof, and appliance repairs.
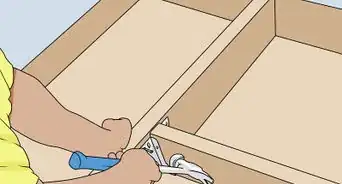
Commercial HandymanYou can use a pry bar or flooring tool to try and pull the boards together. If that doesn't work or you don't want to risk damaging the boards, you can use wood filler to fill in the gap. Then, just use a furniture marking pen to try and match the color of the wood filler to the color of your floor.
Support wikiHow by unlocking this expert answer.
-
QuestionCan I use caulk to fill the gaps between floorboards?Kevin TurnerKevin Turner is a handyman and the owner of Red Gator Maintenance, a handyman business based in Fresno, California. Working on handyman-related projects since the age of 12, Kevin specializes in a wide variety of home improvement projects such as (but not limited to) lighting/electrical, plumbing, deck staining, drywall repairs, cabinet installation, air conditioning, trash removal, and window, roof, and appliance repairs.
Commercial HandymanYou can, but wood filler is probably a better option. If you go for caulk, look for brown or tan caulk that will closely resemble the color of your floor.Support wikiHow by unlocking this expert answer.
-
QuestionWhy do floor boards spread apart?Kevin TurnerKevin Turner is a handyman and the owner of Red Gator Maintenance, a handyman business based in Fresno, California. Working on handyman-related projects since the age of 12, Kevin specializes in a wide variety of home improvement projects such as (but not limited to) lighting/electrical, plumbing, deck staining, drywall repairs, cabinet installation, air conditioning, trash removal, and window, roof, and appliance repairs.
Commercial HandymanWeather and changes in temperature can cause the wood to expand and contract. Over time, this can lead to gaps in the floor boards.Support wikiHow by unlocking this expert answer.
Things You’ll Need
- Caulk
- Caulk gun
- Caulking tool
- Vacuum
- Rubbing alcohol
- Utility knife or putty knife


References
- ↑ https://www.thisoldhouse.com/ideas/laying-down-perfect-bead
- ↑ https://youtu.be/Ud5uyyl1Bc8?t=48
- ↑ https://www.thisoldhouse.com/ideas/laying-down-perfect-bead
- ↑ https://www.bobvila.com/articles/how-to-use-a-caulk-gun/
- ↑ Art Fricke. Home Renovation & Repair Specialist. Expert Interview. 1 July 2020.
- ↑ Kevin Turner. Commercial Handyman. Expert Interview. 15 July 2019.
- ↑ Art Fricke. Home Renovation & Repair Specialist. Expert Interview. 1 July 2020.
- ↑ Kevin Turner. Commercial Handyman. Expert Interview. 15 July 2019.
- ↑ Art Fricke. Home Renovation & Repair Specialist. Expert Interview. 1 July 2020.
- ↑ https://www.bobvila.com/articles/how-to-use-a-caulk-gun/
- ↑ https://www.bobvila.com/articles/how-to-use-a-caulk-gun/
- ↑ https://youtu.be/Ud5uyyl1Bc8?t=91
- ↑ https://youtu.be/Ud5uyyl1Bc8?t=112
- ↑ https://youtu.be/9IUguMjAwzA?t=89
- ↑ https://www.bobvila.com/articles/how-to-use-a-caulk-gun/
- ↑ https://youtu.be/9IUguMjAwzA?t=99
- ↑ https://youtu.be/9IUguMjAwzA?t=113
- ↑ https://www.bobvila.com/articles/how-long-does-caulk-take-to-dry/
- ↑ https://www.homeadvisor.com/r/repairing-sloping-floors/
- ↑ https://www.washingtonpost.com/lifestyle/home/a-growing-gap-in-a-wood-floor-spells-structural-trouble/2019/04/26/e259de3a-650a-11e9-8985-4cf30147bdca_story.html
- ↑ https://www.washingtonpost.com/lifestyle/home/a-growing-gap-in-a-wood-floor-spells-structural-trouble/2019/04/26/e259de3a-650a-11e9-8985-4cf30147bdca_story.html
About This Article