This article was co-authored by Norman Raverty. Norman Raverty is the owner of San Mateo Handyman, a handyman service in the San Francisco Bay Area. With over 27 years of experience, Norman has expertise in all five of the general building trades (carpentry, ceramic tile, drywall, electrical, plumbing).
There are 9 references cited in this article, which can be found at the bottom of the page.
This article has been viewed 145,469 times.
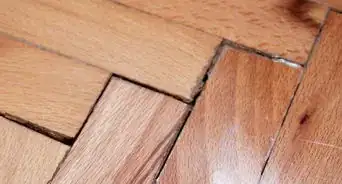
With enough time and wear, unsightly gaps can begin to open up in interlocking laminate flooring. Fortunately, this tends to be a minor issue, and correcting it won’t require you to go to the trouble of replacing the flooring altogether. For most jobs, all you’ll need is a simple tube of wood glue, or a mallet and flat object heavy enough to provide enough traction to allow you to tap the planks back into place.
Steps
Using a Floor Gap Fixer
-
1Purchase a floor gap fixer tool. These days, many companies sell special devices designed to make it easier to close small gaps in hardwood and laminate flooring. These most often take the form of small, heavy rectangular blocks. The blocks feature an adhesive rubber face that provides traction to maneuver the slipped plank back into place with a few taps of a mallet.
- You can find floor gap fixers at most major home improvement centers or online for around $40-60.
- If you’re trying to keep spending to a minimum for your repair project, try making your own floor gap fixer tool by coating one side of a 4x4 with double-sided tape.[1]
-
2Remove the protective backing from the adhesive face of the block. Peel the plastic covering away to expose the tacky rubber pad underneath. This surface will be used to grip the laminate plank while you force it back into place manually.[2]
- The adhesive pad of the floor gap fixer is reusable, as long as it’s properly cleaned between projects.
Advertisement -
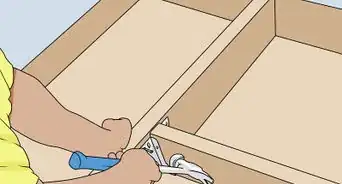
3Position the block 1 inch (2.5 cm) from the end of one of the displaced planks. Situate the tool in the center of either plank, then press down firmly on the topside with both hands to anchor it. It should stick to the plank securely enough to prevent slipping or scooting while you work.[3]
- Once you get started, you'll the shift the plank in the direction of the gap to close it off.
- Avoid removing the block once it’s in place unless it’s absolutely necessary, as this may weaken the hold of the adhesive pad.
-
4Work your way toward the center of the floor and away from the wall. When using the floor gap fixer, it’s generally best to inch the problem plank towards the center of the floor, rather than outward towards the wall. This will ensure that the far end remains concealed by the baseboard. If you go towards the wall instead, you may end up having to deal with gaps in adjacent planks as a result.[4]
- When correcting more than one plank in the same row, it may be necessary to also move the neighboring planks inward to keep the spacing consistent and avoid making the gap worse.
-
5Tap the end of the block with a mallet to close the gap. Steady the tool with one hand and give the side furthest from the gap a couple whacks to move the loose plank closer to the one it’s drifted away from. It should slide along a few millimeters at a time. Continue tapping the block until the plank rests snugly against its neighbor.[5]
- Be careful not to strike the block too forcefully. This could dislodge it, or even damage the underside of the flooring.
- After successfully closing the gap, simply pull up the floor gap fixer to remove it.
-
6Repeat with any remaining gaps. Use the block and mallet to repair any other slipped planks that have appeared in your laminate flooring. Work carefully to keep your floor looking neat. All in all, the project should only take a matter of minutes.
- If necessary, wipe off any dust or debris that’s accumulated on the adhesive pad with a damp cloth before the next time you use it.[6]


Filling Gaps with Wood Glue
-
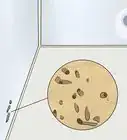
1Scoop up a glob of wood glue using a small utensil. A toothpick, cotton swab, or similar item will make it easier to reach down into the narrow space. Some home improvement buffs even use disposable syringes for precision application. The important thing is that the glue only ends up on the grooves where the planks interlock.[7]
- Any clear or yellow wood glue will work just fine. Invest in a high-strength adhesive to spare yourself followup repairs in the future.
- Alternatively, you can also use caulk or wood putty to fill in gaps in laminate flooring. However, these substances may require special applicators or additional equipment.[8]
-
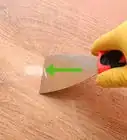
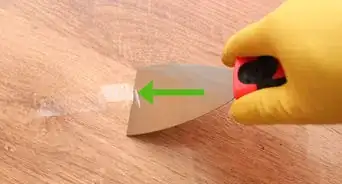
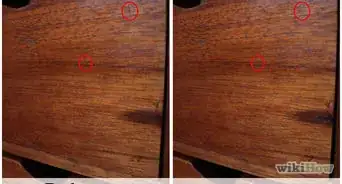
2Swab the glue onto the exposed tongue of the displaced plank. Inside the gap, you should be able to see the squared edge where the bottom of the plank is designed to fit together with the top of the next one in the row. Apply a thick coating of glue to this surface, aiming for even coverage from one end to the other. If you don’t apply enough glue, the repaired section of flooring may not hold up long under constant foot traffic.
- Don’t be afraid to use more glue than you think you need—you don’t want the planks separating again after a few short days.
- Do your best to work neatly and efficiently, but don’t take too much time. Wood glue dries quickly, and once it does, it will be tough to get a second shot.
-
3Push the separated planks together to close the gap. To do this, strike the plank at an angle repeatedly with the palm of your hand. For a less forceful approach, you could also try placing both hands flat against the plank and guiding it slowly towards its neighbor using your full body weight.[9]
- If you own a floor gap fixer tool, consider using it in conjunction with a touch of wood glue to ensure that the gap stays closed for good.
-
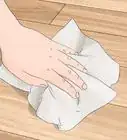
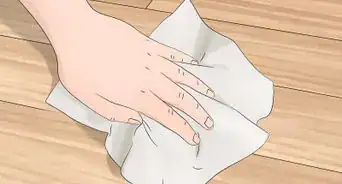
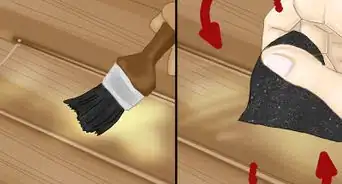
4Wipe away the excess glue. Use a damp rag to blot at the glue squeezing up through the cracks in the newly-repaired gap, then go over the seam until no residue remains. Any adhesive left behind by mistake could dry to a rough texture underfoot or produce mild discoloration in the laminate.
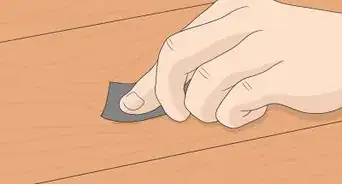
- If you used caulk or wood putty to fill the gap, you may need to sand down the excess material once it has had time to dry. For the smoothest finish, use 180-grit sandpaper or higher.
- Most wood glues dry clear, which means they won’t be visible in the seam between the two planks.


Preventing Gaps in Laminate Flooring
-
1Allow your laminate flooring to acclimate for 48-72 hours. Bring the planks inside and leave them to sit undisturbed prior to installation. This will give the material a chance to get used to the unique conditions in your home, which can help you avoid many environment-related complications later on.
- Fluctuations in temperature and humidity can cause certain types of laminate flooring to swell and shrink slightly. Over time, this can result in noticeable gaps and other inconsistencies.
- Storing your laminate flooring materials in your garage, basement, or foyer also keeps them from being exposed to the elements.
-
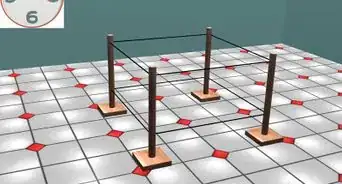
2Make sure the subflooring is perfectly level. Use a level to check the angle of your subfloor every 2–3 feet (0.61–0.91 m). If there are rises or depressions present, your laminate planks won’t sit correctly, no matter how many times you reposition them.
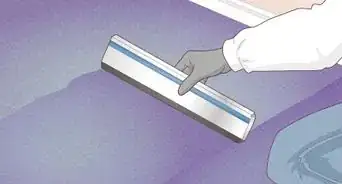
- Subfloors that are off alignment will need to be smoothed out using leveling compound.
- If you plan on adding a separate underlayment for insulation, it will be important to make sure it’s cut properly to eliminate wrinkling, folding, or bunching, all of which could contribute to an off-level subfloor.[10]
-
3Have your laminate flooring installed professionally. Attempting to measure, cut, and install laminate flooring yourself leaves a lot of room for error, even if you have experience with this type of project. In most cases, it will be better to leave it to the pros. They’ll have the equipment, expertise, and manpower needed to get the job done faster and with more lasting results.
- Hiring a flooring specialist to work on your home involves a certain amount of trust. Go online to read reviews of contractors in your area or ask a friend or loved one for a personal recommendation to find one that meets your standards.


Things You’ll Need
Using a Floor Gap Fixer
- Floor gap fixer tool
- Rubber mallet
- 4x4 board (optional)
- Double-sided tape (optional)
Using a Filler Material
- High-strength wood glue
- Caulk or wood putty (optional)
- Toothpick, cotton swab, or similar applicator
- Syringe (optional)
- Clean cloth


References
- ↑ https://www.youtube.com/watch?v=_QAd0hswxP0&feature=youtu.be&t=23
- ↑ https://www.youtube.com/watch?v=CE3FeTNT7nI&feature=youtu.be&t=66
- ↑ https://www.youtube.com/watch?v=CE3FeTNT7nI&feature=youtu.be&t=71
- ↑ https://www.youtube.com/watch?v=_QAd0hswxP0&feature=youtu.be&t=73
- ↑ https://www.youtube.com/watch?v=CE3FeTNT7nI&feature=youtu.be&t=138
- ↑ https://www.youtube.com/watch?v=CE3FeTNT7nI&feature=youtu.be&t=220
- ↑ https://baileylineroad.com/simple-trick-ensures-gap-free-laminate-floors/
- ↑ https://www.familyhandyman.com/floor/floor-repair/home-repair-how-to-seal-laminate-flooring-expansion-gaps/view-all/
- ↑ https://baileylineroad.com/simple-trick-ensures-gap-free-laminate-floors/
About This Article

To close a gap in your laminate flooring, all you’ll need is some wood glue. Apply a thick coat of glue to the tongue of the board that’s come loose. You can then push the 2 boards back together by striking 1 of them at an angle with your fist. Alternatively, push down with your full body weight, then push the board together. You can also fix gaps by using a floor fixer, which you can buy from a hardware store. You’ll first need to attach the device to the affected floorboards, then tap it with a mallet to shift the boards into place. For tips from our Handyman co-author on how to prevent gaps from emerging in your laminate flooring, keep reading!