This article was co-authored by wikiHow Staff. Our trained team of editors and researchers validate articles for accuracy and comprehensiveness. wikiHow's Content Management Team carefully monitors the work from our editorial staff to ensure that each article is backed by trusted research and meets our high quality standards.
There are 14 references cited in this article, which can be found at the bottom of the page.
This article has been viewed 883,709 times.
Learn more...
You may want to fake an injury to get out of work or gym class for a few days, or maybe you’re researching how to act injured for a play. You also may want to fake an injury so you get out of chores or schoolwork. Whatever the reason, knowing an injury’s symptoms and common treatments can make it easy to fake an injury without others catching on. Remember, though, not to fake an injury as a way to sue someone else or earn worker’s compensation, as this is illegal and can result in jail time.
Steps
How to Fake an Injured Ankle or Knee
-
1Fake a sprained ankle for a 3-4 week injury. A sprained ankle is common and easy to explain and fake. Sprained ankles on average take about 6 weeks to heal, although you should keep your fake sprained ankle for a little less time, 3-4 weeks, so that others don’t get concerned.[1]
- You can say that you got the injury while exercising, or that you fell and turned your ankle badly.
-
2Pretend to have knee pain if you want a long-lasting fake injury. Faking knee pain can have the advantage of lasting as long as you want, since knee pain can be chronic or can come and go. You can blame it on bad genes or past sporting injuries from sports like Alpine skiing, soccer, or running.[2]
- If you want it to last for just a set amount of time, say you aggravated your knee by jogging or walking a long distance and that it should settle down soon.
Advertisement -
3Elevate your leg when you’re sitting for the first few days. If you’re faking a new injury, tell people that you need to stay off your feet as much as possible for the first 4-5 days. Whether you’re at school, at work, or at home, sit down as much as you can and keep your leg or knee elevated on a chair or box.[3]
- Explain that this will help alleviate swelling.
- Keep your leg elevated even at night if you’re faking the injury to someone at home.
-
4Wrap a compression bandage around the injury. Get an elastic bandage, like ACE wrap, and wrap it snugly around your ankle or knee. This is used to compress your injury and keep the swelling down, and will be an obvious sign that you’re injured. Keep your foot or knee bare by wearing shorts or no shoes, as this will let others see your bandage. Say that you have to do this because pants and shoes are too tight over the injury.[4]
- Make sure the bandage isn’t tight enough to cut off circulation.
- Don’t wear the bandage wrap at night.
-
5Carry around an ice pack to ice your injury every few hours. Store an ice pack in the freezer at work, or ask to borrow one from the school nurse. Ice your ankle or knee for 15-20 minutes every 2-3 hours, for at least the first week of the injury. Ice is a common at-home treatment for pain and inflammation, and is a tell-tale sign of injury.[5]
- You can use a frozen ice pack, or a bag of frozen peas or corn. Wrap a thin towel around the pack to protect your skin.
- Wrap the pack in a towel so you don’t irritate your skin.
-
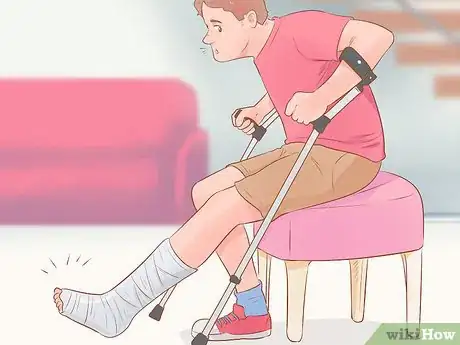
6Walk with crutches for 1-2 weeks to show the extent of the injury. Hobbling around on crutches for a few weeks will definitely convince others that you’ve been injured. If you’re faking an ankle sprain, keep your foot off the ground and hop forward on your other foot and the crutches. If you’re faking a knee injury, place your foot lightly on the ground but lean most of your weight on your other foot and the crutches.[6]
- You can buy crutches at most large general stores, or ask to borrow them from a friend or family member who’s been injured. They are also available for cheap at thrift stores.
-
7Limp on your good leg, if you don’t have crutches. If you can’t get crutches for a few days or the entirety of your “injury,” try limping instead. Lean all of your weight on your good leg and lightly press off of your injured leg to propel yourself forward. Spend more time on the good leg and use your bad leg for only a quick, gentle push.[7]
- Make facial expression to show you’re in some pain and walk very slowly.
- You won’t be able to comfortably limp for longer than a couple days, so if this is your only option, make your fake injury a mild one, like a slightly sprained ankle.
-
8Avoid twisting or putting weight on your “injury.” Whether you’re limping, using crutches, or moving around as you sit, make sure to move your injured ankle or knee very carefully. Don’t put any weight on it or twist it, as that would aggravate a real injury. If you do accidentally walk on it or move it suddenly, make a noise like you’re in pain.
-
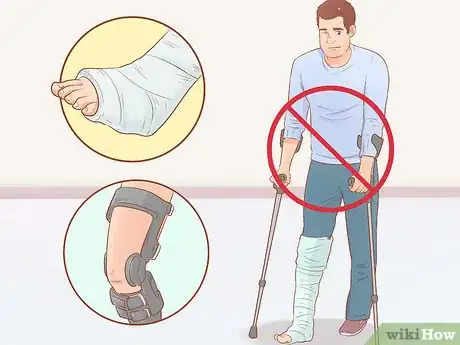
9Don’t fake a major injury, like a broken leg. Big injuries like broken legs or torn ACLs often require casts, expensive knee braces, and many trips to the doctor, all of which are hard to accurately fake. Instead, stick to more minor injuries that you can believably treat at home, such as knee pain or a sprained ankle.
-
10Do not fake an injury in order to sue someone. Some people fake injuries to gain disability benefits or sue a company they dislike. This is considered fraud, and if caught, you can end up in jail. Faking an injury to get out of work or school is one thing, but doing so for money is illegal.
How to Pretend to Have a Hurt Arm
-
1Pretend to have a wrist injury for a small but effective fake injury. Faking an injury on your wrist is an easier injury to work around, because you’ll still be able to walk and get around normally. Depending on which hand you pretend to injure, you might just have to write or use silverware differently. Blame your fake wrist pain on an impact injury, caused by falling on your outstretched hand, which can cause sprains and strains. Pretend to have an arm injury. Faking an injury on your arm is an easier injury to work around. Depending on which arm you pretend to injure, you might just have to be excused from schoolwork or gym.
- This injury can last 2-3 weeks.
-
2Pretend to have a hurt shoulder for a longer recovery period. For a more serious injury, say that you’ve pulled your shoulder muscle. You can say the injury was caused by an awkward fall at home or while playing sports. The time it takes to heal a torn shoulder muscle varies, but you can make it up to 6 weeks if you need to.[8]
-
3Wrap your wrist or shoulder with an elastic bandage. Wrapping up your injured wrist or shoulder will give others a visual reminder of your injury. Get an roll of elastic bandage, which you can find at a drugstore, and wrap it tightly around either your wrist or your shoulder. Make sure that the wrap is snug, but not tight enough to cut off circulation.[9]
- To wrap your wrist, wind the bandage around your hand and thumb up to your mid-forearm.
- To wrap your shoulder, wrap the bandage once around the shoulder bone and muscle, then draw it across the back and around the opposite armpit and your chest. Repeat 1-2 more times.
-
4Ice your injury a few times a day. Set an ice pack or a pack of frozen vegetables on your injury every 2-3 hours, for 15-20 minutes at a time. Do this throughout the day if you can, even at school or work. Wrap a thin towel around the ice to protect your skin from being irritated.[10]
- During the day, you can store the ice in a freezer at work or in the nurse’s office if you’re at school.
- To securely wrap ice onto your shoulder, set the pack in place and secure it with a tight bandage wrap.
-
5Put your arm in a sling to make your injury more noticeable. You can get a simple cloth arm sling online or at most drugstores and large general stores. Use it for at least the first 2-3 weeks of the injury to show the seriousness of the injury. It also serves the dual purpose of reminding you not to use your “injured” arm!
-
6Show some pain when you have to move your arm. If you do have to move your wrist or shoulder at any point, subtly show your pain by grimacing and moving slowly and carefully. Avoid using your arm as much as possible, though, to remind people of your injury.
- If you’re pretending to have hurt the wrist or shoulder on your writing hand, you’ll have to switch to your other hand for the duration of the “injury.”
How to Fake a Mild Head Injury
-
1Fake a mild concussion to avoid showing physical symptoms. The advantage of faking a mild concussion is that you won’t have to limp or use crutches or a sling like you would with a leg or arm injury. Instead, you’ll have to show your injury through the way you talk and react to certain things.
- Faking a concussion will also mean that you’ll be spending a lot of time by yourself as you pretend to go through the recovery process.
-
2Call into work or school to ask for a week or so off. Doctors often recommend that people suffering from a concussion take time off from work or school, or that they shorten their school or workdays. Explain this to your employer or your school and ask for some time off. If you can’t take full days off, work for only half a day or take breaks throughout the day.[11]
- You can also ask for a reduced workload at school or work.
- You’ll also need to avoid physical activity for a few weeks.
-
3Say you got the concussion by bumping your head or taking a bad fall. A concussion is typically caused by a blow to the head, and is often caused by contact sports like football or soccer. If you don’t play a sport, though, you can say you got a concussion from knocking your head against a wall on accident, or falling and bumping it against the floor.[12]
-
4Fake a headache a few times a day. Hold your head and grimace slightly in pain a few times a day. Talk less than usual, rub your forehead a bit, and close your eyes to show that your head hurts.[13]
- Headaches are often caused by light or loud noises, so you can fake one when you’re in bright light or somewhere noisy, like a restaurant or at lunchtime at school.
- Don’t ham it up too much, or people won’t take you seriously. Keep your signs of a headache subtle and simple, mentioning it only once every few days or when someone asks.
-
5Complain of having difficulty sleeping. A concussion often comes along with difficulty sleeping at night. Act subdued or tired during the day and complain of your fatigue to your co-workers, classmates, or friends if they ask how you’re feeling.[14]
- If you’re trying to fake a mild concussion to someone who lives with you, toss and turn a lot when you’re getting to sleep or even set a quiet alarm to get up during the night.
-
6Act like you’re having trouble concentrating. Try to appear scattered at work or at school by letting your eyes drift away from your work. If someone says your name, take a moment to respond and pretend to be caught off-guard. You might even work more slowly or pretend to have more difficulty on your assignments to show how out of sorts you are from your concussion.[15]
-
7Speak softly and wear sunglasses in bright light. People suffering from concussions often become more sensitive to light or noise. Wear sunglasses when you’re outside or even in a bright room and speak more softly than usual, asking others to do the same. Avoid going to loud places like concerts or big restaurants and limit your time in direct sunlight.[16]
-
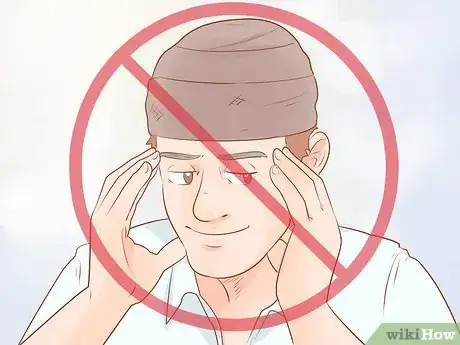
8Do not fake severe concussions. Traumatic brain injuries are nothing to joke about. In the worst cases, concussions can lead to brain damage or even death. Do not mimic the symptoms of a serious concussions, like vomiting, drowsiness, or slurred speech, which will cause unnecessary concern from those around you.[17]
- You will also likely be taken to a hospital, where doctors will know you're faking.
How to Create a Fake Bruise
-
1Add a fake bruise to make a leg or arm sprain believable. If you’ve decided that your fake injury will be a sprain or strain to your ankle, knee, wrist, or shoulder, especially one caused by an impact, adding a fake bruise will make the injury even more believable. Keep the makeup subtle and believable, and avoid adding a fake, bloody gash, which will look over-the-top.
-
2Buy stage makeup at a local costume store. Look for red, purple, green, and yellow eyeshadow, blush, and eyeshadow or blush brushes. Stage makeup will create the most realistic bruise, but you can also use basic makeup in a pinch.
- Some costume stores offer "bruise wheels," which contain all the eyeshadow colors you'll need to make a convincing bruise.
- Cream-based eyeshadows work better than powder-based ones, but either can be used.
-
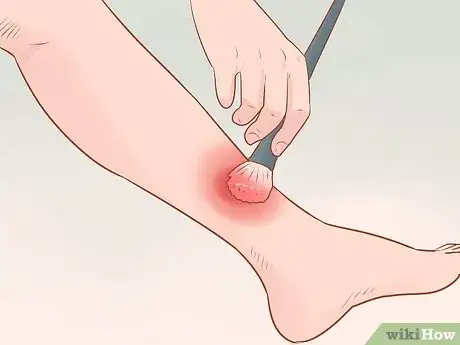
3Cover the area of your bruise with red eyeshadow or blush. Use a brush to apply the eyeshadow. Add purple eyeshadow around the edges of your "bruise," and blend with a blush or powder brush. Blending will help the bruise look like it's inside the skin rather than on top of it.[18]
- Make some parts of the bruise redder than other for an uneven, realistic appearance.[19]
-
4Apply a ring of dark green or blue around the edge of the bruise. Use a brush to blend the makeup for a seamless transition between colors. If you’re using green, add splotches of yellow near the edges. Let the edges stay uneven, since a neat or symmetrical bruise will look less believable.
-
5Make the bruise last with a light brush of powder and setting spray. You want your bruise to last all day long so you don’t have to worry about it wearing off or reapplying. To ensure it stays put, brush a tiny bit of powder on the bruise. Then, use a setting spray to cement it all in place.[20]
- Avoid touching the bruise throughout the day. Not only will this look more realistic--you wouldn’t want to touch a painful bruise--but it will also help keep your makeup in place.
-
6Keep your bruise for one to two weeks. This is approximately how long bruises take to heal. As the weeks progress, make the reddish-purple section smaller and let the greenish-yellow area slowly consume the bruise. Once the reddish-purple section is gone altogether, shrink the greenish-yellow bruise until it gradually disappears.[21]
- Bruises hurt, so grimace or flinch if you or someone else touches it.
Community Q&A
-
QuestionWhat if gym time is spent in the pool?
 Community AnswerSay you pulled a muscle, or that you hurt your arm the day before. You have to fake both for awhile.
 -
QuestionIf you have a parent that is a doctor or a nurse will they believe it too?
 Community AnswerIf your parent works in the medical field, they will probably know you're faking it. Doctors and nurses will be able to assess and diagnose injuries.
 -
QuestionCan you do this more then once?
 Community AnswerYour best bet is to only fake an injury once. If you're constantly getting "injured," others will get suspicious. Eventually, you might get called out as faking.
Warnings
- Don’t use pain medication when you’re faking an injury.⧼thumbs_response⧽
- Never fake an injury to sue someone. This is fraud and will result in jail time.⧼thumbs_response⧽
- Make sure you are not hurting or inconveniencing others by faking your injury.⧼thumbs_response⧽
- Do not fake an injury more than once, especially within 1 year. Others will begin to catch on and will not trust you if you really get hurt.⧼thumbs_response⧽
References
- ↑ https://newsnetwork.mayoclinic.org/discussion/mayo-clinic-minute-ankle-sprains-101/
- ↑ https://www.mayoclinic.org/diseases-conditions/knee-pain/symptoms-causes/syc-20350849
- ↑ https://www.mayoclinic.org/diseases-conditions/sprained-ankle/diagnosis-treatment/drc-20353231
- ↑ https://www.mayoclinic.org/diseases-conditions/knee-pain/diagnosis-treatment/drc-20350855
- ↑ https://www.mayoclinic.org/diseases-conditions/sprained-ankle/diagnosis-treatment/drc-20353231
- ↑ https://www.mayoclinic.org/diseases-conditions/sprained-ankle/diagnosis-treatment/drc-20353231
- ↑ https://www.youtube.com/watch?v=W-e2_He_u6Y&feature=youtu.be&t=1m5s
- ↑ https://www.webmd.com/a-to-z-guides/tc/shoulder-problems-and-injuries-topic-overview#1
- ↑ https://www.mayoclinic.org/diseases-conditions/wrist-pain/diagnosis-treatment/drc-20366215
- ↑ https://www.mayoclinic.org/diseases-conditions/wrist-pain/diagnosis-treatment/drc-20366215
- ↑ https://www.mayoclinic.org/diseases-conditions/concussion/diagnosis-treatment/drc-20355600
- ↑ https://www.mayoclinic.org/diseases-conditions/concussion/symptoms-causes/syc-20355594
- ↑ https://www.mayoclinic.org/diseases-conditions/concussion/symptoms-causes/syc-20355594
- ↑ https://www.mayoclinic.org/diseases-conditions/concussion/symptoms-causes/syc-20355594
- ↑ https://www.mayoclinic.org/diseases-conditions/concussion/symptoms-causes/syc-20355594
- ↑ https://www.mayoclinic.org/diseases-conditions/concussion/symptoms-causes/syc-20355594
- ↑ https://www.cdc.gov/traumaticbraininjury/symptoms.html
- ↑ https://www.cutoutandkeep.net/projects/how-to-realistic-fake-bruise
- ↑ https://www.youtube.com/watch?v=KDQ8GN47-es
- ↑ http://www.cosmopolitan.com/uk/beauty-hair/makeup/tips/a33424/make-your-makeup-last-all-day/
- ↑ http://www.webmd.com/first-aid/helping-bruise-heal#2
About This Article
If you want to fake an injury, start by figuring out how much down time you want so that you can pick the appropriate injury. Go with a sprained ankle or knee injury if you want to keep up the charade for a few weeks. To make it look convincing, wrap your knee or ankle with an ace bandage and use crutches for the first week or so. You can also use stage makeup to create realistic-looking bruising on and around your fake injury. Apply a mix of red, purple, green, and yellow cream eyeshadow with eyeshadow brushes to create a multicolored bruise that looks authentic! For tips on how to move around convincingly for different types of injuries, read on!


Medical Disclaimer
The content of this article is not intended to be a substitute for professional medical advice, examination, diagnosis, or treatment. You should always contact your doctor or other qualified healthcare professional before starting, changing, or stopping any kind of health treatment.
Read More...