This article was co-authored by Claire Bowe, M.Ed., PT, Cert. MDT. Claire Bowe is a Physical Therapist and the Owner of Rose Physical Therapy Group, a physical therapy clinic based in Washington D.C. Claire has over 20 years of patient care experience and specializes in a personalized, one-on-one therapeutic approach to physical therapy. Claire is certified in Mechanical Diagnosis & Therapy (MDT) by the McKenzie Institute and is an Ergonomic Assessment Specialist under the United States Occupational Health and Safety Administration (OSHA). She holds an M.Ed. in Special Education from Portland State University, an MA in Physical Therapy from Governors State University, and a BS from Oregon State University.
There are 9 references cited in this article, which can be found at the bottom of the page.
wikiHow marks an article as reader-approved once it receives enough positive feedback. In this case, 80% of readers who voted found the article helpful, earning it our reader-approved status.
This article has been viewed 656,470 times.
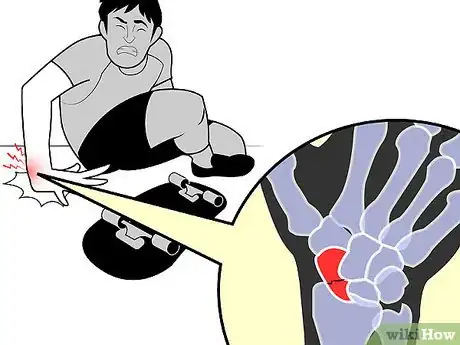
Your wrist is vulnerable to conditions that cause pain. Your wrist pain may be from an injury, such as a sudden strain or sprain, from a medical condition, such as arthritis or carpal tunnel syndrome, or from repetitive overuse, such as participating in sports like bowling or tennis. Tendonitis or a fracture can also cause wrist pain. Wrapping an injured wrist, combined with other basic care measures, can relieve the pain and aid in healing your injury. More serious injuries may require a splint, brace, or even a cast if a bone is broken. Wrist wrapping, or taping, is also commonly done to prevent injury to the wrist in some types of sports.
Steps
Wrapping an Injured Wrist
-
1Wrap your wrist. Wrapping your wrist provides compression. Compression aids in minimizing swelling, helps to reduce pain, and provides stability to restrict movement, allowing your injury to heal more effectively.
- Use an elastic bandage wrap to compress and support your wrist. Start your wrap at a point farthest from your heart.
- This is done to prevent swelling of the lower part of the extremity that can be caused by the wrapping process. Compression can help enable lymphatic and venous return to the heart.
-
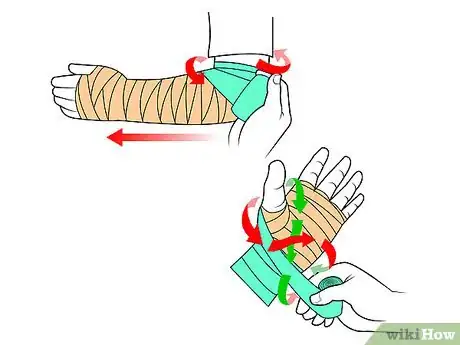
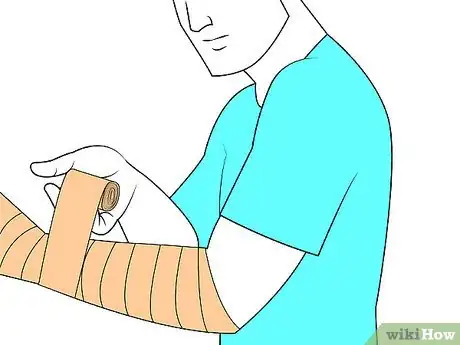
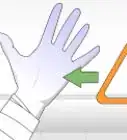
2Start wrapping from your hand area. Begin the first wrap around your fingers just below the knuckles, and covering your palm.
- Passing between your thumb and index finger, move the next few wraps around your wrist area, and continue to wrap your way towards the elbow.
- Wrapping the area from the hand to the elbow is recommended to provide the greatest stability, promote healing, and avoid additional injury to your wrist.
- Each wrap should cover 50% of the previous wrap.[1]
Advertisement -
3Reverse direction. Once you have reached the elbow, continue to wrap moving back towards the hand area. This may require using more than one elastic bandage.
- Include at least one more figure 8 pass, wrapping through the space between your thumb and index finger.
-
4Secure the elastic bandage. Using the clips provided, or self-attaching ends, secure the end to a stable section of the wrap along the forearm area.
- Check for warmth in the fingers to be sure the wrap is not too tight. Be sure the fingers can be wiggled, there are no areas of numbness, and that the wrap does not feel too tight. The wrap should be snug but not tight enough to cut off blood flow.
-
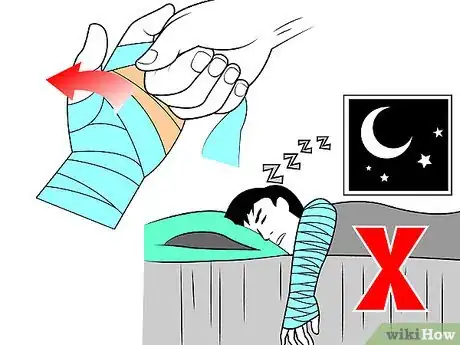
5Remove the wrap. Take the wrap off when it is time to ice the area.
- Do not sleep with the wrap on. For some injuries, your doctor may recommend some method of support for your wrist during the night. Follow the instructions provided by your doctor.
-
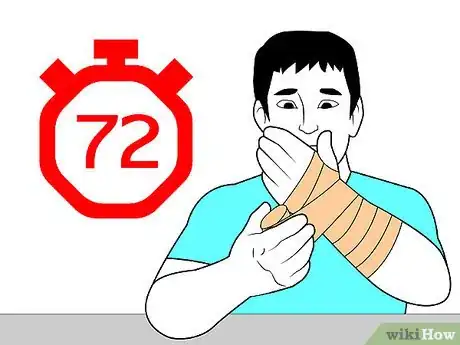
6Continue to wrap your wrist beyond the first 72 hours. It may take as long as four to six weeks for your injury to heal.
- Keeping the wrist wrapped during this time can allow you to gradually resume your activities, provide support for your injury, and prevent further injury.
- The risk of swelling is reduced 72 hours following the injury. [2]
-
7Use a different wrapping technique as you resume activity. A different method for wrapping your wrist may provide greater stability for the injured area and allow you to resume minor activity when you are ready.
- Start your wrap by securing the elastic bandage wrap at an area just above the injury, meaning on the elbow side of the injured part of the wrist. Wrap the bandage around your forearm at this location two to three times.[3]
- The next wrap should move across the injured area, and include several wraps around your forearm just below the injury, closer to your hand. This method provides added stability for the injured part of your wrist, which is now located between the two sections of the wrapped elastic bandage.[4]
- Make at least two figure 8 passes between your thumb and index finger, securing each one with an additional wrap around your wrist area.[5]
- Continue to wrap your wrist moving toward your elbow, covering 50% of the previous section with each wrap around your forearm.[6]
- Reverse direction and wrap back in the direction of your hand.
- Secure the ends of the elastic bandage with the clips provided, or by using the self-closure tab.
- An injury to the wrist is best maintained if the wrap is extended from the finger or palm area to the elbow. This may require more than one elastic bandage wrap to properly wrap your injured wrist.
Treating Your Injured Wrist
-
1Treat your injury at home. Minor injuries involving wrists strains or sprains can be treated at home.[7]
- A strain involves overstretching or pulling a muscle or the tendons that connect that muscle to bone.
- A sprain occurs when a ligament is overstretched or torn. Ligaments connect one bone to another bone.
- The symptoms of strains and sprains are very similar. You can expect the area to be painful, swollen, and have limited movement of the affected joint or muscle area.[8]
- Bruising is more common with a sprain, as well as sometimes hearing a “pop” sound at the time of the injury. Strains involve muscle tissue, so muscle spasms can sometimes occur with a strain.[9]
-
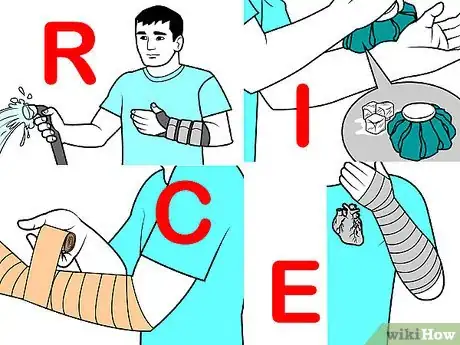
2Apply R-I-C-E treatments. Both strains and sprains respond well to this form of therapy.
- R I C E stands for Rest, Ice, Compression, and Elevation.
-
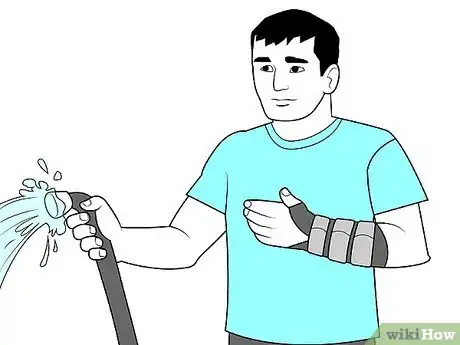
3Rest your wrist. Try not to use your wrist as much as possible for several days to allow it to start healing. Rest is the most important step in the four areas defined as RICE.
- Resting your wrist means avoiding activities with the involved hand. Do not allow your wrist to do any work at all if possible.
- This means no lifting of items with that hand, no twisting of your wrist or your hand, and no bending your wrist. This may also mean no writing or computer work, depending on the severity of your wrist injury.
- To help your wrist to rest, you may want to consider purchasing a wrist splint. This is especially important if you have a tendon injury. A splint provides support for your wrist and helps immobilize it, to keep you from causing further injury. Wrist splints are available in most drug stores.
-
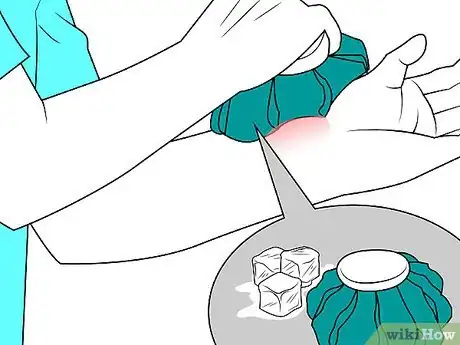
4Apply Ice. Applying ice to the injured wrist, the cold temperature works its way through the exterior of the skin and into the deeper areas of soft tissue.
- The colder temperatures decrease blood flow to the area and help to minimize swelling and reduce inflammation in the area.
- Ice can be applied by using ice placed in a baggie, frozen veggies, or some other form of ice pack. Wrap the icepack, baggie, or frozen veggies in a cloth or towel, and avoid placing frozen objects directly on your skin.
- Apply the ice for 20 minutes at a time, then let the area warm to room temperature for 90 minutes. Repeat this process as often as possible, at least two to three times each day, for the first 72 hours after the injury.
-
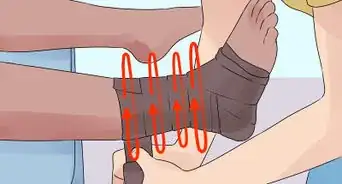
5Compress your wrist. Compression helps to minimize swelling, provides light stability, and helps to prevent sudden movements that can be painful.
- Using an elastic bandage wrap, start at your fingers or hand area, and wrap your wrist. Progress towards your elbow. For the greatest stability and to promote healing, the area should be wrapped from the hand and fingers to the elbow.
- This is done to prevent swelling of the lower part of the extremity while it is being wrapped.
- Each subsequent wrap should cover 50% of the previous wrapped part of the elastic bandage.[10]
- Check to be sure your wrap is not too tight and there are no areas of numbness.[11]
- Take the wrap off when it is time to ice the area.
- Do not sleep with the wrap on. For some injuries, your doctor may recommend some method of support for your wrist during the night. Follow the instructions provided by your doctor.
-
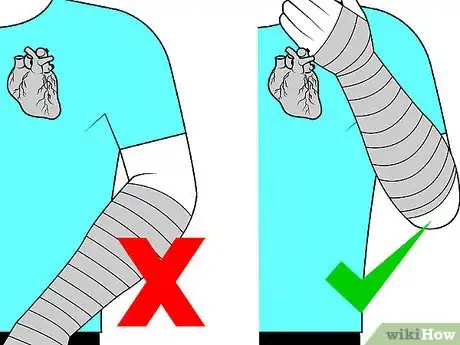
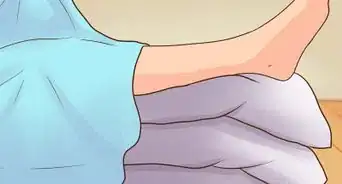
6Elevate your wrist. Elevating your wrist can help to reduce pain, swelling, and bruising.
- Keep your wrist elevated above the level of your heart when you are applying ice, prior to compression, and when you are resting.
-
7Continue to wrap your wrist beyond the first 72 hours. It may take as long as four to six weeks for your injury to heal. Keeping the wrist wrapped during this time can allow you to gradually resume your activities, provide support for your injury, and prevent further damage.
-
8Resume your normal activity. Gradually work towards resuming your previous level of activity with your injured wrist.
- Mild discomfort in working to regain mobility or during reconditioning exercises is normal.
- Try taking NSAIDS such as tylenol, ibuprofen, or aspirin for pain as necessary.
- Any activity that causes pain should be avoided and approached more gradually.
- Every person and injury is different. Expect your recovery time to be about four to six weeks.
Wrapping Your Wrist for Sports
-
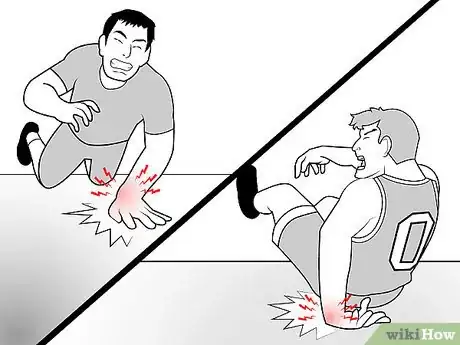
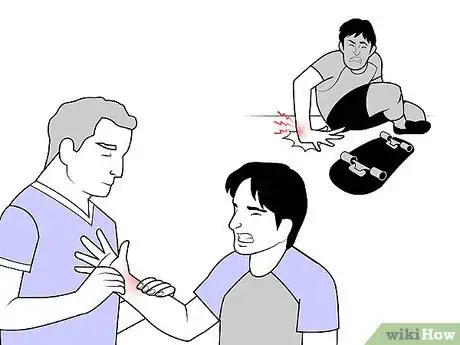
1Prevent hyperextension and hyperflexion. Wrapping the wrist to avoid a sports-related injury is most commonly done to prevent two common types of wrist injuries. These are known as hyperextension and hyperflexion.
- Hyperextension is the most common type of wrist injury. This occurs when your hand goes out to break your fall, and you land on your opened hand.
- This type of falling causes your wrist to bend further back to bear the weight and impact of the fall. This is called hyperextension of the wrist.
- Hyperflexion occurs when the outer part of your hand catches your weight as you fall. This causes your wrist to bend too far towards the inside of your arm
-
2Wrap your wrist to prevent hyperextension. In some sports this injury is more common, and athletes often have their wrists wrapped to prevent a hyperextension injury or re-injury.
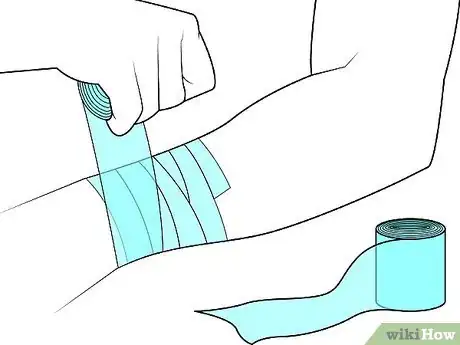
- The first step in wrapping a wrist to prevent hyperextension is to start with a pre-wrap.
- Pre-wrap is a type of lightly adhesive, rolled tape that is used to protect the skin from irritation that is sometimes caused by the stronger adhesives used in athletic and medical tape products.
- Pre-wrap, sometimes called underwrap, comes in a standard width of 2.75 inches and is available in different colors, and also in different textures. Some pre-wrap products are thicker or have a foam-like feel.
- Wrap the wrist with pre-wrap by starting about a third to halfway between the wrist and the elbow.
- The pre-wrap should be snug but not too tight. Wrap the pre-wrap several times around the wrist area and up through the hand, passing between the thumb and index finger at least once. Continue back down to the wrist and forearm area, and wrap the pre-wrap several more times around the wrist and forearm.
-
3Anchor the pre-wrap in place. Using standard 1 and ½ inch athletic or medical tape, place several anchors around the pre-wrap to hold it in place.
- Anchors are pieces of tape that reach around the wrist with a few extra inches to secure the anchors.
- Begin securing the anchors in place by wrapping them around the pre-wrap starting closest to the elbow. Continue to place anchors over the pre-wrap along the area of the wrist and forearm.
- The section of pre-wrap that passes through the hand also needs to be anchored with a longer piece of tape that follows the same pattern as the pre-wrap.
-
4Start wrapping the wrist. Using the standard 1 and ½ inch athletic or medical tape, begin closest to the elbow and wrap the wrist in a continuing motion with a solid piece of tape. Unroll more as you need it from the original roll of athletic or medical tape.
- Follow the same pattern as that used by the pre-wrap, including passing through the area between the thumb and index finger several times.
- Continue to wrap the wrist until all areas of pre-wrap, and all edges from the anchors, are covered well.
-
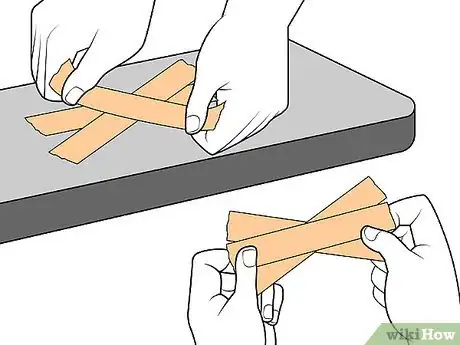
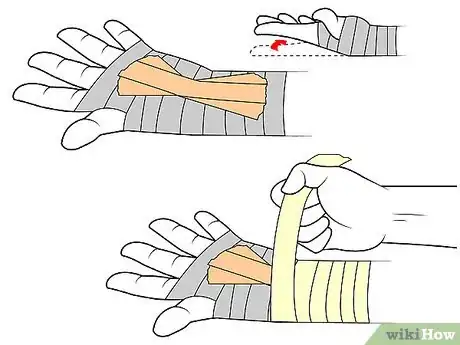
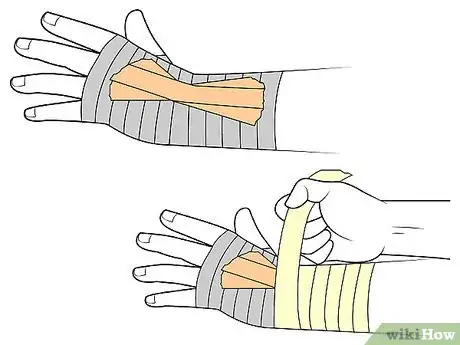
5Add a fan. A fan is the key part of the wrap that not only strengthens the wrap but provides stability in the position of the hand to prevent injury or re-injury.
- While it is called a fan, in reality the shape is more of a crisscross, similar to the shape of a bow tie. Start with a piece of tape that is long enough to reach from the palm of the hand, across the wrist area, and extend about one third of the way up the forearm.
- Lightly place the piece of tape on a clean, flat surface. Follow that piece with another piece the same length, crossing in the middle of the first, and at a slight angle.
- Continue with another piece of tape done the same way, but along the opposite side of the original piece as the first, and at the same slight angle. You should have something shaped like a bow tie.
- Place one more piece of tape directly over the very first piece. This gives added strength to your fan.
-
6Tape your fan to your wrap. Place one end of the fan in the palm of the hand area. Gently pull the hand into a slightly bent position. Secure the other end of the fan along the inside of the wrist area.
- The hand should not be bent too far inward. That would interfere with the ability to use the hand during the sporting activity. By securing the hand in a gently bent position, you are ensuring that the person can still use the hand, but it is taped securely to avoid hyperextension.
- Follow the taping of the fan with one final complete wrap of tape securing the fan in place.
-
7Prevent hyperflexion. The wrapping technique to prevent hyperflexion follows the same steps as those for hyperextension, except for the placement of the fan.
- The fan is created in the same manner, creating a bow tie shape.
- The fan is then placed on the outer part of the hand, and the hand is gently pulled into a very slight angle that opens up the hand. Secure the other end of the fan, past the wrist area, and onto the taped part of the outside part of the forearm.
- Secure the fan in place in the same manner as preventing hyperextension, by wrapping the wrist again using a continued piece of tape. Be sure that all ends of the fan are securely taped down.
-
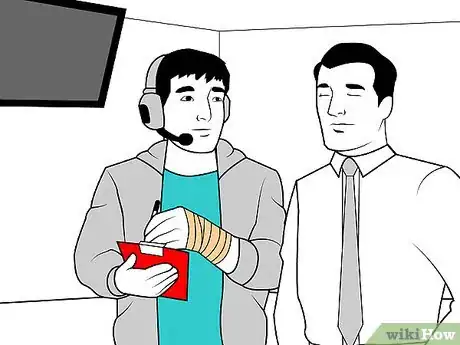
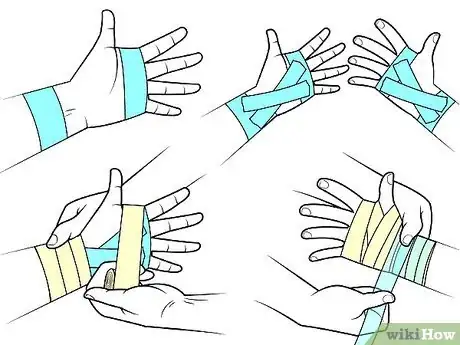
8Use a less restrictive wrap. In some cases, only a light wrapping may be needed.[12]
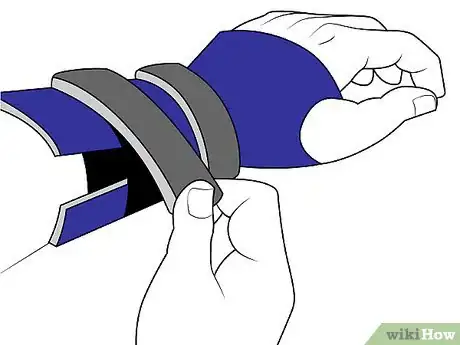
- Apply one strip of pre-wrap around your hand along the area of your knuckles, passing between your thumb and index finger.[13]
- Apply a second strip of pre-wrap just below your wrist area, on the elbow side of your wrist.[14]
- Apply two pieces in a crisscross fashion to the outside of your hand, attaching the ends from one side of the crisscross to the pre-wrap that passes through your thumb and index finger, and the other end attached to the pre-wrap piece along your forearm.[15]
- Copy the crisscross piece, and attach it in the same manner, but to the inside of your hand and inside part of your wrist and forearm.[16]
- Using the pre-wrap material, wrap the wrist by starting at the forearm location with several passes around the wrist area. Follow this with a crisscross, or X-like pattern. Pass the pre-wrap through your thumb and index finger area then around your hand along your knuckles, and back down to the wrist area.[17]
- Continue wrapping to provide the crisscross pattern on the inside and outside of your hand area, securing each pass to the wrist and forearm area.[18]
- Follow this with anchors using standard 1 and ½ inch athletic or medical tape. Start at the forearm area and progress toward your hand area. Follow the same pattern used with the pre-wrap.[19]
- Once the anchors are in place, begin wrapping with a continuous section of tape, following the pattern used with the pre-wrap.[20]
- Be sure all areas of pre-wrap are covered as well as all loose ends of the anchors.[21]
Seeking Medical Attention
-
1Be sure your wrist is not broken. A broken or fractured wrist requires immediate medical attention. If your wrist is broken, you may experience the following symptoms:[22]
- Severe pain that gets worse when trying to grip or squeeze something.[23]
- Swelling, stiffness, and difficulty moving your hand or your fingers.[24]
- Tenderness and pain when applying pressure.[25]
- Numbness in your hand.[26]
- An obvious deformity involving your hand positioned at an angle that is not normal.[27]
- With a severe break, the skin may be split open and bleeding, and protruding bone may be visible.[28]
-
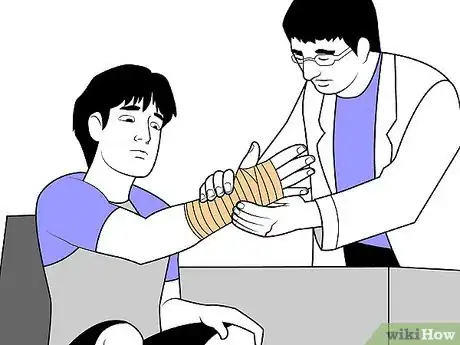
2Do not delay in seeking medical care. A delay in seeking proper medical treatment for a broken wrist can impair healing.[29]
- This can cause problems with your getting back your normal range of motion, as well as resuming the ability to properly grasp and hold objects.[30]
- Your doctor will examine your wrist, and possibly do imaging tests like X-rays to see if there are any fractures or broken bones.
-
3Watch for signs that your scaphoid bone may be broken. The scaphoid bone is a boat-shaped bone located on the outside of other bones in your wrist, and closest to your thumb. There is no clear indication when this bone is broken. The wrist does not appear deformed and there is little swelling. Symptoms of a broken scaphoid bone include the following:[31]
- Pain and tenderness to the touch.[32]
- Difficulty gripping an object.[33]
- A general improvement in pain after a few days, then return of the pain, felt as a dull ache.[34]
- Severe pain and tenderness is felt when pressure is applied to tendons that are located between your thumb and hand.[35]
- See a doctor for a diagnosis if you have these symptoms. You will need help from a healthcare professional since diagnosing a broken scaphoid bone is not always clearly evident.[36]
-
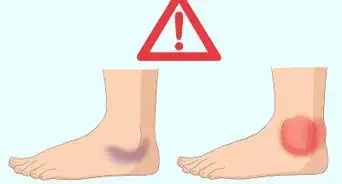
4Seek medical attention for severe symptoms. If your wrist is bleeding, extremely swollen, and if you are experiencing intense pain, you need to be seen by a medical professional as soon as possible.[37]
- Other symptoms that warrant medical attention for your wrist injury include pain when trying to turn your wrist, move your hand, and move your fingers.[38]
- You need to be examined immediately by a doctor if you are unable to move your wrist, hand, or fingers.[39]
- If your injury is thought to be minor and you proceed with treatment at home, see a doctor if the pain and swelling lasts for more than a few days, or if symptoms begin to worsen.[40]
Preventing a Wrist Injury
-
1
-
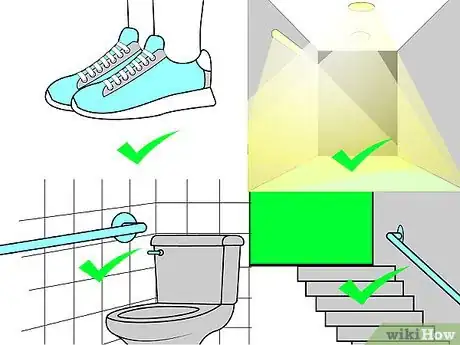
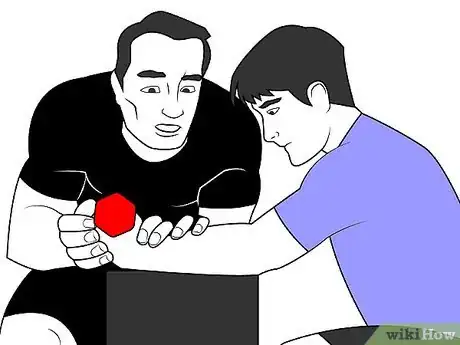
2Prevent falls. One of the major reasons for wrist injury is falling forward and catching yourself with your hand.[43]
-
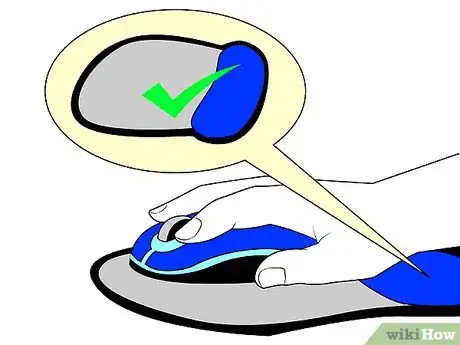
3Use ergonomic devices. If you spend your time typing at a computer keyboard, consider using an ergonomic keyboard or foam pads for the mouse that are designed to position your wrist in a more natural way.[47]
-
4Wear proper protective gear. If you participate in sports that require wrist action, be sure you wear the proper equipment to protect your wrist from injury.[50]
- Many sports can lead to wrist injuries. Wearing the appropriate equipment, including wrist guards and wrist supports can minimize, and sometimes prevent, injury.[51]
- Examples of sports that are commonly associated with wrist injuries include in-line skating, regular skating, snowboarding, skiing, gymnastics, tennis, football, bowling, and golf.
-
5Condition your muscles. Regular conditioning, stretching, and muscle strengthening activities can help you to develop your muscles to prevent injury.[52]
- By working to develop proper muscle tone and conditioning, you can more safely participate in your sport of choice.[53]
- Consider working with a sports trainer. To avoid injury, and especially to avoid re-injury, take steps to work with a trainer in order to properly develop your body and enjoy your sport while minimizing your risk of injury.[54]
Expert Q&A
Did you know you can get expert answers for this article?
Unlock expert answers by supporting wikiHow
-
QuestionHow should your elbows be when typing?
 Claire Bowe, M.Ed., PT, Cert. MDTClaire Bowe is a Physical Therapist and the Owner of Rose Physical Therapy Group, a physical therapy clinic based in Washington D.C. Claire has over 20 years of patient care experience and specializes in a personalized, one-on-one therapeutic approach to physical therapy. Claire is certified in Mechanical Diagnosis & Therapy (MDT) by the McKenzie Institute and is an Ergonomic Assessment Specialist under the United States Occupational Health and Safety Administration (OSHA). She holds an M.Ed. in Special Education from Portland State University, an MA in Physical Therapy from Governors State University, and a BS from Oregon State University.
Physical Therapist
-
QuestionMy wrist and hand has been hurting on and off for about a year now. I saw a doctor who did x-rays and blood tests and found nothing. It hurts more when I write, but aches most of the time. Any ideas what it could be and how to help it?
 Chris M. Matsko, MDDr. Chris M. Matsko is a retired physician based in Pittsburgh, Pennsylvania. With over 25 years of medical research experience, Dr. Matsko was awarded the Pittsburgh Cornell University Leadership Award for Excellence. He holds a BS in Nutritional Science from Cornell University and an MD from the Temple University School of Medicine in 2007. Dr. Matsko earned a Research Writing Certification from the American Medical Writers Association (AMWA) in 2016 and a Medical Writing & Editing Certification from the University of Chicago in 2017.
Family Medicine Physician If your x-rays and blood test are normal it is unlikely that it is rheumatoid arthritis, but you may have another rheumatological disease that causes hand pain. If you start to notice a deformity in your fingers and pain in your wrist, this is characteristic of rheumatoid disease. There are other conditions that you have to be examined for and these include the following: IBD, lupus erythematosus, fibromyalgia, psoriatic arthritis, mixed connective tissue disorder, and polymyalgia rheumatica. Follow up with your doctor and ask if you might be suffering from any of these conditions.
References
- ↑ http://share.upmc.com/2015/01/wrap-ankle-wrist-sprain/
- ↑ http://share.upmc.com/2015/01/wrap-ankle-wrist-sprain/
- ↑ http://share.upmc.com/2015/01/wrap-ankle-wrist-sprain/
- ↑ http://share.upmc.com/2015/01/wrap-ankle-wrist-sprain/
- ↑ http://share.upmc.com/2015/01/wrap-ankle-wrist-sprain/
- ↑ http://share.upmc.com/2015/01/wrap-ankle-wrist-sprain/
- ↑ http://www.mayoclinic.org/diseases-conditions/wrist-pain/basics/definition/con-20031860
- ↑ http://www.mayoclinic.org/diseases-conditions/sprains-and-strains/basics/definition/con-20020958
- ↑ http://www.mayoclinic.org/diseases-conditions/sprains-and-strains/basics/definition/con-20020958
- ↑ http://share.upmc.com/2015/01/wrap-ankle-wrist-sprain/
- ↑ http://share.upmc.com/2015/01/wrap-ankle-wrist-sprain/
- ↑ http://www.physioadvisor.com.au/11376450/wrist-taping-wrist-strapping-strap-wrist-phy.htm
- ↑ http://www.physioadvisor.com.au/11376450/wrist-taping-wrist-strapping-strap-wrist-phy.htm
- ↑ http://www.physioadvisor.com.au/11376450/wrist-taping-wrist-strapping-strap-wrist-phy.htm
- ↑ http://www.physioadvisor.com.au/11376450/wrist-taping-wrist-strapping-strap-wrist-phy.htm
- ↑ http://www.physioadvisor.com.au/11376450/wrist-taping-wrist-strapping-strap-wrist-phy.htm
- ↑ http://www.physioadvisor.com.au/11376450/wrist-taping-wrist-strapping-strap-wrist-phy.htm
- ↑ http://www.physioadvisor.com.au/11376450/wrist-taping-wrist-strapping-strap-wrist-phy.htm
- ↑ http://www.physioadvisor.com.au/11376450/wrist-taping-wrist-strapping-strap-wrist-phy.htm
- ↑ http://www.physioadvisor.com.au/11376450/wrist-taping-wrist-strapping-strap-wrist-phy.htm
- ↑ http://www.physioadvisor.com.au/11376450/wrist-taping-wrist-strapping-strap-wrist-phy.htm
- ↑ http://www.mayoclinic.org/search/search-results?q=broken wrist
- ↑ http://www.mayoclinic.org/search/search-results?q=broken wrist
- ↑ http://www.mayoclinic.org/search/search-results?q=broken wrist
- ↑ http://www.mayoclinic.org/search/search-results?q=broken wrist
- ↑ http://www.mayoclinic.org/search/search-results?q=broken wrist
- ↑ http://www.mayoclinic.org/search/search-results?q=broken wrist
- ↑ http://www.mayoclinic.org/search/search-results?q=broken wrist
- ↑ http://www.mayoclinic.org/search/search-results?q=broken wrist
- ↑ http://www.mayoclinic.org/search/search-results?q=broken wrist
- ↑ http://www.ucsfhealth.org/conditions/hand_and_wrist_fractures/
- ↑ http://www.ucsfhealth.org/conditions/hand_and_wrist_fractures/
- ↑ http://www.ucsfhealth.org/conditions/hand_and_wrist_fractures/
- ↑ http://www.ucsfhealth.org/conditions/hand_and_wrist_fractures/
- ↑ http://www.ucsfhealth.org/conditions/hand_and_wrist_fractures/
- ↑ http://www.ucsfhealth.org/conditions/hand_and_wrist_fractures/
- ↑ http://www.mayoclinic.org/diseases-conditions/wrist-pain/basics/definition/con-20031860
- ↑ http://www.mayoclinic.org/diseases-conditions/sprains-and-strains/basics/definition/con-20020958
- ↑ http://www.mayoclinic.org/diseases-conditions/sprains-and-strains/basics/definition/con-20020958
- ↑ http://www.mayoclinic.org/diseases-conditions/wrist-pain/basics/definition/con-20031860
- ↑ http://www.mayoclinic.org/diseases-conditions/wrist-pain/basics/definition/con-20031860
- ↑ http://www.mayoclinic.org/diseases-conditions/wrist-pain/basics/definition/con-20031860
- ↑ http://www.mayoclinic.org/diseases-conditions/wrist-pain/basics/definition/con-20031860
- ↑ http://www.mayoclinic.org/diseases-conditions/wrist-pain/basics/definition/con-20031860
- ↑ http://www.mayoclinic.org/diseases-conditions/wrist-pain/basics/definition/con-20031860
- ↑ http://www.mayoclinic.org/diseases-conditions/wrist-pain/basics/definition/con-20031860
- ↑ http://www.mayoclinic.org/diseases-conditions/wrist-pain/basics/definition/con-20031860
- ↑ http://www.mayoclinic.org/diseases-conditions/wrist-pain/basics/definition/con-20031860
- ↑ Claire Bowe, M.Ed., PT, Cert. MDT. Physical Therapist. Expert Interview. 23 April 2020.
- ↑ http://www.mayoclinic.org/diseases-conditions/wrist-pain/basics/definition/con-20031860
- ↑ http://kidshealth.org/PageManager.jsp?dn=KidsHealth&lic=1&ps=207&cat_id=20019&article_set=20379
- ↑ http://www.mayoclinic.org/diseases-conditions/sprains-and-strains/basics/definition/con-20020958
- ↑ http://www.mayoclinic.org/diseases-conditions/sprains-and-strains/basics/definition/con-20020958
- ↑ http://www.mayoclinic.org/diseases-conditions/sprains-and-strains/basics/definition/con-20020958
About This Article
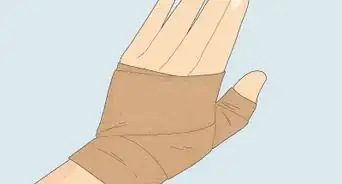
To wrap an injured wrist, start by wrapping an elastic bandage around your fingers, just below the knuckles. Next, wrap the area between your thumb and index finger, then wind the wrap around your wrist area several times. Continue to wrap all the way to your elbow for the greatest stability. After you reach your elbow, reverse the direction and wrap back towards your hand, then secure the bandage using the clips provided or the self-attaching ends. For more tips from our Medical co-author, like how to wrap your wrist for sports, read on!
















Medical Disclaimer
The content of this article is not intended to be a substitute for professional medical advice, examination, diagnosis, or treatment. You should always contact your doctor or other qualified healthcare professional before starting, changing, or stopping any kind of health treatment.
Read More...