This article was co-authored by Stephen Cardone and by wikiHow staff writer, Nicole Levine, MFA. Stephen Cardone is the COO of NY Headshots, a New York City-based studio that specializes in shooting and producing headshots for individuals and businesses. Stephen has over four years of professional photography experience and over six years of documentary filmmaking experience. Stephen also works extensively as a photographer at NY Headshots. His work includes events, environmental photography, as well as headshots for actors, models, and corporate. He holds a BA in Non-fiction Writing from The New School.
The wikiHow Tech Team also followed the article's instructions and verified that they work.
This article has been viewed 213,683 times.
This wikiHow teaches you how to reduce the size of a digital photo on a computer, phone, or tablet. Making an image smaller will also reduce the overall size of the image, making it easier to send via email and messaging apps. While it's easy to make images smaller, you'll lose quality if you try to blow them up again. For the best results, always edit your images before you downsize them.
Steps
Using the Free / Built-in Preview App on macOS
-
1Open a photo in the Preview app. Do so by double-clicking on the blue Preview icon that looks like overlapping snapshots, then clicking on File in the menu bar and Open... in the drop-down menu. Select a file in the dialog box and click on Open.
- You can also open the image in Preview by double-clicking it, or by right-clicking it and selecting Open with > Preview.
-
2Click the Tools menu. It's in the menu bar at the top of the screen.[1]Advertisement
-
3Click Adjust Size… on the menu. This opens the Image Dimensions panel.
-
4Check the box next to "Scale proportionally." It's below the measurements. This ensures that you don't warp the image when resizing. If it's already selected, there's no need to make any changes.
-
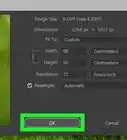
5Set a new size for the image. There are three ways to reduce the size:
- If you want to choose a size from a list, click the "Fit into" menu and make your selection. To specify a size, choose Custom from this menu instead (which should be the default).
- If you select "Custom," select Percent from the menu next to the Width and Height fields and then enter the percentage by which you want to decrease the size. For example, to make the image 20% of its current size, you'd enter 20% in either the Width or Height field.
- To specify the size in a different unit, such as pixels or inches, select that unit type from the menu next to the Width and Height fields. Then, enter the desired values.
-
6Click OK. This reduces the image size.
-
7Click the File menu and select Save. The image is now saved with the dimensions you specified.


Using Adobe Photoshop on Windows or macOS
-
1Open a Photoshop file. To do so, open Adobe Photoshop from the Start menu or Applications folder. Then, click the File menu, select Open, choose your file, and then click Open.
-
2Click the Image menu. It's in the menu bar at the top of Photoshop (PC) or at the top of the screen (Mac).
-
3Click Image Size…. This opens a dialog window.
-
4Select Bicubic Sharper (best for reduction) from the "Resample" drop-down menu (optional). If your goal is to reduce the overall file size in addition to the actual image dimensions, this option will preserve the image's quality. [2] Otherwise, leaving the "Automatic" option selected is usually fine for most uses.
-
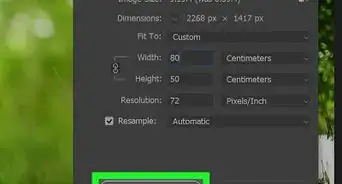
5Choose new dimensions for your image. First, choose the units from the "Dimensions" drop-down menu. For example, you can set dimensions by Pixels, Centimeters, or Percent. Then, enter your smaller dimensions into the Width or Height boxes. Entering the desired Width will automatically adjust the Height to scale and vice-versa—this is to preserve the scaling and avoid warping your image.
- You can also adjust the number of pixels per inch/cm in the "Resolution:" field in the "Document Size:" section
- If you want to define the height and width specifically and don't mind a little warping, click the small link between the "Width" and "Height" options.
-
6Click OK. The image will now display in its new size
-
7Click the File menu and select Save as….
-
8Type a name for the image.
-
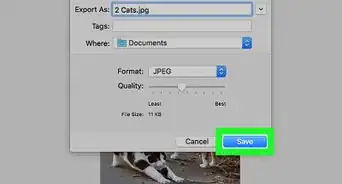
9Select an image format in the "Format" or "Save as Type" menu. The default format is Photoshop, but if you want to share the image online, you'll probably want to change the format to a more widely-used format like PNG or JPG.
-
10Click Save. The image is now saved with the dimensions you specified.


Using Paint in Windows
-
1Right-click an image and select Open with…. Another menu will expand.
-
2Click Paint. This opens the image in Microsoft Paint.
-
3Click the Home tab. It's a tab near the top of the window.
-
4Click Resize. It's the two overlapping squares in the toolbar. This opens the "Resize and Skew" dialog box.
-
5Check the box next to "Maintain aspect ratio." This ensures that you won't accidentally warp the image when resizing.
-
6Set a new size for the image. You have two options for doing so:
- Click Percentage to enter a percentage in either the "Vertical" or "Horizontal" field to reduce the image size by a certain proportion.
- Click Pixels to enter specific dimensions in the "Vertical" or "Horizontal" field.
-
7Click OK. The image is now resized.
-
8Click the File menu and select Save as….
-
9Type a name for the image in the "File name" field.
-
10Click Save. The image will be saved with the dimensions you specified.


Using Image Size for iPhone/iPad
-
1Install Image Size from the App Store . Image Size is a free, well-reviewed, ad-supported app that lets you make images larger or smaller on your iPhone/iPad.
- To download the app, open the App Store, tap the magnifying glass to open the search bar, and search for Image Size. Tap the app with a blue diamond icon and a curved arrow inside, and then tap GET to install.
-
2Open Image Size. After downloading the app, you can tap OPEN in the App Store to open it, or tap its blue diamond and arrow icon on the home screen.
-
3Tap the icon of two overlapping images. It's in the upper-right area. You'll be asked if you want to give Image Size access to your photos. This will only happen the first time you edit a photo with Image Size.
-
4Tap Allow Access to All Photos. Now you'll be able to open any photo.
-
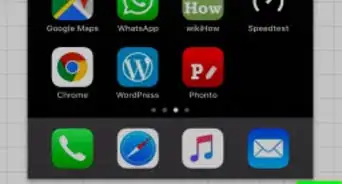
5Tap the image you want to resize. A preview will appear.
-
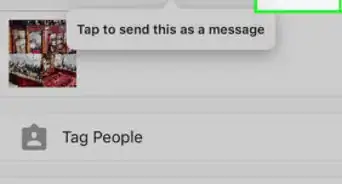
6Tap Choose. It's at the bottom-right corner. This opens the image in the editor.
-
7Select your method for reducing the image size. By default, the pixel tab at the top-left is selected—this lets you specify the image size in pixels. If you'd prefer, you can choose < pixel (the second option) to specify a resolution in pixels rather than dimensions, mm for millimeters, cm for centimeters, or inch for inch.
-
8Enter your dimensions. For example, if you selected pixel, enter the desired width in pixels—the height will automatically adjust so that it's proportionate to the width you entered.
- If you don't want the height to automatically adjust, you can tap the link icon between the Width and Height options to remove this feature. Just be aware that this can warp the image.
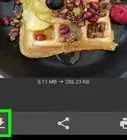
-
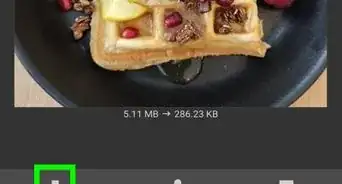
9Tap the download arrow. It's at the bottom-left corner. This saves the image to your camera roll.
- An ad will usually pop up at this point. Just tap the X in one of the corners to close it.


Using Samsung Gallery for Android (Samsung Galaxy Only)
-
1Open the Gallery app on your Samsung Galaxy phone or tablet. It's the red icon with a white flower inside, and you'll find it in your app list.[3]
-
2Tap the picture you want to resize. This displays a larger version.
-
3Tap the pencil icon. It's at the bottom of the screen.
-
4Tap the three-dot menu ⋮. It's at the top-right corner.
-
5Tap Resize image on the menu. This opens a list of image sizes.
-
6Tap a smaller image size. You can reduce the image by 20%, 40%, 60%, or 80%.
-
7Tap Done. It's the yellow link at the bottom. The image size is now smaller.


Using Resize Me on Android
-
1
-
2Open Resize Me. If you're still in the Play Store, you can tap the Open button to launch the app. Otherwise, tap the Resize Me icon, which is a multicolored photograph icon with two-way arrow on it.
-
3Tap ALLOW when prompted. This gives the app permission to access your photos. You'll only have to do this once.
-
4Tap Photo Album. It's the first item on the menu.
-
5Select the image you want to resize. This opens it in the editor.
-
6Tap the icon with a two-sided arrow. It's at the bottom-right corner of the image. A list of sizes will appear.
-
7Tap the desired size. If you don't see the size you want, tap Custom and enter a size in pixels. Once you enter a width, the height value will adjust automatically so the image doesn't warp. If you need to specify both the width and height values and don't care if the image will warp, you can remove the checkmark from "Keep Aspect Ratio."
- If you entered dimensions manually, tap OK to save your work.
-
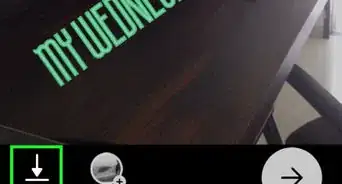
8Tap the disk icon to save your resized image. It's in the upper-right corner of the screen.


Expert Q&A
Did you know you can get expert answers for this article?
Unlock expert answers by supporting wikiHow
-
QuestionHow do I adjust the size of my photo?
 Stephen CardoneStephen Cardone is the COO of NY Headshots, a New York City-based studio that specializes in shooting and producing headshots for individuals and businesses. Stephen has over four years of professional photography experience and over six years of documentary filmmaking experience. Stephen also works extensively as a photographer at NY Headshots. His work includes events, environmental photography, as well as headshots for actors, models, and corporate. He holds a BA in Non-fiction Writing from The New School.
Professional PhotographerYou can use different programs, like the basic photo editor that comes with your computer, or a more advanced program like Photoshop. Just reset the image size from 100% to something smaller, like 90%.
Support wikiHow by unlocking this expert answer.


References
About This Article

1. Open the image in Microsoft Paint for Windows.
2. Click "Resize" on the Home tab.
3. Check the box next to "Maintain Aspect Ratio."
4. Enter new dimensions.
5. Click "OK."