This article was co-authored by Ellen East. Ellen East is a certified yoga instructor and owner of Studio 4 WholeHealth in Hartwell, Georgia. She received her 200RYT certification from Yoga Alliance and has been a yoga practitioner for over 25 years.
wikiHow marks an article as reader-approved once it receives enough positive feedback. In this case, 96% of readers who voted found the article helpful, earning it our reader-approved status.
This article has been viewed 57,331 times.
Sirsasana is often referred to as the “king” of all yoga poses and rightly so, since it is one of the practice’s most difficult to master. Sirsasana, which means roughly “headstand” in Sanskrit, is a complete inversion, in which the body is held upright by the arms, with the feet in the air, while the head rests on the ground. With practice and concentration, you can master the pose and perform one of yoga’s most complicated inversions.
Steps
Building Your Foundation
-
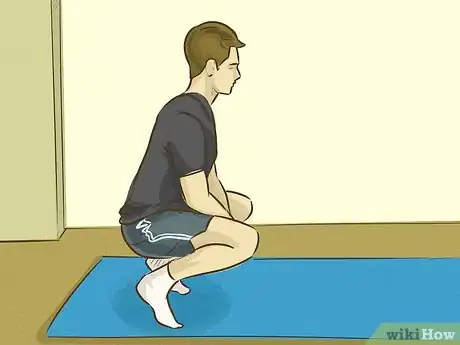
1Squat down on your toes. From standing position, lower yourself down to a squatting position. Balance on your toes with your arms between your knees and your hands clasped.[1]
-
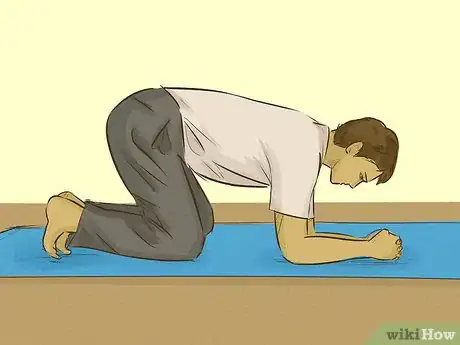
2Lower yourself down onto your knees. Rest your knees on the ground, placing your hands and forearms extended straight in front of you. You will be a in position very similar to child’s pose. Spread your knees wide, while making sure that your big toes are touching. Rest your buttocks on your heels and place your forehead on the floor.[2]Advertisement
-
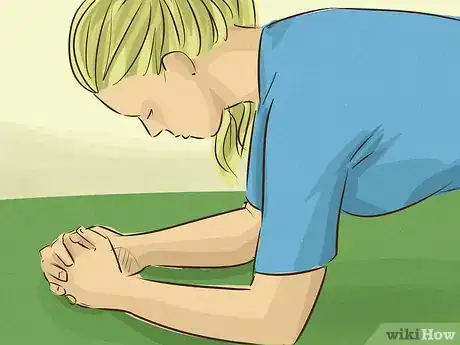
3Use your arms to build your foundation. Interlock your fingers and place your elbows shoulder-width apart on the mat. Make sure that your arms are horizontally out in front.[3]
- The elbows should be about one forearm’s length apart. This is roughly 30cm or 1ft.
-
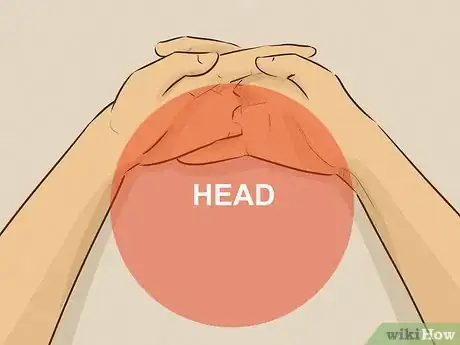
4Position your hands to hold your head. Create a bowl with your hands that will hold your head. Make sure that your fingers are comfortable and not getting squished.[4]
- Depending on which hand is on the bottom, the little or pinky finger can sometimes get in the way. You can either place it within the bowl made by your interlocked hands or slightly underneath it.
-
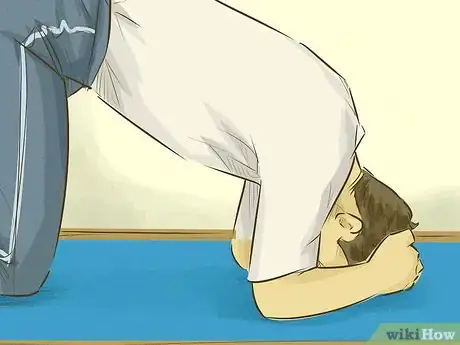
5Put your head in your hands. Bend forward and place the top of your head on the ground and the back of your head between your palms. Be sure to check that your shoulders are not putting too much pressure on your head and neck. Test this by moving your head from side to side in your hands.[5]
Raising Your Body
-
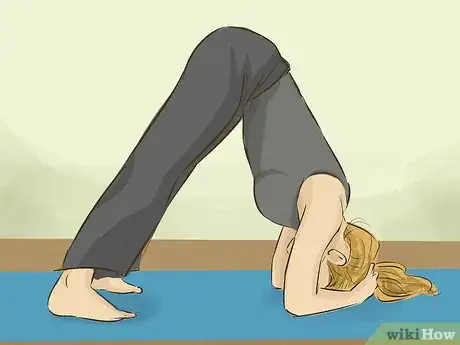
1Straighten your legs. Extend both of your legs and raise your buttocks in the air. Keep your knees straight.[6]
- This movement is similar to that made during downward dog or dolphin pose.[7]
- Be sure to warm up before trying this pose. If your hamstrings are tight, this movement will be very difficult to do.
-
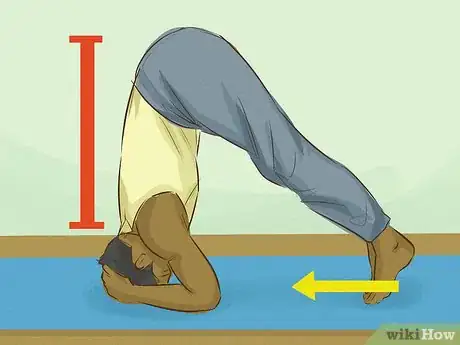
2Walk your feet towards your hands. Slowly take small steps forward until the head, neck and back form a straight line and are perpendicular to the ground. Your upper body should be completely vertical.[8]
- Avoid looking into a mirror because this may cause you to lose your balance. If you are trying the pose for the first time, be sure to have an experienced practitioner of yoga there to help you.
- More advanced practitioners may be able to lift their legs straight up without walking them towards their head.
-
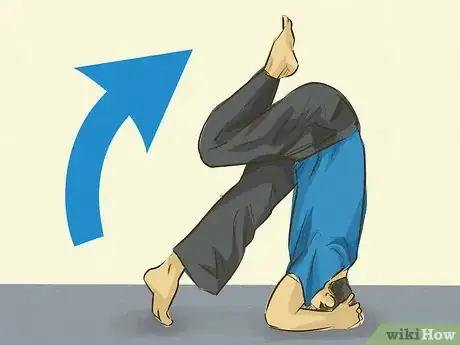
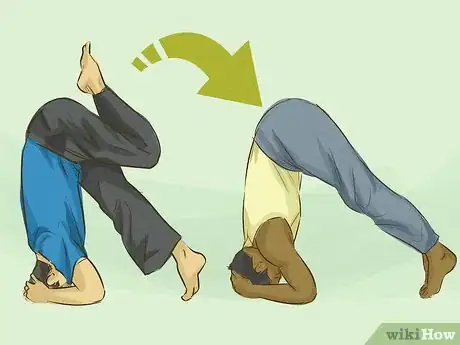
3Slowly lift your feet off the floor. One at a time, bend your knees and gradually lift your feet off the floor. Pull each knee in to your chest and keep your toes pointed up. To maintain your balance, focus on pushing through your back and shoulders into the ground.[9]
- For more advanced practitioners, try straightening your legs out in front of you, instead of bending your knees to your chest.
EXPERT TIPEllen East is a certified yoga instructor and owner of Studio 4 WholeHealth in Hartwell, Georgia. She received her 200RYT certification from Yoga Alliance and has been a yoga practitioner for over 25 years.Yoga Instructor
 Ellen East
Yoga InstructorBe careful to not hurt yourself as a beginner. Ellen East tells us it can be a good idea to "practice against a wall until you feel comfortable and safe enough."
-
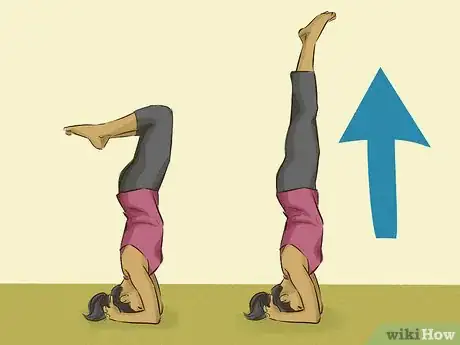
4Stretch your legs upwards. Slowly extend your legs towards the ceiling. Straighten your legs and keep your toes pointed. Maintain your balance by focusing on pushing through back, shoulders, and arms into the ground.[10]
- Focus on your breathing. Exhale once you have brought your knees to your chest and then straighten them towards the ceiling when you inhale.
Releasing From the Pose
-
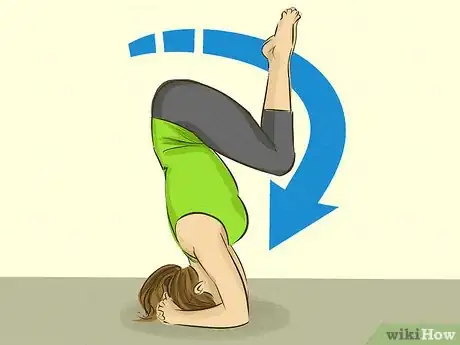
1Lower the knees back down to the chest. Once you have completed the position, gradually bring the knees back down to the chest. Bend at the hips until your knees are close to your chest. Continue to focus on your breathing and push into the ground for balance.[11]
-
2Place both feet on the floor. One at a time, lower your toes to the ground. Keep your knees and back straight. If needed, hold this position for a moment to balance yourself.[12]
-
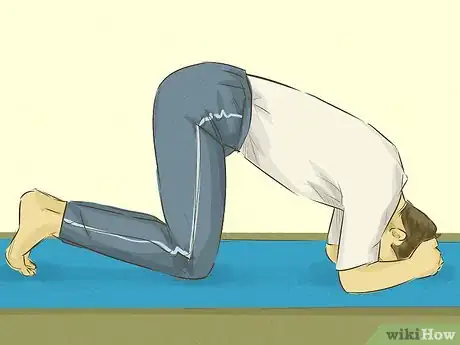
3Return to your hands and knees. Bend the knees and lower your hips. Move towards the ground until your weight is on your legs. Bring your upper body down and rest your head on the ground. Stay in this pose for 15 to 30 seconds.[13]
-
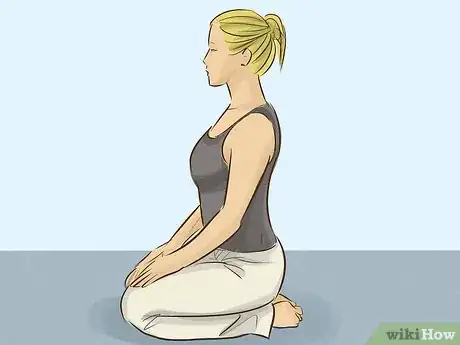
4Roll back into sitting position. Lift your head and straighten your back. Slowly shift your weight forward onto your toes. One after the other, straighten your legs out into sitting position with your buttocks on the ground. Your back should still be straight and vertical with the ground.[14]
-
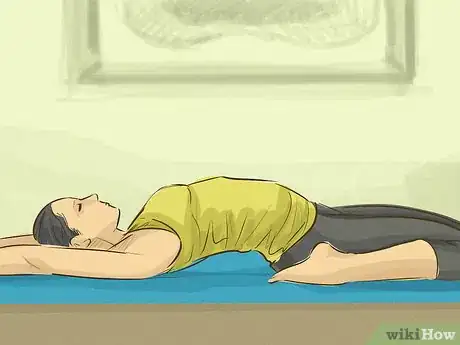
5Lower yourself into supine position. Lean back and place your elbows on the ground. Gradually lower your upper body until your back is touching the ground. Extend your arms and legs a little, creating a comfortable and relaxing position. Close your eyes and focus on your breathing.[15]
Warnings
- Always warm up before attempting more complicated yoga poses. Keeping loose will help prevent injury.⧼thumbs_response⧽
- If you are attempting Sirsasana for the first time, be sure to have a more advanced practitioner there to help you and ensure that you do not get injured.⧼thumbs_response⧽
References
- ↑ http://www.yogapoint.com/yoga-poses/shirshasana.htm
- ↑ http://www.yogapoint.com/yoga-poses/shirshasana.htm
- ↑ http://www.yogapoint.com/yoga-poses/shirshasana.htm
- ↑ http://www.yogapoint.com/yoga-poses/shirshasana.htm
- ↑ http://www.yogapoint.com/yoga-poses/shirshasana.htm
- ↑ http://www.yogapoint.com/yoga-poses/shirshasana.htm
- ↑ https://lotsofyoga.com/blogs/yoga-poses/sirsasana-yoga-headstand-for-beginners
- ↑ http://www.yogapoint.com/yoga-poses/shirshasana.htm
- ↑ http://www.yogapoint.com/yoga-poses/shirshasana.htm
- ↑ http://www.yogapoint.com/yoga-poses/shirshasana.htm
- ↑ http://www.yogapoint.com/yoga-poses/shirshasana.htm
- ↑ http://www.yogapoint.com/yoga-poses/shirshasana.htm
- ↑ http://www.yogapoint.com/yoga-poses/shirshasana.htm
- ↑ http://www.yogapoint.com/yoga-poses/shirshasana.htm
- ↑ http://www.yogapoint.com/yoga-poses/shirshasana.htm





-Step-16.webp)


