This article was co-authored by Claire Donovan-Blackwood. Claire Donovan-Blackwood is an Arts & Crafts Specialist and CEO of Heart Handmade UK, a site dedicated to helping people live a happy, creative life. With over 13 years of experience, Claire uses art as a form of therapy and focuses on mindfulness in the making of art. She makes crafting easy and accessible for those she works with. Claire received her B.A. in Photography & Visual Imagery from The University of Huddersfield.
This article has been viewed 20,334 times.
Designing a flower pot is a fun way to enliven your garden or your home décor! It involves choosing the type of pot, the paints, and any other items you want to attach to the pot. Once you have finished decorating the pot how you want, you can plant something in it, or you can use it in an unconventional way.
Steps
Planning Your Flower Pot Design
-
1Choose a pot in the shape and size you want. Flower pots come in all different shapes and sizes. You can get a terra cotta pot to design, or choose a flower pot that has already been painted and glazed and add accents onto it. You could even purchase a plastic flower pot for a lightweight option.
- Flower pots are available at home improvement stores, craft supply stores, and big box stores.
- Try getting a basic round flower pot for something simple, or choose a multi-tiered flower pot for a more elaborate option.
-
2Select 1 or more colors of acrylic paint. You can paint your flower pot 1 solid color, or you can paint it with a few different colors. Choose the paint colors you want to use to create your design. Some options include:
- Painting your flower pot dark blue with white and yellow dots for a starry sky look.
- Creating layers of red, orange, yellow, green, blue, and purple for a rainbow look.
- Painting your pot a pastel pink or blue and then adding a cute face and horn for a unicorn pot.
Advertisement -
3Decide if you want to glue items onto your flower pot. You can glue almost anything you want onto a flower pot. Choose items that appeal to you and make sure that you will have enough to cover the entire surface of the pot or at least the areas you want to cover.
- Try gluing seashells onto the flower pot for a whimsical seaside look.
- Glue twigs or bark onto the pot for a rustic forest look.
- Attach gems and crystals for a sparkly flower pot.


Painting a Flower Pot
-
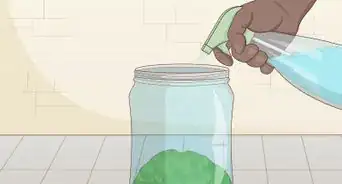
1Soak terra cotta pots in warm water for 1 hour, then scrub them. It is important to start with a clean, dry pot. Place any terra cotta pots you are using into a tub or sink filled with warm water. Do not use soap! Then, wait 1 hour and scrub the pots with a dish brush to remove any stuck on dirt that has loosened up. Rinse the pots and place them upside down on a towel to dry.[1]
- If you are using glazed or plastic pots, you can wash them with dish soap and water, and then dry them off with a clean, dry towel before decorating them.
-
2Place your paint onto a paper plate and thin it with water if desired. Put about 2 tablespoons (30 ml) of paint onto a paper plate to dip your brush into. If you want to use a small amount of a few different colors of paint, then place them all on separate parts of the plate or use a separate plate for each color. You may thin out 2 tablespoons (29.6 ml) of acrylic paint with 1 teaspoon of water if desired. This will make it a little easier to apply the paint.
- Start with a small amount of paint and add more if needed. This will help you to avoid wasting paint.
-
3Use a large sponge brush to apply a base coat of paint to the pot. Paint the surface of your pot with your main color of paint, or create the first stripe or design in that color if you don’t want to paint on a base coat. Dip the sponge into the paint and then sweep it across the pot to distribute the paint. After, dip the brush again and repeat.[2]
- Make sure to use a sponge brush to avoid getting loose paintbrush bristles stuck on the surface of your pot.
-
4Let the paint dry completely. Before you paint anything else onto the pot, make sure that the base coat is completely dry. Painting a new layer onto wet paint may cause the paints to smear or run together. Place your pot somewhere out of the reach of kids and pets and let it dry for at least a few hours or overnight before you paint additional designs onto it.[3]
-
5Paint small shapes and designs onto the pot with a small brush. You can paint anything you like on your pot. Make sure to let the paint dry completely after you finish painting on your designs. Some design ideas include:[4]
- Adding contrasting color polka dots all over the surface of a solid color pot.
- Painting foliage or flowers all over the flower pot.
- Create a striped or checkered print all over the pot.
-
6Use stencils to add letters to your pot. Adding letters to a flower pot is another cute way to customize it. Instead of painting letters freehand, you can use stencils to create neat looking labels for your pots. For example, you could:
- Label a pot to explain what it contains, such as by labeling a pot of basil with the word “Basil.”
- Put your family’s last name onto a pot, such as “The Smith Family.” Place the pot on your front porch for a cute way to help visitors find your home.
- Add initials for monogrammed gift flower pot, such as “RSJ” for Rachel Sue Jones.


Gluing Items onto a Flower Pot
-
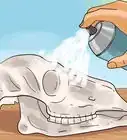
1Start with a clean, dry painted pot.[5] Items will stick to the pot better if it is clean and dry. If you are using an old terra cotta pot, make sure to soak it in warm water for about an hour and scrub it with a dish brush. Then, let it dry completely before you get started.[6]
- If you are using a plastic or glazed pot, you can wash it with warm water and soap, then rinse and dry it with a towel.
-
2Gather the items you want to glue onto the pot. You can glue almost anything you like onto the pot, but it is best to stick with small, lightweight items that have a flat surface. This will allow you to get a good bond between the pot and the item. Some fun options include:
- Gems
- Twigs
- Bark
- Small seashells
- Beads
- Sequins
- Fabric scraps
- Pebbles
-
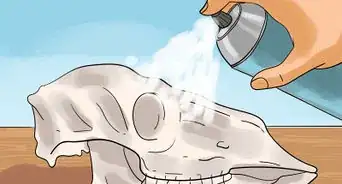
3Apply a strong crafting glue to the pot where you want to attach an item. It is important to use glue that is meant for gluing items onto your pot’s material, such as plastic if you have a plastic pot. Check the packaging to be sure. You can find strong crafting glues at craft supply stores. With the pot sitting upright or on its side, dispense a small amount of the glue onto the surface of the pot where you want to glue an item.
- Make sure your glue will hold up against the elements. Look for a glue that holds up even if it gets wet and one that will not soften when the weather gets warm.
- If you're going to be watering a live plant in the pot, don't use water-based glue or else it will reactivate every time you get water on it.[7]
-
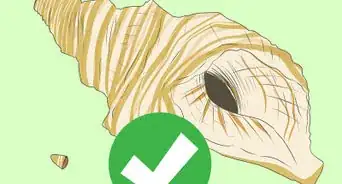
4Press and hold each item after gluing it into place. After you have applied the glue, press the item into it. Hold the item in place for a few seconds to ensure that it will stay put. Check the instructions for your glue to see if there are additional instructions for getting a secure hold.
- If you will be gluing items all over the pot, start gluing items near the base of the pot and work your way up. This will provide some scaffolding for the other items you glue on.
-
5Continue to glue and press your items onto the pot until you have attached all of them. This may take quite a while, depending on the amount of items you have. After you finish attaching everything, let the glue dry overnight before using the pot.
- If you need to take a break, place your pot and items up somewhere that they will not be disturbed and come back to it later.


Finishing up Your Flower Pot
-
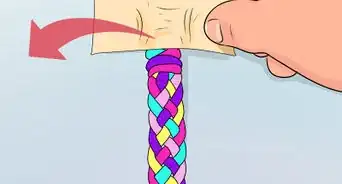
1Look for accent materials to tie onto the finished pot. After you have finished painting and/or gluing items onto your flower pot, you might also want to tie something around it as a final accent. You can tie a piece of twine, ribbon, yarn, lace, fabric, or something else around your flower pot to add an extra accent.
- Choose a piece of twine for a rustic accent.
- Select a colorful print ribbon to offset a colorful pot.
- Tie some lace ribbon around the pot for a classy, antique look.
-
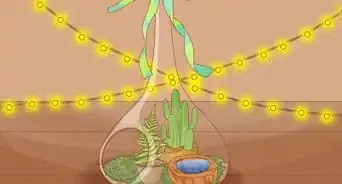
2Choose flowers to put into your flower pots. After you have finished decorating your pot as desired, select one or more flowers or plants to grow in it. For larger pots, you can choose a centerpiece plant, a filler plant, and a plant that will cascade over the edges. This will create an appealing display to compliment your decorative flower pot.
- For example, you could go with a vibrant pink begonia for your centerpiece, then surround it with a dark leafy filler plant, such as black dragon, and then add cascading verbena around the edges of the planter.
- Choose flowers that will match or compliment the colors of your pot, such as pink roses in a pink pot, or purple pansies in a yellow pot. Choose any color of flowers that you want!
- Make sure that you select healthy looking plants from your local nursery or garden center. Avoid any plants that look wilted or brown around the leaves and flowers.
-
3Arrange flowers in a pleasing way. Fill the pot with soil and create a well in the center, or a few wells for multiple plants. Place your flowers into the pot how you want them, but make sure that any cascading plants are near the edges of the planter so that they will spill out the sides of the pot. Position the base of the stems so they are even with the top of the pot and cover the roots with soil.
- For a small pot, you might only be able to fit 1 flower plant, but for a large pot you may be able to fit 3 or 4.
- Try putting 2 different colors of flowers in a pot so that they will offset each other, such as red flowers and yellow flowers in the same pot.
-
4Use the pot for home décor or in a non-traditional manner. You don’t have to put flowers in the pot if you don’t want to! You could use your finished pot as a pencil holder, a coin jar, or somewhere to stash your keys when you get home each day. Place the pot somewhere visible so you can enjoy the design you have created and use it however you like!


Expert Q&A
Did you know you can get expert answers for this article?
Unlock expert answers by supporting wikiHow
-
QuestionHow do you design pots in a simple way?
 Claire Donovan-BlackwoodClaire Donovan-Blackwood is an Arts & Crafts Specialist and CEO of Heart Handmade UK, a site dedicated to helping people live a happy, creative life. With over 13 years of experience, Claire uses art as a form of therapy and focuses on mindfulness in the making of art. She makes crafting easy and accessible for those she works with. Claire received her B.A. in Photography & Visual Imagery from The University of Huddersfield.
Arts & Crafts SpecialistIf you're painting a standard terracotta pot, you could paint the thick stripe around the top a different color from the rest of the pot for a nice contrast.
Support wikiHow by unlocking this expert answer.
-
QuestionHow do you decoupage a flower pot?Claire Donovan-BlackwoodClaire Donovan-Blackwood is an Arts & Crafts Specialist and CEO of Heart Handmade UK, a site dedicated to helping people live a happy, creative life. With over 13 years of experience, Claire uses art as a form of therapy and focuses on mindfulness in the making of art. She makes crafting easy and accessible for those she works with. Claire received her B.A. in Photography & Visual Imagery from The University of Huddersfield.
Arts & Crafts SpecialistStart with a clean surface and apply a non-water-based glue. Then, apply either paper or fabric to the pot and smooth it out so there are no bubbles. Let that dry, then coat the pot in a layer of varnish.Support wikiHow by unlocking this expert answer.
Things You’ll Need
- Terra cotta, glazed, or plastic pot
- Acrylic paint
- Paintbrushes
- White glue
- Items to glue onto the pot, such as gems, beads, bark, shells, etc.
- Ribbon or twine to tie around the pot
- Potting soil
- Plants or flowers
-Step-11.webp)

References
- ↑ https://www.finegardening.com/article/painting-clay-pots
- ↑ https://www.finegardening.com/article/painting-clay-pots
- ↑ https://www.finegardening.com/article/painting-clay-pots
- ↑ https://www.finegardening.com/article/painting-clay-pots
- ↑ Claire Donovan-Blackwood. Arts & Crafts Specialist. Expert Interview. 3 May 2019.
- ↑ https://www.finegardening.com/article/painting-clay-pots
- ↑ Claire Donovan-Blackwood. Arts & Crafts Specialist. Expert Interview. 3 May 2019.
About This Article


-Step-11.webp)