This article was co-authored by Tony Hoang. Tony Hoang is a Landscaper and the Principal at H&J Landscaping & Concrete Contractor in Newark, CA. With over six years of experience, he specializes in designing the perfect concrete driveways & backyard patios for homes. H&J Landscaping & Concrete Contractor is a 4.5-star business on Yelp.
This article has been viewed 37,782 times.
Pavers are great alternatives to large pieces of plain concrete. Whether they are stone, brick, or concrete, they can be used to add visual flair to walkways, patios, and driveways. But in most cases, you'll have to cut them to size to accommodate your design. Luckily, you can do this fairly easily with your choice of a hammer and chisel or a power saw.
Steps
Using a Cold Chisel
-
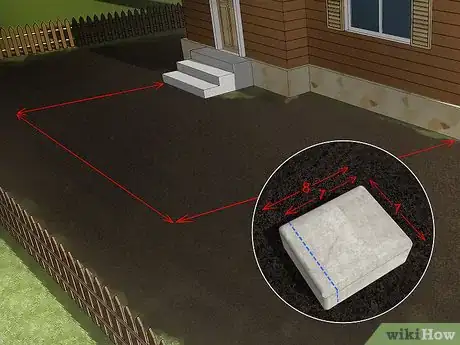
1Compare the installation space measurements to your paver. Use a measuring tape to determine the measurements of the installation space. Be sure to get a measurement for all 4 sides of the space. Afterward, compare the measurements to your paver and determine what needs to be cut from your paver to make it fit.[1]
- For example, your installation location might be a 7 by 7 inch (18 by 18 cm) square and your paver 7 by 8 inches (18 by 20 cm). In this case, you need to cut a 1 by 7 inch (2.5 by 17.8 cm) piece from the longer side of your paver.
-
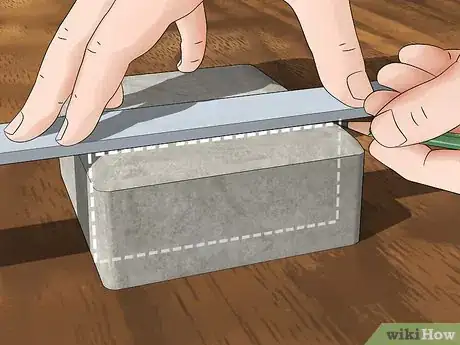
2Use a straightedge to mark cutlines onto all 4 sides of your paver. Use your installation measurements to determine how much to cut off your paver. Place a ruler onto your paver and draw a line across the top to mark the region to be removed. Afterward, continue the line along the 2 sides and bottom of the paver. Double check that each pair of side lines and top and bottom lines are parallel to each other—you need to score along the entirety of this line.[2]
- If you need to cut multiple points of the paver, create additional cutlines. For example, if you need to remove 2 corners of the paver, draw cut lines around each of its corners.
Advertisement -
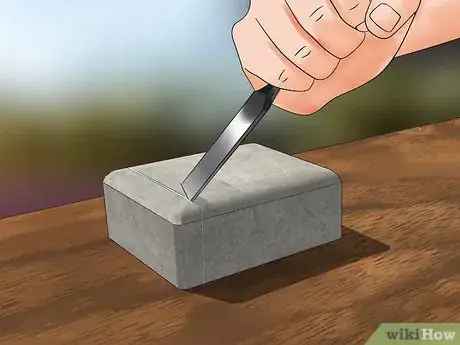
3Score along the cutlines using a 1 inch (2.5 cm) wide cold chisel. Place the paver onto a flat surface. Align the sharp edge over your chisel over the cutline. Begin gently tapping the handle with a hammer to create a groove in the paver. Continue tapping the chisel along the cutline. Repeat this process until there is a 1⁄16 inch (0.16 cm) groove along the entire cutline of the paver.[3]
- Avoid hitting the chisel too hard—you might break off too much of the paver.
- If you can't find a flat surface, place your paver onto a piece of plywood held up by 2 sawhorses.
-
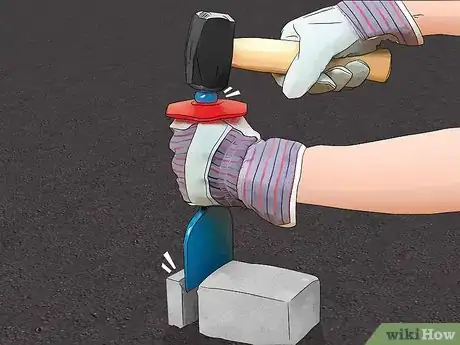
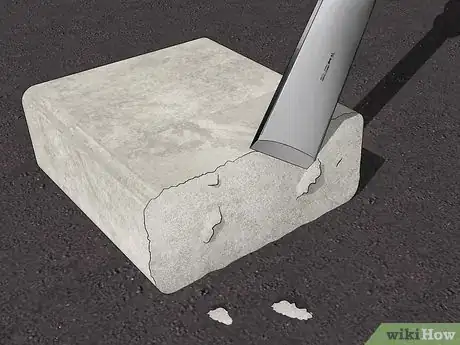
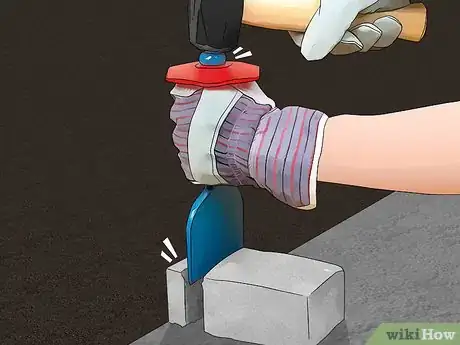
4Hammer along the cutline groove to separate the paver into 2 pieces. Place the paver flat onto the ground. Align a brick-set chisel vertically in the middle of the groove. Firmly strike the handle of the chisel with a hammer to split the paver into 2 separate pieces.[4]
- If you're having trouble, score around the cutline with your cold chisel again.
-
5Remove protruding or uneven bits from the broken paver. Chip away at any problematic areas using your brick-set and hammer. Chiseling your paver can take a bit of practice to make a clean cut. For the first few times, you will likely have to take some time to even it out after the initial cut.
- Place your paver on a sandbag if it gets unsteady.
- Use a stone carving file to smooth out problematic spots. Push the file away from you and then lift it up instead of grinding it back and forth..
Using a Circular Power Saw
-
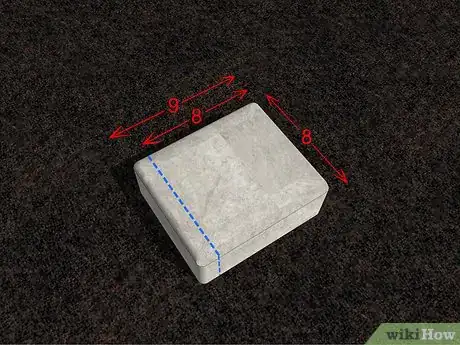
1Compare the installation location measurements to your paver. Use a measuring tape to measure the space you plan to install your paver in. Make sure to record a measurement for each side of the space. Afterward, compare these measurements to your paver and determine how much needs to be removed to make it fit.
- For example, your installation location might be 8 by 8 inch (20 by 20 cm) square and your paver 8 by 9 inches (20 by 23 cm). In this case, you need to cut a 1 by 9 inch (2.5 by 22.9 cm) piece from the longest side of your paver.
-
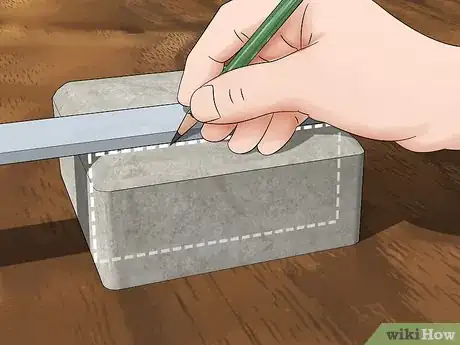
2Mark a cutline onto the top and bottom of your paver using a straight edge. Using your installation measurements, determine how much to remove from your paver. Place a ruler onto your paver and draw a line on the top to mark off the region that needs to be cut. Afterward, turn the paver over and draw a line on the bottom parallel to the first one.[5]
- Don't draw side lines on your paver—you don't need to cut along them.
-
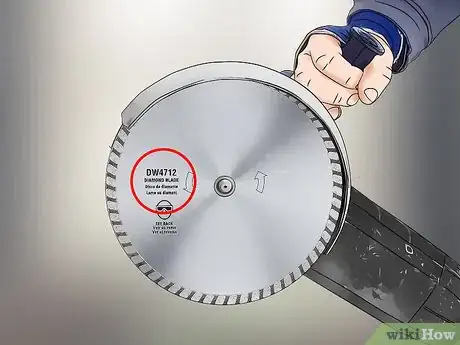
3Attach a diamond masonry blade to your power saw. Attach vice grips to the side of the old blade. Loosen the bolt with a wrench and remove it. Afterward, take off the flange (the small rim under the bolt) and lift out the blade. Place your new blade on, reattached the flange, and tighten the bolt over it.[6]
- Make sure that the teeth of the diamond blade are pointing in the opposite direction of the paver.
- Select a blade designed for cutting stone if you are working with stone pavers or it won't cut through them properly.
- Be sure to use a diamond blade specifically designed for cutting masonry and stone. This will help to prevent the blade from becoming blunt too quickly.
-
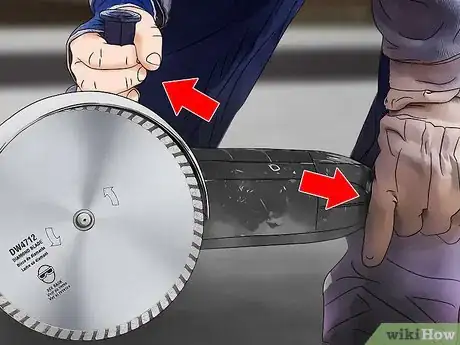
4Place your left hand on the handle and your right on the blade shield. Before you begin cutting, get comfortable with the positioning of your hands. Grip the handle with your left hand and practice moving the blade forward and backward. Use your right hand to keep the saw steady. Press the blade against your brick and make sure it doesn't move around.
- Put a rubber mat or small carpet under the paver to prevent it from moving.
-
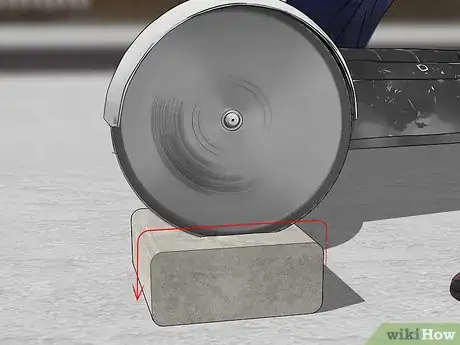
5Saw along the marked line 1⁄2 inch (1.3 cm) deep. Place the paver on a flat surface. Set the saw blade the cut to 1⁄2 inch (1.3 cm) deep. Begin sawing along the penciled line. Press down on the saw with your right hand and apply gentle pressure to the paver. Afterward, you should have deep score lines on the back and front of the paver.[7]
- Pull the blade out of the paver every 30 seconds to keep the temperature cool.
-
6Place the paver onto a step with the unwanted end hanging off. Hold the paver firmly in place with one hand. Grab a hammer or mallet with your other hand and tap the unwanted end of the paver hanging off the step. The paver should break cleanly into 2 pieces along its deep score lines.[8]
- If you don't have a step nearby, firmly hit the tip of the paver onto a flat, concrete surface. However, this method is more likely to create a jagged edge.
- Even out jagged edges with a hammer and 1 inch (2.5 cm) wide cold chisel. You can also use a stone carving file by pushing it away from you and lifting it up.
Expert Q&A
-
QuestionCan I put pavers directly on top of the soil?
 Scott JohnsonScott Johnson is the Owner and Lead Design Consultant for Concrete Creations, Inc., an award-winning landscape and design company based in the San Diego, California metro area. He has over 30 years of experience in the pool and landscape construction industry and specializes in large estate outdoor environment construction projects. His work has been featured in San Diego Home & Garden Magazine and on Pool Kings TV Show. He earned a BS degree in Construction Management with an emphasis in Architecture and CAD design from Northern Arizona University.
Landscape & Design Consultant No, you really don't want to do this. Over time, your pavers will end up shifting and moving around. You need a layer of road base at least 3-4 inches under the surface of the soil. Then, you need to cover the road base with sand. The pavers go on top of the sand.
Things You'll Need
Using a Cold Chisel
- Gloves
- Goggles
- Measuring tape
- Pencil
- Cold chisel with a 1 inch (2.5 cm) blade
- Brick-set chisel
- Hammer
- Stone carving file
Using a Circular Power Saw
- Gloves
- Goggles
- Dust mask
- Ear plugs
- Measuring tape
- Pencil
- Vice grips
- Wrench
- Power saw (circular saw or angle grinder)
- Diamond masonry blade
- Mallet or hammer
Expert Interview

Thanks for reading our article! If you'd like to learn more about pavers, check out our in-depth interview with Tony Hoang.
References
- ↑ https://www.thisoldhouse.com/more/how-to-hand-cut-brick
- ↑ https://www.bobvila.com/articles/how-to-cut-pavers/
- ↑ https://www.bobvila.com/articles/how-to-cut-pavers/
- ↑ https://youtu.be/6xUEE3zxqQs?t=4m11s
- ↑ https://www.bobvila.com/articles/how-to-cut-pavers/
- ↑ https://youtu.be/cjLHqBZGFaA?t=1m36s
- ↑ https://youtu.be/vYrkFwXOyS4?t=51s
- ↑ https://youtu.be/vYrkFwXOyS4?t=59s
About This Article
Before cutting pavers, make sure you've measured your space and know what size you want. Once you know your measurements, use a straight edge to mark cutlines onto all 4 sides of your paver. Then, gently tap your 1-inch wide cold chisel with a hammer until you have a 1/16 inch groove along the entire cutline. You can then hammer along the cutline groove to separate the paver into 2 pieces. Chip away at any uneven bits using your brick-set and hammer. To learn how to use a circular power saw to cut pavers, keep reading!
