This article was co-authored by wikiHow Staff. Our trained team of editors and researchers validate articles for accuracy and comprehensiveness. wikiHow's Content Management Team carefully monitors the work from our editorial staff to ensure that each article is backed by trusted research and meets our high quality standards.
There are 9 references cited in this article, which can be found at the bottom of the page.
The wikiHow Video Team also followed the article's instructions and verified that they work.
This article has been viewed 31,548 times.
Learn more...
Chives add hints of garlic and onion flavor to all kinds of dishes. There really isn’t much to cutting them. All you need is a cutting board and a knife, or kitchen shears and a dish. If you have chives in your garden, then there are a few easy-to-follow guidelines for cutting them off the plant to harvest them and take back to your kitchen.
Steps
Choosing and Washing Chives
-
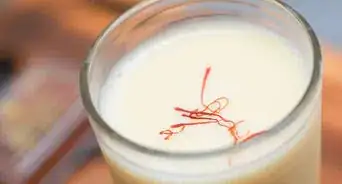
1Select brightly-colored and fresh-looking chives to use in the kitchen. Healthy chives have a bright green color all over and a crisp texture. Don’t use chives that are soft or dry.[1]
- You can store chives for about 3-4 days in the refrigerator after purchasing or harvesting them.
Tip: The garlic chive variety will have tightly closed flower buds at the tip of their stalks. If the flowers are open, then they are too old to eat.
-
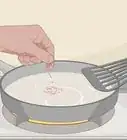
2Rinse the chives under cool running tap water to remove any dirt. Hold the bunch of chives you want to cut over the sink or put them in a strainer and rinse them. Use your fingers to rub off any stubborn dirt.[2]
- Chives are normally eaten raw, so make sure to rinse them thoroughly to clean them if you plan on doing so.
Advertisement -
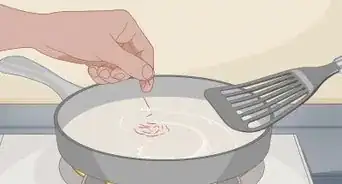
3Remove any slimy or wilted parts from the chives. Don’t use any chives that are completely wilted. Pull off any ends that feel slimy or look dead and throw them away.[3]
- Avoid any chives that smell bad as well. Chives should smell just faintly like onions.


Chopping Chives with a Knife
-
1Place the chives in a bunch on a cutting board and hold them in place. Line up the chives so the stalks are at about the same length and with no space between them. Hold them loosely together in the bundle with your non-dominant hand.
- Try not to squish the chives flat as you hold them in a bunch.
-
2Use a chef’s knife to chop them into 1⁄2 in (1.3 cm) sections for most recipes. Use a back and forth rocking motion with the chef’s knife to cut the stalks into pieces. Move your non-dominant hand down the stocks of the chives and follow with your dominant hand and the knife until you completely chop them up.
- You can adjust the size of the chives or cut them at different angles to change their appearance for whatever the recipe you are making calls for.
Tip: Dampen a paper towel and fold it in half lengthwise into a 1–2 in (2.5–5.1 cm) strip. Wrap the damp paper towel around the bundle of chives, about 2 in (5.1 cm) from the bottoms, to provide extra stability while you chop them.
-
3Mince the chives by chopping them into the smallest possible pieces. Cut off and discard about 1⁄4 in (0.64 cm) from the tips to make the ends even before you slice them. Slice them as thin as you can with a very sharp chef’s knife if your recipe calls for minced chives.[4]
- Chives are very delicate, so it’s important to have a very sharp knife when you attempt to mince them so as not to crush and bruise them.

Using Kitchen Shears
-
1Hold a bunch of chives above a dish with your non-dominant hand. Position a bunch of chives so the ends are about even and pick them up in your hand. Hold them over a dish.[5]
- You can wrap a wet paper towel around the chives for added stability and grip.
-
2Snip the chives into evenly-sized pieces with a pair of kitchen scissors. Pick up a pair of kitchen scissors with your dominant hand. Start snipping the chives into pieces of the size you want.[6]
- Snip the chives into pieces that are about 1⁄2 in (1.3 cm) if your recipe calls for chopped chives, or make them as small as you possibly can if your recipe calls for minced chives.
Tip: You can purchase herb scissors that are specifically designed for cutting chives and other culinary herbs.
-
3Let the chives fall into the dish below or right into the meal you’re making. Keep repositioning your hand so the pieces are falling into the dish below as you cut. Snip them right into a mixing bowl, salad bowl, or on top of the meal you are adding them to.[7]
- For example, if you are cutting them up as a garnish for something like baked potatoes, then let them fall into a dish that you can grab from at the dinner table. If you are adding them to a salad, you could snip them right above the salad bowl and let them fall in on top of all the other ingredients.

Harvesting Chives
-
1Prune off the flower heads with garden shears after they bloom. Wait for the flowers to start fading after blooming, and then give the whole chive plant a “haircut” right below the flowers. This process, called deadheading, will help the chives look nice and encourage new growth after blooming.[8]
- Make sure to use a clean pair of garden shears or hedge trimmers to prune the chives.
-
2Harvest chives when they have grown to at least 6 in (15 cm) tall. It’s important to wait until the chives are established to harvest them so that they will grow back. This will be around late summertime if it is the first year of planting your chives.[9]
- After the chives are established, you can harvest them at any time.
-
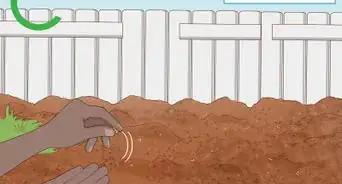
3Cut the chives down to about 2 in (5.1 cm) from the ground. Use shears to snip the green stalks off to use. You don’t need to dig up the bulbs to use chives. Leaving approximately 2 in (5.1 cm) will ensure that the chives grow back.[10]
- You can clip off smaller pieces if you only want to use a little bit at a time. You don’t have to only harvest the whole stalks.
Tip: Chives grow in the early spring and will stay green into the early fall. Thus, you can enjoy fresh chives for most of the year.
-
4Freeze the chives if you won’t use them all right away. Chives freeze very well and you can use the frozen chives just as you would use fresh ones in things like soups, sauces, and stews. Chives will retain their flavor in the freezer but may lose some of their texture. Use fresh chives if you plan on putting them in raw dishes, like salads.[11]
- You can go ahead and chop the chives up before you freeze them so they are ready to go when you need to use them. You can store the chopped chives in a freezer bag and throw them into your recipes easily.


References
- ↑ https://harvesttotable.com/chivesbulb_vegetablesherbs_you/
- ↑ https://www.bhg.com/recipes/how-to/cooking-basics/how-to-chop-green-onions/
- ↑ https://www.bhg.com/recipes/how-to/cooking-basics/how-to-chop-green-onions/
- ↑ https://penandfork.com/recipes/cooking-tips/how-to-micro-mince-chives/
- ↑ https://www.themountainkitchen.com/5-uses-for-kitchen-scissors/
- ↑ https://www.themountainkitchen.com/5-uses-for-kitchen-scissors/
- ↑ https://thetakeout.com/which-summer-greens-should-you-tear-snip-or-chop-1826302010
- ↑ https://getbusygardening.com/time-to-deadhead-chives/
- ↑ https://morningchores.com/growing-chives/
About This Article