This article was co-authored by Sarah Stearns. Sarah Stearns is a DIY Specialist, Artist, Maker, Blogger, and the Founder of SarahMaker.com. With over ten years of experience, she specializes in fun, approachable crafts like crocheting, making polymer clay jewelry, quilting, and creating Cricut projects. Her work has been featured in several publications, such as Scientific American, Good Housekeeping, Vox, and Apartment Therapy. Sarah holds a BA in Psychology from Vanderbilt University.
There are 9 references cited in this article, which can be found at the bottom of the page.
This article has been viewed 41,986 times.
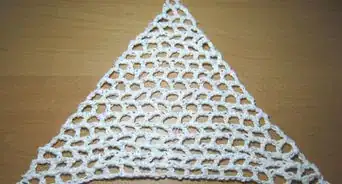
Corner to corner crochet is a popular technique for making afghans, but you can also use it to make other square items, such as washcloths, potholders, and wide scarves. The process uses a series of chains and double crochet stitches to create small squares that you connect using slip stitches. This technique is easy to learn, even if you are new to crochet. You will just need some yarn and a crochet hook to get started.
Steps
Making the Foundation Square
-
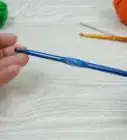
1Make a slipknot. Crochet work always begins with a slipknot.[1] To make one, loop the yarn around your finger twice and pull the first loop over the second loop. Then, tug on the free end of the yarn to tighten the knot. Slide the loop onto your crochet hook and tighten the loop some more. The loop should be snug on the crochet hook.
-
2Chain 6. To start your corner to corner crochet project, make a chain of 6.[2] Loop the yarn over the hook in front of the slipknot. Then, pull this loop through the slipknot. This is your first chain. Repeat this 5 more times to make a total of 6 chains.[3]
- Practice chaining if you are new to crochet.
Advertisement -
3Double crochet once into the fourth chain from the hook.[4] To double crochet, loop the yarn over the hook and insert the hook into the fourth chain from the hook. Then, yarn over again and pull through the first stitch. Yarn over again and pull through 2 loops. Then, yarn over 1 more time and pull through the remaining loops on the hook. This will complete 1 double crochet stitch.[5]
- Practice double crochet if you are new to crochet.
-
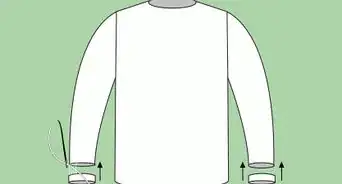
4Double crochet once into the next 2 chains. To finish the foundation square, double crochet 1 time into each of the next 2 chains.[6]
- This completes the foundation square.


Increasing in Corner to Corner Crochet
-
1Turn and chain 6 again. Making the next square and increasing the width of your rows is similar to making the first square. Begin the new square by turning your work around and then make a chain of 6. This is how you will begin each new row.[7]
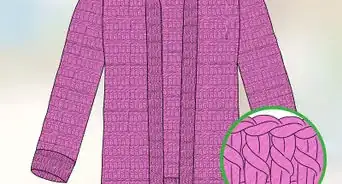
- If desired, change colors before you begin work a new row. Tie the new yarn to the base of the last stitch in a row and then use the new yarn to work the stitches in the new row.
- Organize your yarn with bobbins when you're crocheting a corner-to-corner pattern with lots of color changes.[8]
-
2Double crochet into the fourth chain from the hook 1 time. Next, double crochet into the fourth chain from the hook.[9]
-
3Double crochet 1 time into the next 2 chains. Next, double crochet into the fifth and sixth chains from the hook.[10]
-
4Slipstitch into the top chain to join the squares. You should now have two squares that are connected at the bottom by a chain. To connect them at the top as well, insert the hook into the top chain of the square next to it. Then, yarn over the hook and pull through both loops on the hook. This will bind the squares together.[11]
-
5Chain 3. To begin the next square, make a chain of 3. You will need to do this each time you start a new square after completing the first square.[12]
-
6Double crochet 3 times into the top chain. To create the next square, double crochet 3 times into the chain that is along the top of the first square you made. This will complete the second and final square in the second row, and you do not need to do anything else.[13]
- To create more squares for other wider rows, repeat the chain 3 and double crochet 3 times into the chain until you reach the end.
-
7Repeat the process to add more squares. Start over at the beginning to add more rows and more squares to your corner to corner crochet project. Keep going until the project is the width you want it to be.[14]


Decreasing in Corner to Corner Crochet
-
1Chain 1 and turn. Start decreasing the width of the rows when you have finished your longest row. Make a chain of 1 and then turn your work around.[15]
-
2Slipstitch into the first 2 stitches and chain 3 space. Instead of starting your first decrease row with a chain of 3, start by slipstitching 3 times. Slipstitch 1 time into each of the first 2 stitches, and then 1 time into the chain 3 space. This will serve as your decrease for the row.[16]
-
3Chain 3. Work the rest of the row the same as the previous rows. Start with a chain of 3.[17]
-
4Work 3 double crochet stitches into chain 3 space. Next, work your 3 double crochet stitches into the chain 3 space. This will build the first square in the first decrease row.[18]
-
5Repeat chain of 3 and 3 double crochet stitches to the second to last square. Keep repeating the chain of 3 and 3 double crochet stitches until you complete the second to last square in the row.
-
6Slipstitch into last 3 stitches. To complete the first decrease row and all subsequent decrease rows, slipstitch into the last 3 stitches instead of creating another square. This will complete the decrease row.
- If desired, you can change yarn colors after each decrease row. Tie the new yarn to the base of the last stitch, and then use the new yarn to work the next row.
-
7Repeat the process to continue decreasing. To continue your decreases, repeat the same process over again. Keep going until you only have 1 square left.
-
8Tie off the last stitch. Tie off the end strand of your final stitch by pulling the end of the yarn all the way through the stitch. Pull the tail of the yarn to create a knot with the final stitch. Then, cut the excess above the knot and you are all finished!


Things You’ll Need
- Yarn
- Crochet hook (check your yarn label to see what size hook is recommended)
- Scissors
References
- ↑ https://www.craftyarncouncil.com/mar06_crochet.html
- ↑ https://makeanddocrew.com/how-to-corner-to-corner-crochet-c2c-for-beginners/
- ↑ https://www.craftyarncouncil.com/mar06_crochet.html
- ↑ https://makeanddocrew.com/how-to-corner-to-corner-crochet-c2c-for-beginners/
- ↑ https://www.craftyarncouncil.com/mar06_dc.html
- ↑ https://makeanddocrew.com/how-to-corner-to-corner-crochet-c2c-for-beginners/
- ↑ https://makeanddocrew.com/how-to-corner-to-corner-crochet-c2c-for-beginners/
- ↑ Sarah Stearns. DIY Specialist. Expert Interview. 4 October 2021.
- ↑ https://makeanddocrew.com/how-to-corner-to-corner-crochet-c2c-for-beginners/
- ↑ https://makeanddocrew.com/how-to-corner-to-corner-crochet-c2c-for-beginners/
- ↑ https://makeanddocrew.com/how-to-corner-to-corner-crochet-c2c-for-beginners/
- ↑ https://makeanddocrew.com/how-to-corner-to-corner-crochet-c2c-for-beginners/
- ↑ https://makeanddocrew.com/how-to-corner-to-corner-crochet-c2c-for-beginners/
- ↑ https://makeanddocrew.com/how-to-corner-to-corner-crochet-c2c-for-beginners/
- ↑ https://www.youtube.com/watch?v=DqR7UNx_NKU&feature=youtu.be&t=45s
- ↑ https://www.youtube.com/watch?v=DqR7UNx_NKU&feature=youtu.be&t=57s
- ↑ https://www.youtube.com/watch?v=DqR7UNx_NKU&feature=youtu.be&t=1m15s
- ↑ https://www.youtube.com/watch?v=DqR7UNx_NKU&feature=youtu.be&t=1m25s
About This Article