This article was co-authored by wikiHow Staff. Our trained team of editors and researchers validate articles for accuracy and comprehensiveness. wikiHow's Content Management Team carefully monitors the work from our editorial staff to ensure that each article is backed by trusted research and meets our high quality standards.
The wikiHow Video Team also followed the article's instructions and verified that they work.
This article has been viewed 146,823 times.
Learn more...
Making a mini-electromagnet is a simple project that you can complete just for fun, or to use as an educational experiment. It only takes a few minutes to create a mini-electromagnet, but you will need some special materials to do it. After you have completed your first mini-electromagnet, you can also make modifications to your creation that might make the magnet more powerful.
Steps
Making a Mini-Electromagnet
-
1Gather your materials. Making a mini-electromagnet is a fun, easy project. You can use it to learn more about how magnets work, or just as a way to pick up some paperclips that you spilled on your desk. To make a mini-electromagnet, you will need:[1]
- nail or screw (at least three inches long and made from iron, zinc, or steel)[2]
- some thin, coated copper wire
- scissors
- one AA battery
- electrical tape
- something to pick up, such as metal paperclips or tacks
-
2Wrap the screw with thin coated copper wire. Take your nail or screw and begin wrapping the copper wire around it, but make sure that you leave a tail of about three inches. You will need this to connect the wire to the battery.[3]
- Coil the wire tightly around the nail or screw until you reach the end. Then, leave another three-inch tail. Cut the wire about three inches past the end of the nail or screw.
- When you are done, you should have two three-inch pieces of copper wire hanging off of the ends of your screw or nail.
Advertisement -
3Loop the ends of the wire. Take the wire pieces that are hanging off of the ends of your screw or nail. Then, curl up the ends of these pieces of wire a little bit, as if you are making a tiny loop on each end.[4]
- Looping the ends of the wire will help to create a better connection between the battery and the wire.
-
4Attach the wire loops to your battery. Next, take the loops that you created and attach one loop to each pole of your battery. Attach one to the positive pole and the other to the negative pole.[5]
- Secure each of the wire loops to the opposite poles of your battery with a small piece of electrical tape.
-
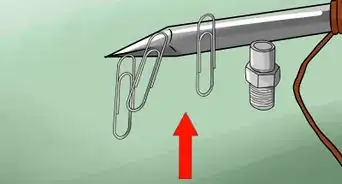
5Use your magnet to pick things up. After you have attached the wires and secured them with tape, your mini-electromagnet is complete. Now you can use the wire-wrapped part of the nail or screw to pick up things like paperclips, tacks, nails, screws, and other small metal objects.[6]
- If your mini-electromagnet does not work, then check to ensure that the wires are making close contact with both ends of the battery. If they are loose or not connected, then the electromagnet will not work.
- Detach the copper wires from the battery when you are done using the magnet. The magnet will become hot if the wires are connected for too long.

Modifying the Design
-
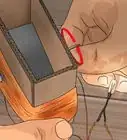
1Try a different type of nail or screw.[7] You might find that different materials have different levels of magnetism. Try swapping an iron nail for a steel one to see if this increases or decreases the amount of paperclips you can pick up.
- Don’t forget to count the number of paperclips that your current design can lift before you make adjustments.
-
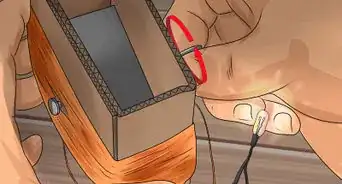
2Use a larger screw or nail.[8] A larger screw or nail may also have more magnetic power than a small one because you can coil more copper wire around it. Try upgrading your current screw or nail with a larger one to see if this makes the magnet more powerful.
-
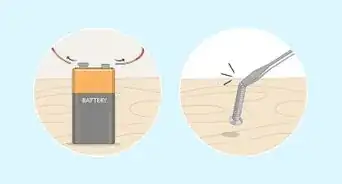
3Attach a larger battery.[9] AA batteries work well for this experiment, but maybe a larger battery will make your electromagnet more powerful. Try swapping your AA battery for a D battery to see if this results in a more powerful magnet.
- Attach the wires to the D battery the same way that you would attach them to the AA battery.
-
4Add a switch.[10] By adding a knife switch, you can control the flow of power with the push of a button. To add a knife switch, you will need two D batteries, more wire, and a knife switch, which you can find in most hobby stores.
- Coil the wire around your nail or screw, then connect the wire from one end of the screw to your knife switch.
- Then, connect the wire from the other end of the nail or screw to the negative pole of one of the D batteries.
- Next, connect a piece of copper wire between the positive pole of your battery that is connected to the screw and the negative pole of the battery that is not yet connected to anything.
- Finish the circuit by connecting a wire between the remaining positive pole and the knife switch.
- Close the knife switch and you should be able to pick up some paperclips or tacks.


Community Q&A
-
QuestionWhy is it that the nail becomes hot when I connect to the charge?
 Shawn BerlinghoffCommunity AnswerThe nail becomes hot because the wire is becoming hot. The wire becomes hot whenever it is too small for the amount of electricity you're trying to push through it. To stop this problem simply increase the gauge of wire.
 -
QuestionDoes the battery still need to have a charge?
 Community AnswerYes. A battery that does not have a charge will probably not work, or at least not as well as one that has a full charge. Try to do the experiment with a new battery for best results.
 -
QuestionWhen do electromagnets acquire magnetism?
 Harigovind RCommunity AnswerElectromagnets acquire magnetism when electrons flow through them. That's why electromagnets work only when there is a potential difference at its ends. For making that potential difference, we connect a battery to it.
Warnings
- The battery and the wire can become hot, so you may want to wear gloves if you will be handling the magnet after it has been connected for a few minutes.⧼thumbs_response⧽
- Always be careful when dealing with electricity.⧼thumbs_response⧽

References
- ↑ https://www.youtube.com/watch?v=PwVuLK0Q-po
- ↑ https://www.teachengineering.org/view_activity.php?url=collection/cub_/activities/cub_mag/cub_mag_lesson2_activity1.xml
- ↑ https://www.youtube.com/watch?v=PwVuLK0Q-po
- ↑ https://www.youtube.com/watch?v=PwVuLK0Q-po
- ↑ https://www.youtube.com/watch?v=PwVuLK0Q-po
- ↑ https://www.youtube.com/watch?v=PwVuLK0Q-po
- ↑ http://uw.physics.wisc.edu/~wonders/More%20Home%20Experiments.pdf
- ↑ https://sciencebob.com/make-an-electromagnet/
- ↑ https://sciencebob.com/make-an-electromagnet/
- ↑ http://www.energyquest.ca.gov/projects/electromagnet.html
- Videos provided by voodoo30x
About This Article