This article was co-authored by wikiHow staff writer, Travis Boylls. Travis Boylls is a Technology Writer and Editor for wikiHow. Travis has experience writing technology-related articles, providing software customer service, and in graphic design. He specializes in Windows, macOS, Android, iOS, and Linux platforms. He studied graphic design at Pikes Peak Community College.
The wikiHow Tech Team also followed the article's instructions and verified that they work.
This article has been viewed 190,193 times.
Learn more...
This wikiHow teaches you how to check the health of your solid-state drive (SSD) on a Windows or Mac computer. On Windows, you can check the health of your SSD using a third-party application, and on Mac, you can use the built-in disk utility.
Steps
On Windows
-
1Go to https://crystalmark.info in a web browser. Using your preferred browser, go to the CrystalMark website which has the app we will use to check the SSD's health.
-
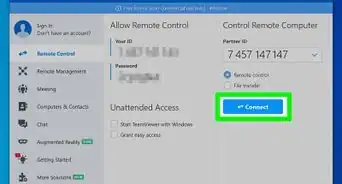
2Click CrystalDiskInfo Standard Edition. It's the first option under "Quick Download". This will take you to a download page where the download will start automatically. If the download does not start automatically, click the blue link that says "CrystalDiskInfo7_5_2.exe" in the middle of the page.Advertisement
-
3Open the installation file. Double-click the installation file you just downloaded to start the installation wizard. The full filename is "CrystalDiskInfo7_5_2.exe".
- Your downloaded files can usually be found in your "Downloads" folder by default.
- Click YES to allow the installation file to make changes to your computer if prompted.
-
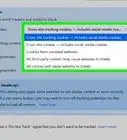
4Select "I accept the agreement" and click Next. If you wish, read the license agreement, then click the radio button next to "I accept the agreement". Click "Next" when you are ready to continue.
-
5Click Next. This will install CrystalDiskInfo in the default location listen in the text field. If you wish to change the install location, click Browse and select a different location.
-
6Click Next. This will create a folder in the Start menu. You can change the default name in the text field to change the name of the folder in the Start menu.
- You can also click the checkbox for "Don't create a Start Menu folder" if you don't want to add a folder to the Start menu.
-
7Check or uncheck "Create desktop shortcut" and click Next. This will create a shortcut on your desktop. If you don't wish to have a desktop shortcut, uncheck the box and click "Next".
-
8Click Install. This will begin the installation process. The installation should take less than a minute.
-
9Launch CrystalDiskInfo. If you just finished installing CrystalDiskInfo, make sure the checkbox is checked for "Launch CrystalDiskInfo" and then click Finish to launch the app. Otherwise, you can double-click the application shortcut on your desktop or in the folder where you installed it.
-
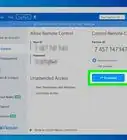
10Select a drive. All disk drives installed on your computer are listed at the top of the app. Click the SSD you want to check the health of and inspect the rating under "Health Status". A good rating will say "Good" followed by a health percentage, where 100% is the best rating possible.
- If the health status says "Caution," your SSD may have corrupted sectors which indicate the drive is old and could be failing.


On Mac
-
1
-
2Click Applications. It's in the left-hand column of the Finder window.
-
3Double-click the Utilities folder. It's the blue folder near the bottom of the page with the image of a screwdriver and wrench on it.
-
4Double-click Disk Utility. It's the app with the icon of a hard drive with a stethoscope. This display information about the disk drives you have installed on your Mac.
-
5Select your SSD drive. All the disk drives you have installed will be listed in the sidebar to the left. Click a drive to select it.
-
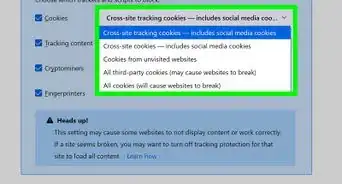
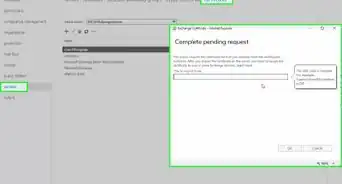
6Click First Aid. It's the tab at the top of the screen that has an icon of a stethoscope. A pop-up will appear asking if you would like to run First Aid on the drive.
-
7Click Run. It's in the lower-right corner of the pop-up window.
-
8Click Continue. If you are running First Aid on your boot disk, the boot volume will be temporarily frozen and other apps won't respond until the operation is completed.
-
9Click Show Details. This will show a report of any problems found on the disk drive. Messages with red text indicate a problem was found with the disk drive. The final message will tell you if the SSD needs to be repaired.
-
10Click Done. It's the blue button in the bottom-right corner of the First Aid summary window. This closes the First Aid pop-up window in the Disk Utility app.


-Step-7.webp)


About This Article