This article was co-authored by wikiHow Staff. Our trained team of editors and researchers validate articles for accuracy and comprehensiveness. wikiHow's Content Management Team carefully monitors the work from our editorial staff to ensure that each article is backed by trusted research and meets our high quality standards.
There are 15 references cited in this article, which can be found at the bottom of the page.
The wikiHow Video Team also followed the article's instructions and verified that they work.
This article has been viewed 16,771 times.
Learn more...
While you might think a coconut shell is best used to hold a cool drink, you can also use it to make beautiful carvings! Coconut carvings are incredibly popular in certain parts of the world, like China and India, and you can use this traditional practice to make lovely decorative pieces. While there are lots of things you can make from a coconut shell, the easiest is a bowl, so we’ll walk you through that process.[1]
Steps
Shell Prep and Sanding
-
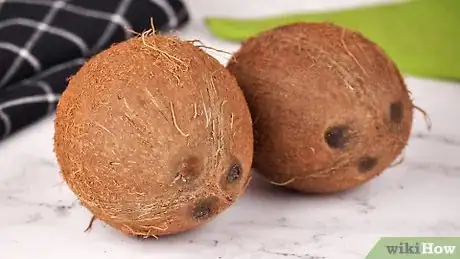
1Pick an unblemished coconut shell with no noticeable cracks. The beautiful thing about using a coconut shell to make a bowl is that you can make a bowl of any size. For a smaller bowl, simply pick a smaller coconut. For a larger bowl, grab a bigger one.[2]
- If there are cracks, they’ll just get larger and more pronounced as you smooth and sand the shell.
-
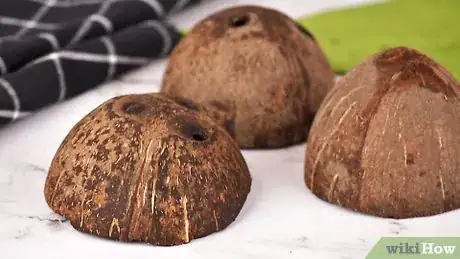
2Drain the liquid from the coconut and split it in half. Grab a bowl, a cutting board, a hammer, and a screwdriver. Tap the screwdriver through the eyes of the coconut and drain the liquid into the bowl. Then, strike the coconut with the hammer all the way around its hemisphere until a crack starts to form. Keep hammering the coconut until the crack is large enough for you to pull the coconut apart.[3]
- The great thing about making bowls is that you can get 2 out of each coconut. One of the halves will have holes in it from where you pierced through the eyes, but you can incorporate those into the bowl's design.
Advertisement -
3Pry the coconut meat away from the shell so the inside is smooth. This sounds harder than it is! Wedge a butter knife between the shell and the coconut meat and wiggle it back and forth until the meat begins to come away from the shell. It might take a while to do the entire coconut, but it’s an essential part of the process.[4]
- Be careful while doing this. Try holding the coconut shell in your non-dominant hand so you can wield the butter knife with more control.
-
4Remove the fibrous exterior of the coconut with 80-grit sandpaper. If possible, attach a sanding flap wheel to a drill to make the process go faster—it can take quite a while to sand the shell down by hand.[5] Make sure to wear a dust mask and gloves while you work![6] If you don’t have a drill and sanding flap wheel, a few other alternatives are listed below for you:
-
5Sand the exterior of the shell by hand to a smooth finish. Hold the shell in a gloved hand so that if the sandpaper slips, it won’t rough up your skin. Since you already used 80-grit sandpaper, move on to something higher, like 100-grit for the first pass-over. Continue using finer and finer grits of sandpaper until ending at 240-grit.[10]
- For example, you could go from 100-grit to 120-grit to 240-grit.
- The goal is to expose the smooth, polished shell beneath the fibrous exterior.
-
6Rub the edge of the shell over 40-grit sandpaper to even it out. The edge of your coconut shell might not be completely even and might have a few jagged sections. Place a piece of 40-grit sandpaper on your workstation, place the shell cut-side-down on it, and rub it back and forth until the edge is smooth to the touch.[11]
- This process makes your bowls look much more professional and polished once they’re done.
Designs and Finishes
-
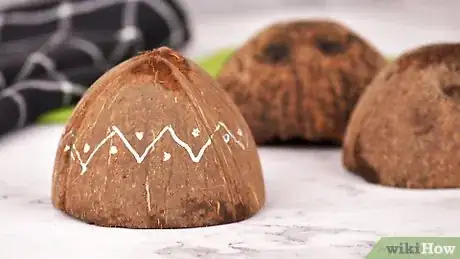
1Sketch your design on the outside of the shell so it’s easy to follow. You can always freestyle your carvings, but if you want something intricate, it’s best to follow an outline. Use a pencil or pen—basically anything that will be visible without permanently marring the shell's surface.[12] You could also print a design on paper and tape it to the outside of the shell. If you do this, take a precision knife and cut the paper away in the spots you want the shell carved. In this way, you make your own stencil.[13]
- Keep in mind that coconut shells are really thin. You may not be able to carve it the same way you might traditionally carve a piece of wood.
- Think about using small holes to create different designs, like swirls, geometric patterns, or even faces or words.
-
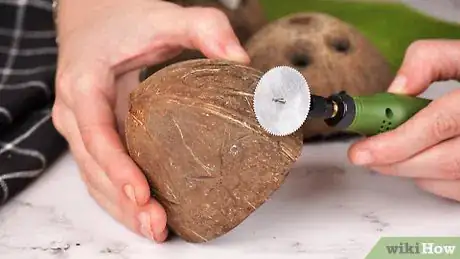
2Use a power drill or dremel to carve your bowl’s design. With a dremel, you can usually carve a design into the shell without going all the way through. Just be conscious of how deep you’re carving, so you don’t accidentally break through. Use a small bit on a drill to make delicate holes through the shell.[14]
- This is the fun part of the carving process! It’s super cool to watch your bowl take on a design and transform before your eyes.
-
3Add decorative elements to the edge of the shells with a file. For example, file a “V” shape into the edge of the shell every 2 to 3 inches (5.1 to 7.6 cm) to resemble flower petals.[15] You can use flat, rounded, circular, or triangular files on a coconut shell.[16]
- Be careful working with metal files. They can be very sharp!
-
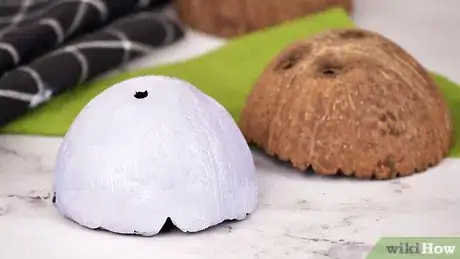
4Paint your bowls with acrylic paint if you want to add color to them. The finish of a coconut shell all on its own is perfectly beautiful, but adding color could give your bowl a whole new look![17]
- Acrylic paint is an excellent choice for coconut shells because it dries quickly.
-
5Polish your carved bowls with beeswax for a natural shine. Put a little beeswax on a clean rag and rub it all over the shell. Reapply wax to the rag when it gets dry, and continue buffing the shell until it has an even shine all over.[18]
- You can reapply beeswax as needed to keep your carved shell looking nice.
-
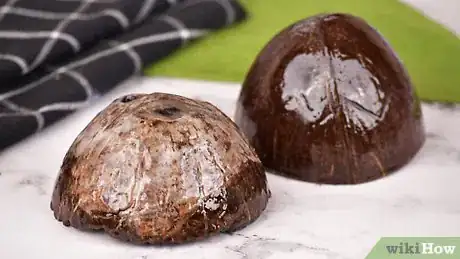
6Apply a coat of varnish if you want your bowls to have a glossy finish. Use a clear varnish if you want the shell’s color to shine through, or use a colored varnish for a deeper shine. Let the varnish dry completely before moving the shell.[19]
- If the shell is to hold food or drink, don’t apply varnish or wax on the inside.
- Always read the instructions on the varnish before using it to make sure you’re applying it properly.
- Do this step in a well-ventilated area. Varnish can produce some pretty strong fumes!
-
7Dry your bowls in the sun until they’re no longer tacky. The heat from the sun will help the wax or varnish dry faster. Once the bowls are no longer sticky or tacky to the touch, you can move them.[20]
- If the weather isn’t cooperating, try putting the shell somewhere warm and dry. Just avoid putting it too close to direct heat so that it doesn’t become a fire hazard.
Warnings
- Be very careful if you use any power tools. Wear goggles to protect your eyes and consider wearing a face mask, too, because of potential dust.[22]⧼thumbs_response⧽
Things You’ll Need
Shell Prep and Sanding
- Coconut
- Bowl
- Cutting board
- Hammer
- Screwdriver
- Butter knife
- Sanding flap wheel
- Drill
- Sandpaper
- Dust mask
- Protective gloves
Designs and Finishes
- Writing utensil
- Power drill
- Dremel
- Precision knife
- Metal files
- Acrylic paint (optional)
- Beeswax
- Varnish
References
- ↑ http://www.craftandartisans.com/coconut-shell-fibre-stem-craft-of-kerala.html
- ↑ http://patricklepetit.jalbum.net/PHATTHALUNG/LIBRARY/Coconut%20Craft.pdf
- ↑ https://youtu.be/oFDePsAqxnI?t=17
- ↑ http://patricklepetit.jalbum.net/PHATTHALUNG/LIBRARY/Coconut%20Craft.pdf
- ↑ https://youtu.be/qR9o9s8ItwA?t=406
- ↑ https://youtu.be/qR9o9s8ItwA?t=416
- ↑ http://patricklepetit.jalbum.net/PHATTHALUNG/LIBRARY/Coconut%20Craft.pdf
- ↑ http://www.craftandartisans.com/coconut-shell-fibre-stem-craft-of-kerala.html
- ↑ https://youtu.be/cp1m60kW7QE?t=89
- ↑ https://youtu.be/qR9o9s8ItwA?t=516
- ↑ https://youtu.be/qR9o9s8ItwA?t=585
- ↑ https://youtu.be/DVfdw1sVqII?t=242
- ↑ https://youtu.be/CW17nvTi6aY?t=20
- ↑ https://youtu.be/z9CTlO3i8pE?t=60
- ↑ https://youtu.be/R1_ANt0teAU?t=62
- ↑ http://patricklepetit.jalbum.net/PHATTHALUNG/LIBRARY/Coconut%20Craft.pdf
- ↑ http://www.dsource.in/resource/coconut-shell-painting-bhubaneshwar-orissa/tools-and-raw-materials
- ↑ http://patricklepetit.jalbum.net/PHATTHALUNG/LIBRARY/Coconut%20Craft.pdf
- ↑ http://patricklepetit.jalbum.net/PHATTHALUNG/LIBRARY/Coconut%20Craft.pdf
- ↑ http://patricklepetit.jalbum.net/PHATTHALUNG/LIBRARY/Coconut%20Craft.pdf
- ↑ https://www.thekitchn.com/how-to-crack-and-open-a-coconut-cooking-lessons-from-the-kitchn-176321
- ↑ https://www.osha.gov/Publications/osha3157.pdf
