wikiHow is a “wiki,” similar to Wikipedia, which means that many of our articles are co-written by multiple authors. To create this article, 40 people, some anonymous, worked to edit and improve it over time.
This article has been viewed 901,783 times.
Learn more...
Sometimes, your WiFi signal just doesn't reach where you want it to reach. You've seen wireless adapters at the store, but they can cost a lot more than you want to spend. We'll show you a way to build a directional WiFi antenna using off-the-shelf parts, no new software, and without opening your computer case. Get a significant signal boost for about $30USD.
Steps
-
1Get a USB Wireless LAN adapter "dongle". This small device, about the size of your thumb, provides WiFi capability to your computer. You will need this even if your computer has integrated wireless.
- For best compatibility, get one that includes the 802.11b and 802.11g standard.
- Check Google Commerce for good prices—simple ones, which are quite effective at close range, cost around $15 to $20USD.
- The shape is important. For cost effectiveness, look for a small thumb-shaped device. Larger "squashed mouse" models (~$50-60USD) are generally more sensitive and powerful. Although they may be harder to mount, they perform better in more demanding setups.
-
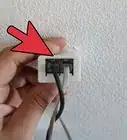
2Get a USB passive extension cable. You want a Type A (male) to Type A (female )cable. (you can find these at the dollar store, your local computer store, or Radio Shack). This will connect the USB WiFi adapter to your computer's USB port.
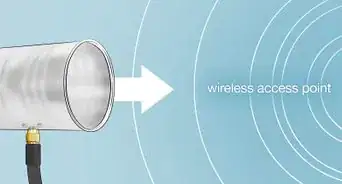
- The antenna is directional, so you'll need to position it so it has a direct line of sight view of the wireless access point. Make sure your cable is long enough to position it where you need, up to a maximum of 15 feet (4.6 m) (5m).
- You can link multiple extension cables together if you need.
- Active USB extenders (~$10USD) allow further cable runs, which may even allow elevated outdoor antenna placement.
Advertisement -
3Get a mesh-covered dish. The easiest to use is an Asian "scoop" cooking utensil (shaped like a wok, but mesh) used to fry things—it's the perfect shape and conveniently comes with a long wooden handle!
- Other options include sieves, steamers, pot lids, and lamp shades—as long as they are dish-shaped and metal. Any parabolic piece of metal mesh will work—bigger means a better signal, but harder to carry around.
- Larger options include discarded DirectTV dishes or mesh covered umbrellas, and although these should give more signal boost, mounting difficulties and wind resistance tend to make about 12 inch (30 cm) (300mm) diameter the most practical.
- Flexible stalk desk lamps allow these to be neatly mounted & positioned.
-
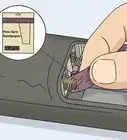
4Assemble the system. Attach the WiFi dongle and USB extension cable in the dish with twist-ties, tape, or hot melt glue.
- You want the dongle at the focal point "hot spot" apex of the dish—radio signals come in and bounce toward the center, a few fingers above the surface of the dish.
- The best dongle location spot can be found by simple experiment. One aiming method involves covering the dish with aluminum foil and watching it reflect sunshine—the spot with the most light is the dish's hot spot.
- You may need a short support stick to get the dongle off the surface of the dish into this position.
- Alternative support methods use string tied across the face of the dish like a spider web, hollowed out plastic garden hose fittings, or even chop sticks!
-
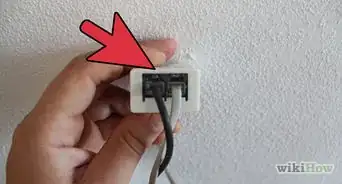
5Plug in your antenna. Insert the male end of the USB extension cable into your computer, and set that as your WiFi card using your network settings.
-
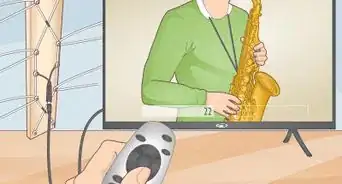
6Aim your dish. Locate the remote WiFi transmitter that you want to access.
- Your WiFi antenna is very directional, so getting the aim right is important. Pointing the dish towards the remote antenna is the best place to start, although stray reflections from buildings etc may sometimes give good signals from unexpected directions.
- You can use an inexpensive hand-held laser pointer to verify that you are aimed right at the wireless transmitter. It's great fun with your cat when you're done surfing the web!
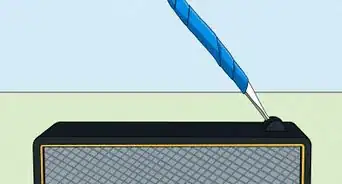
-
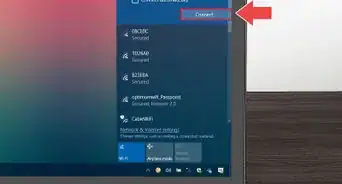
7Fine tune your dish. Once you are connected, tune your dish by adjusting the position of the dongle while watching the signal meter on your computer.
- A program like NetStumbler for Windows or KisMAC for the Macintosh can greatly help by giving you graphical readouts of signal strengths.
- Compared with inbuilt WiFi adapters, which are usually down at desk level and can easily be screened by metal walls, partitions, vegetation, or your body, even a simple elevated "woki" setup like this can boost signals and extend ranges enormously!


Community Q&A
-
QuestionCan I use a satellite dish?
 Community AnswerYes, you can.
 -
QuestionWill it require a password?
 Community AnswerThe antenna merely amplifies the WiFi signal, it will still require an existing wireless Internet access point.
 -
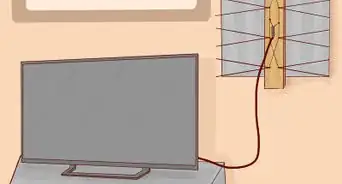
QuestionCan I send a WiFi signal directly to my TV with this antenna?
 Community AnswerYes, I believe it will work if your TV has a USB port and you know how to connect your TV to different WiFi signals.
Warnings
- Using "borrowed" bandwidth may by frowned on by the provider.⧼thumbs_response⧽
- Some WLANs may be password-protected.⧼thumbs_response⧽
Things You'll Need
- USB Wifi adapter
- USB extension cable (A to A, Male to Female).
- Dish-shaped metal cookware—experiment!
- Twist-ties, tape, or hot melt glue etc.
- A short stick support or plastic garden hose fitting.
- Optional: Signal auditing program on your computer


About This Article
To build a low-cost WiFi antenna, you'll need a USB WiFi adapter, a USB extension cable, and a dish-shaped piece of metal cookware. First, connect the USB WiFi adapter and USB extension cable. Then, attach them to the inside of the metal cookware using twist-ties, tape, or hot glue. Next, plug the antenna into your computer using the extension cable. Finally, aim the antenna at a remote WiFi transmitter. For tips on how to fine tune the antenna once you're connected, scroll down!