This article was co-authored by wikiHow Staff. Our trained team of editors and researchers validate articles for accuracy and comprehensiveness. wikiHow's Content Management Team carefully monitors the work from our editorial staff to ensure that each article is backed by trusted research and meets our high quality standards.
There are 17 references cited in this article, which can be found at the bottom of the page.
This article has been viewed 205,515 times.
Learn more...
Why drop big bucks on a new desk for your home office when you could build one yourself? Making a basic, functional desk is a relatively simple project that anyone can pull off with little or no furniture crafting experience. First, measure your workspace and decide on a practical size for your desk. Then, purchase your wood and other supplies and cut the boards to the appropriate dimensions to serve as your desktop and legs. Finally, paint or stain your components as desired and put them together using wood screws to ensure that your finished desk is sturdy, stable, and built to last.
Steps
Fashioning the Desktop
-
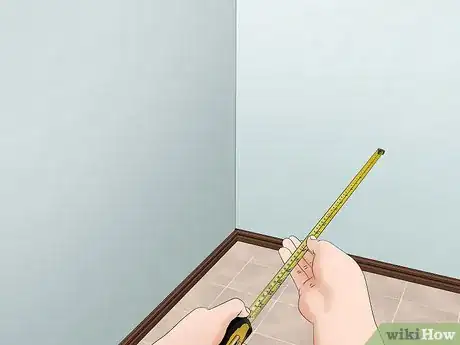
1Measure the area where you’ll be putting your desk. Once you’ve determined where your new desk will go, stretch a tape measure from one end of your workspace to the other. Write down or make a mental note of the measurements you get. You’ll need to keep them in mind while gathering your materials and planning the dimensions of your desk.[1]
- If you don’t think you have enough room for a full-sized desk, consider installing a floating desk along the wall of your workspace. Floating desks can be as small as 1.5 feet (0.46 m) x 3 feet (0.91 m), and often require only 1-2 pieces of wood.
-
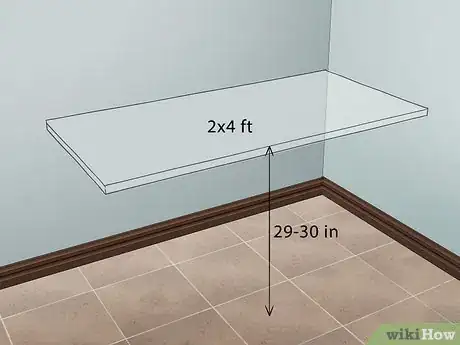
2Decide on a practical size for your desk. If you have roughly 5 square feet (0.46 m2) of space to work with, you might make a desk that’s 2 feet (0.61 m) long by 4 feet (1.2 m) wide to ensure that you’ll have plenty of room. Of course, you’re free to play around with the dimensions of your desk however you see fit. Don’t forget to account for the space that your chair or stool will occupy when settling on a size for your desk.
- Most standard desks are around 29–30 inches (74–76 cm) high. Internal dimensions vary, but some of the more common lengths include 48 in (120 cm), 60 in (150 cm), and 72 in (180 cm), with widths of 24 in (61 cm), 30 in (76 cm), and 36 in (91 cm).[3]
- To keep things simple, round off the planned measurements for your desk to the nearest 1⁄2 foot (0.15 m). This will make all the measuring, marking, and cutting much easier.
Tip: Think about whether you want your desk to take up all of your available space or whether you’d like to leave room for other items, such as a separate filing cabinet or multimedia station.[2]
Advertisement -
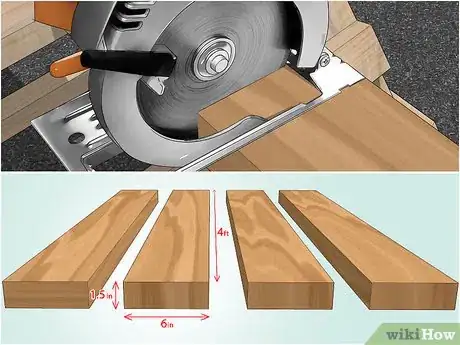
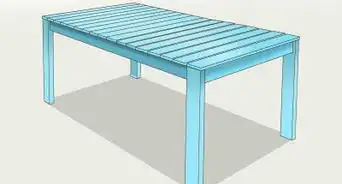
3Cut your wood to the appropriate dimensions. It’s possible to construct a basic desk entirely out of 2x6 and/or 2x4 boards. Mark your chosen measurements on your boards in pencil and use a circular saw or miter saw to trim them to size. For a 2 ft (0.61 m) x 4 ft (1.2 m) desk, you would simply cut two 8 ft (2.4 m) 2x6 boards in half lengthwise to get four pieces that you can then assemble into a single plane.[4]
- You’ll be clamping multiple boards together to fashion the desktop, so be sure to shave off any rounded edges on the boards that will go in the middle section. Setting the adjustable blade guard on your saw will make this task easier.
- If you don’t want to bother with a lot of cutting and clamping, another option is to buy a solid door slab or sheet of laminated 3⁄4 in (1.9 cm) plywood and use it as a readymade one-piece desktop.[5]
-
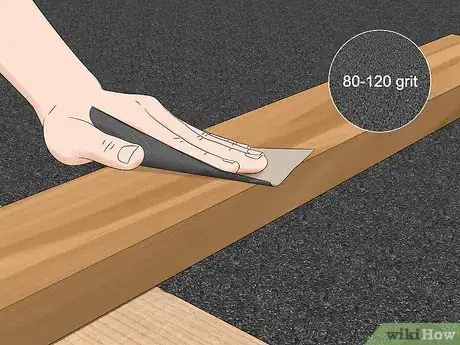
4Sand the wood thoroughly to prepare it for paint or stain. Once you’ve finished cutting your boards, run a sheet of medium- or high-grit sandpaper (80-120-grit will provide the best results) over the faces and edges of each piece using smooth circular motions. The idea is to scuff up the surface of the wood so it will better accept paint or stain.[6]
- An automated finishing sander can save you quite a bit of time and energy compared to manual sanding.
- If you’d prefer to leave your wood unfinished for more of a contemporary rustic look, you can skip straight to gluing the boards together.
-
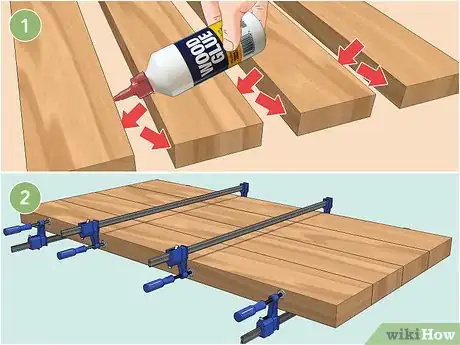
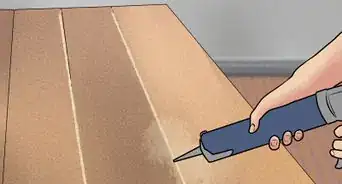
5Glue your boards together end-to-end widthwise into a single piece. Apply a straight, even line of glue to the cut edge of your first board, leaving the rounded edge clean. Then, press one of the cut edges of the next board into place and spread another line of glue onto the far edge. Continue in this fashion until you have each of your boards properly situated. Use a series of clamps (you’ll need at least 2) to hold the boards tightly together as the glue begins to dry.[7]
- Wipe off any excess glue that seeps out through the cracks in the boards right away to prevent it from hardening on the surface of the wood.
- Allow the glue to dry for at least 1 hour before unclamping the boards and proceeding with your project.[8]
-
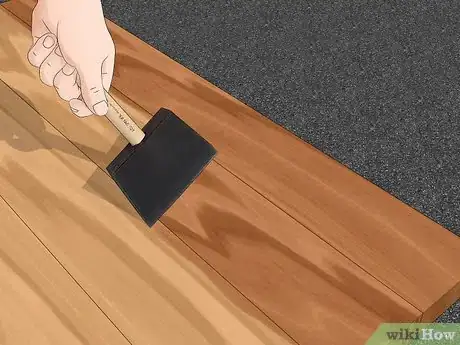
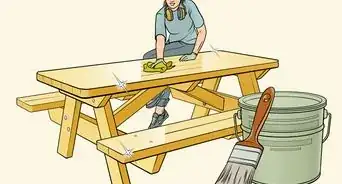
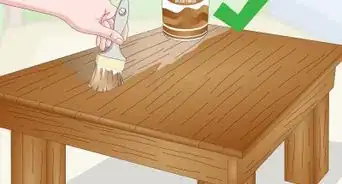
6Paint or stain your desktop. After the glue has had time to dry completely, apply 2-3 coats of paint or stain in the shade of your choice to your desktop. To achieve full coverage, brush or wipe on your color both with and against the pattern of the wood grain. Let each coat of paint or stain dry to the touch before applying follow-up coats.[9]
- Add stain one layer at a time until you get the desired depth of color, wiping off the excess pigment between coats.[10]
- When you’re satisfied with the appearance of your newly-finished desktop, allow it to dry for at least 24 hours.
Attaching the Legs
-
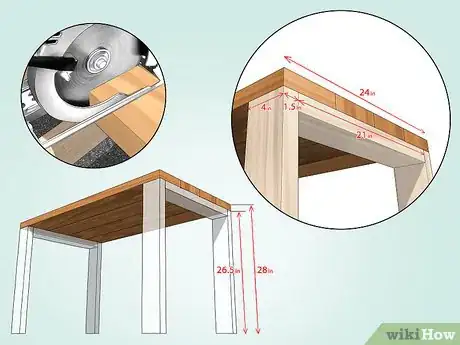
1Cut your own custom desk legs using 2x4 boards. Start by sawing a 2x4 board into 2 pieces that are the same width as your desktop, minus the width of the two legs that will go on either side. These pieces will serve as supports to brace the desk from beneath. Once you’ve done this, cut your remaining wood into 4 identical legs. Their length should correspond to the desired height of your desk, minus the width of the boards making up the desktop.[11]
- Note that 2x4 boards are actually only 1.5 inches (3.8 cm) thick, not a full 2 inches (5.1 cm). This means that if your desktop is 24 inches (61 cm) wide, each of your support pieces will need to be 21 inches (53 cm) to allow enough room for a leg on either side.
- Similarly, you’ll need to subtract 1.5 inches (3.8 cm) from your initial table leg measurements to reflect the thickness of the desktop—you want your desk to sit 28 inches (71 cm) off of the ground, for example, each of your legs will need to be 26.5 inches (67 cm) long.
- Paint or stain your table legs to match your desktop, or leave them unfinished to provide some visual contrast.
-
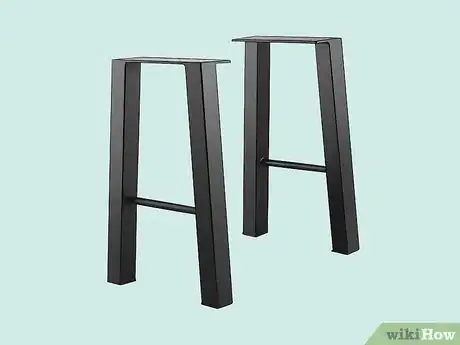
2Purchase premade desk legs to give your desk a more polished look. You can find premade desk and table legs at most hardware stores and home improvement centers, as well as certain specialty furniture stores like IKEA. They’re available in a variety of lengths, shapes, and materials, which means you’re sure to find the perfect set to complete the style of desk you’ve envisioned.[12]
- Metal legs, for instance, could give a lightly-stained wooden desk a sleek, minimalistic modern air, while square frames can keep the underside of a desk from looking so open without sacrificing valuable storage space.[13]
Tip: Extendable desk legs make it possible to convert an ordinary desk into a standing desk in just a few seconds.
-
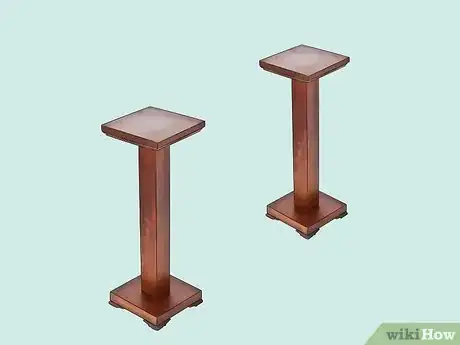
3Use other items as improvised legs for a thrifty and unique approach. Keep in mind that you’re not limited to simple 2x4 or premade legs. You might also turn a few old wooden pedestals into one-of-a-kind decorative stands to lend your desk added personality, or even just secure your desktop to a pair of sawhorses for a clever, no-fuss solution. The possibilities are virtually endless![14]
- Think outside the box and keep your eyes peeled for interesting materials and objects that you think might make good legs for a homemade desk.
- Examples of other unusual items you could utilize as legs include plywood sheeting, bamboo, industrial pipe, telescopic metal poles, or even modified wooden crates or pallets.[15]
-
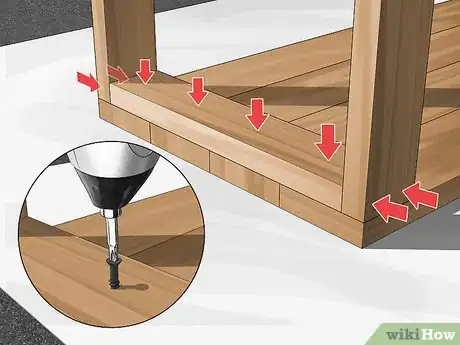
4Attach your desk legs to the bottom of your desktop using wood screws. To fasten legs cut from 2x4 boards, drill 2 screws through the outer edge of each leg and into the end of the central support piece on each side of the desk. Then, sink another screw every 7 inches (18 cm) along the length of the support. Jostle your desk gently when you’re finished to confirm that it’s stable.[16]
- Store-bought desk legs typically have screw holes molded into the ends to make the assembly process a cinch.
- You may need to get creative when it comes to putting on legs made from converted or salvaged materials, depending on the general shape and configuration of the pieces.
Incorporating Additional Features
-
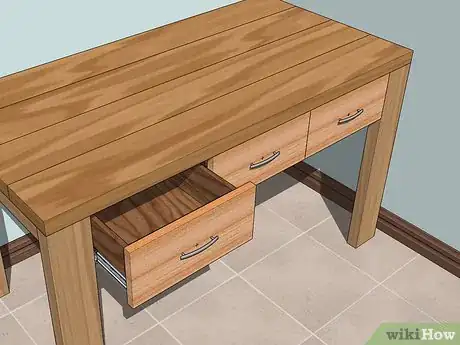
1Buy or build drawers to keep your work materials organized. A few pull-out drawers can come in handy for stashing things like documents, devices, and spare office supplies. To add drawers to your desk, it will first be necessary to install slide hardware or a separate wooden frames along the underside of the desktop, then guide your drawers into position inside the slots.[17]
- Make sure the drawers you use are a suitable size for your desk’s overall dimensions.
- Antique stores and thrift shops are good place to hunt for old furniture containing drawers that you might be able to transplant into your homemade desk.
-
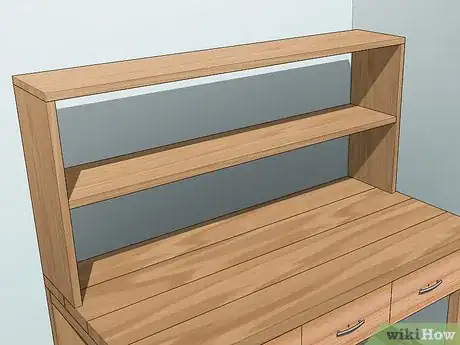
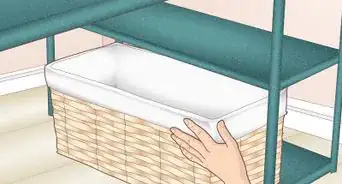
2Substitute other furniture items to maximize your storage potential. For some people, a couple sliding drawers just won’t cut it. If you need to create as much built-in storage space as possible, one thing you can do is forego legs altogether in favor of supports that double as their own storage solutions, such as bookshelves, metal racks, or filing cabinets. Just align your items with the edges of your desktop, screw or bolt it on, and get to work!
- Choose storage pieces that are approximately the same height that you want your desk to be.
- If you like, you could even cut legs for one side of your desk and place a cabinet or shelf on the opposite side to get the best of both worlds.
Warning: Avoid mixing-and-matching end pieces unless they’re exactly the same size. Otherwise, you may end up with a desktop that’s off-level.
-
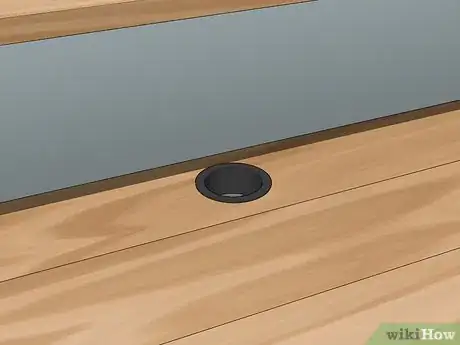
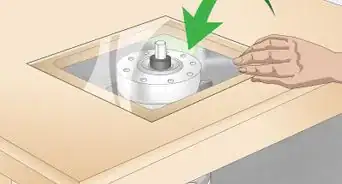
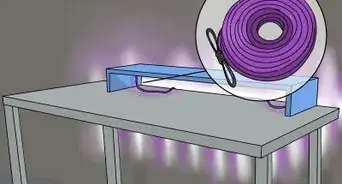
3Add a hole to the back of the desk to hide your devices’ electrical cords. Fit your drill with a hole saw attachment and use it to make an opening in an inconspicuous spot along the desk’s rear edge. Slip a plastic grommet of the same size into the hole to cover the exposed edges of the wood, then thread the cables for your computer, keyboard, printer, scanner, and other electronic equipment through the hole to keep them bundled together out of sight.[18]
- Creating a hidden cord hole can be a good way to keep all those pesky wires and cables organized and out of the way, especially if you plan on positioning your desk flush against the wall of your work space.
- Hole saws come in a variety of diameters, ranging from less than 1 in (2.5 cm) to 6 inches (15 cm). Use the size that you think will work best to contain all of the cords for your various devices.[19]
-
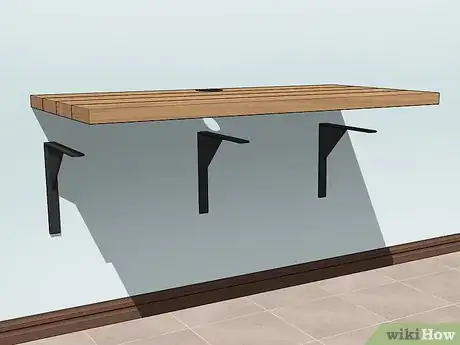
4Mount your desktop on the wall to make a floating desk. A minimalistic floating desk can make a savvy and attractive alternative to a traditional leg-supported desk if storage isn’t a major concern. Simply attach a pair of brackets to your wall at the desired height and fasten your desktop to the brackets. You can use all the time you save to catch up on all those unanswered emails you have sitting in your inbox.[20]
- Floating desks can make for tidier workspaces, as they enable easy cleaning and leave the floor open for separate storage solutions or additional furniture or accessories.
- Mount your desk at around chest height to make a standing desk that also functions as an inconspicuous shelf when you’re not working.
-
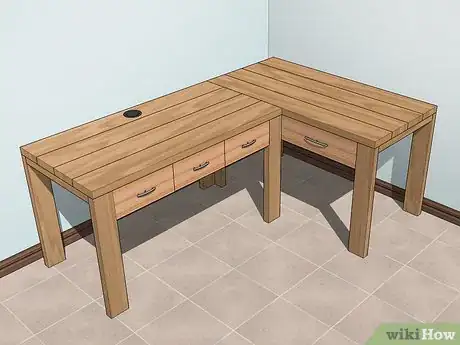
5Make an L-shaped desk to double your work area. Putting together an L-shaped desk is as simple as cutting, sanding, and painting a second desktop and securing it perpendicularly to one of the edges of the first. The add-on only requires slightly more work, but can end up offering you twice the amount of space (or more), which can be a big benefit if you’re an artist, avid crafter, or just really, really busy.[21]
- To avoid complicating things, use the same type of wood for both sections of your L-shaped desk.
- Remember that you’ll need to attach 2 additional legs or another rack, shelf, or cabinet to support the extension.
wikiHow Video: How to Build a Desk
Warnings
- Exercise caution anytime you're working with power saws and other potentially dangerous equipment.⧼thumbs_response⧽
Things You’ll Need
Fashioning the Desktop
- Measuring tape
- Pencil and paper
- 2x6 boards
- Circular, table, or miter saw
- 80-120-grit sandpaper
- Wood glue
- Table clamps
- Paint or stain
- Paintbrush
- Automated finishing sander (optional)
- Door slab or laminated plywood (optional—for one-piece desktop)
- Disposable rag (optional—for stain)
Attaching the Legs
- Tape measure
- Pencil
- 2x4 boards
- Circular saw
- Power drill
- Wood screws
- Premade desk legs (optional)
- Other assorted objects and materials (optional—for improvised legs)
Incorporating Additional Features
- Drawers
- Various storage solutions
- Sliding drawer hardware (optional)
- Scrap wood (optional—for drawers and drawer frames)
- Hole saw attachment (optional)
- Wall brackets (optional—for floating desks)
References
- ↑ https://www.houseplanshelper.com/desk-dimensions.html
- ↑ https://donpedrobrooklyn.com/diy-computer-desk/
- ↑ https://www.forbes.com/sites/houzz/2016/12/16/10-things-your-home-office-needs-and-how-to-fit-it-all-in/#61055af57f0a
- ↑ https://www.tds-office.com/diy-desk-office-desk/
- ↑ https://www.popsci.com/build-custom-computer-desk
- ↑ https://www.bobvila.com/articles/30124-dream-it-do-it-how-to-paint-wood-furniture/
- ↑ https://www.familyhandyman.com/woodworking/wood-joints/edge-gluing-boards/
- ↑ https://www.woodmagazine.com/materials-guide/adhesives/zimmerman
- ↑ https://www.theweathereddoor.com/2017/01/how-to-paint-and-stain-furniture-with-videos.html
- ↑ https://www.youtube.com/watch?v=kUW3QVHgIDg&feature=youtu.be&t=155
- ↑ https://www.tds-office.com/diy-desk-office-desk/
- ↑ https://www.popsci.com/build-custom-computer-desk#page-4
- ↑ https://donpedrobrooklyn.com/diy-computer-desk/
- ↑ https://www.bobvila.com/slideshow/15-easy-designs-for-a-diy-desk-48527#diy-pedestal-leg-desk
- ↑ https://donpedrobrooklyn.com/diy-computer-desk/
- ↑ https://www.tds-office.com/diy-desk-office-desk/
- ↑ https://www.apartmenttherapy.com/how-to-add-a-drawer-to-a-flat-top-desk-166039
- ↑ https://thediyplaybook.com/2014/05/drill-hole-for-cords.html
- ↑ https://www.familyhandyman.com/tools/saws/how-to-properly-use-a-hole-saw/
- ↑ https://www.diys.com/wall-mounted-desks/
- ↑ https://www.thehandymansdaughter.com/15-diy-desk-plans/
About This Article
Building a desk from scratch is a fun and affordable alternative to buying a premade desk. To get started, measure the area where you’d like your desk to be so you know how big to make it. For instance, you might decide to make your desk 4 ft (1.2 m) long and 2 ft (.61 m) wide by 30 in (76 cm) high. Once you’ve decided on your dimensions, measure and cut some planks to the right size to make the desktop. For a 4 ft (1.2 m) by 2 ft (.6 m) desk, you’d just need to cut a pair of 8 ft (2.4 m) by 6 in (15 cm) boards in half lengthwise. To ensure that your desk has a nice sturdy top, choose boards that are at least 2 in (5.1 cm) thick. After cutting the boards, sand them thoroughly using medium to high-grit sandpaper, which will make it easier to paint or stain the boards after your desktop is built. Lay the boards down side-by-side so the long edges are parallel to each other, then apply a line of wood glue to each of the inner edges where the boards meet. Use at least 2 wide clamps to squeeze the boards together and help the glue set. If any excess glue seeps out between the cracks, wipe it away with a clean cloth so it doesn’t harden on top of the wood. Let the glue set for at least an hour before you remove the clamps. Once the glue is fully cured, which usually takes about 24 hours, you can stain or paint the desktop however you like. You may need to use 2 to 3 coats of stain or paint to get the amount of coverage you want. Once the paint or stain is dry , it’s time to add the legs. Saw a 2 by 4-inch (5 by 10 cm) board into 2 pieces the same width as your desktop, minus the width of the legs. These boards will act as braces to help support the legs. Next, cut another board into 4 legs of the desired length, minus the height of the desktop. For instance, if you want a desk that’s 30 in (76 cm) high, cut the leg pieces 28 in (71 cm) long. Sand the legs and brace pieces down and paint or stain them to match your desk, or use a contrasting color if you prefer. After the paint dries, attach the support braces to the underside of the desk on each end using screws. As a rule of thumb, try to drive a screw in every 7 inches (18 cm) or so along the length of the brace. Then, hold the legs in place and attach them to the ends of the braces using 2 screws each. Now you have a basic, handmade desk. If you like, you can always enhance your desk by adding other features, such as shelves, sliding drawers, or a hole to hide cords for your computer or other electronics.





-Step-9.webp)


