This article was co-authored by Anthony "TC" Williams. Anthony "TC" Williams is a Professional Landscaper in Idaho. He is the President and Founder of Aqua Conservation Landscape & Irrigation, an Idaho Registered Landscape Business Entity. With over 21 years of landscaping experience, TC has worked on projects such as the Idaho Botanical Garden in Boise, Idaho. He is a Idaho Registered Contractor and a previously Licensed Irrigator in the State of Texas.
wikiHow marks an article as reader-approved once it receives enough positive feedback. In this case, 88% of readers who voted found the article helpful, earning it our reader-approved status.
This article has been viewed 475,213 times.
Once carpenters were judged by how skilled they were by the projects they had worked on, the tools in their tool boxes and by their ability to build steps. Despite the skill level, building porch steps is still within the capabilities of the average do-it-yourselfer.
Steps

Building the Porch Steps
-
1Calculate the run of the steps (how long they will be). Also, check local codes for specifications regarding handrail requirements and permitting.[2]
-
2Measure from the bottom of the level to the ground using a 4-foot (1.2 m) level set on the top of the porch.
- Take the total height and divide it by the height of the riser. This tells you the number of steps you will need.
- Remember that the riser height averages between 6 and 8 inches (15.2 to 20.3 cm) high. As an example, a height of 35 inches (88.9 cm) divided by a 7-inch (17.8 cm) riser will result in 5 equal steps.
- Don't forget to consider the blocking or apron at the bottom of the stairs to support the stairs.
-
3Multiply 5 steps by 10.5 inches (26.7 cm). That will give you the run (or length) of steps from the face of the porch to the end of the steps. In this case, the run is 52.5 inches (1.33 m).
-
4Lay out the steps to be cut from the stringer using a carpenter's square.[3]
- Have the square set up by clamping a straight edge at the 7-inch (17.8 cm) mark on the short outside section of the square.
- The long outside section of the square, at that point, will be at the 10.5-inch (26.7 cm) mark.
-
5Place the square along the edge of the stringer and mark out the 5 steps beginning at the end.
-
6Use a circular saw to cut out the steps and square up the ends of the stringer to the steps. Double check all of your measurements carefully and make sure they are clearly visible, and then use the saw. Note that you will not cut all the way through with the circular saw. Finish the cut with a hand saw or jigsaw.
-
7Take the first stringer you cut out and use it as a pattern. Now, mark out the other stringers you need.[4] The spacing of the stringers should not be more than 16-inches (40.6 cm) apart for strength. You would need 4 stringers on a 4-foot-wide (1.2 m) stair.
-
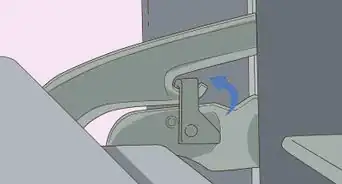
8Attach the stringers to the porch using metal stringer hangers and 1.5-inch (3.8 cm) deck screws.[5]
- Check to make sure that they are plumb and level to each other as you go.
- The bottoms of the stringers need to be sitting on a concrete pad or brick base and not on bare ground.
-
9Connect the riser board (cut to the length and width needed) using 2.5-inch (6.4 cm) deck screws.
-
10Install the 2 x 6-inch (5.1 X 15.2 cm) treads (again cut to length) parallel to each other with 1/8 inch (3 mm) spacing between the boards.
-
11Attach the treads to the stringers using 2.5-inch (6.4 cm) deck screws.[6]
-
12Finish it with waterproof deck stain or exterior porch paint.


Community Q&A
-
QuestionCan I buy a pre-cut kit?
 Community AnswerYes, most big-box hardware stores carry these.
Warnings
- Always use a dust mask and safety glasses when cutting treated wood.[7]⧼thumbs_response⧽
Things You'll Need
- 4 foot (1.2 m) level
- Tape measure
- Electric or battery operated drill
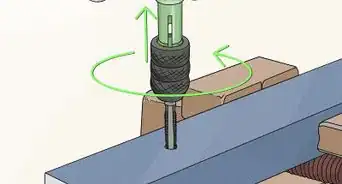
- 1/8 inch (3 mm) drill bit for pilot holes
- Hammer
- Circular saw
- Hand saw or jigsaw
- Carpenter's square
- Spring clamps
- Metal or wooden yardstick for a straight edge
- 1.5 inch (3.8 cm) deck screws
- 2.5 inch (6.4 cm) deck screws
- Concrete drill bit
- 2 inch (5.2 cm) Concrete nails
- 2 x 12 inch (5.1 x 30.5 cm) treated lumber for stringers
- 2 x 6 inch (5.2 x 15.3 cm) treated lumber for treads
- 1 x 6 or 1 x 8 inch (2.5 x 15.2 or 2.5 x 20.32 cm) cedar boards for risers and/or toe boards
- Waterproof deck stain or porch enamel
- Concrete blocks


References
- ↑ https://www.popularmechanics.com/home/how-to-plans/how-to/a2145/4224738/
- ↑ https://www.popularmechanics.com/home/how-to-plans/how-to/a2145/4224738/
- ↑ https://www.front-porch-ideas-and-more.com/how-to-build-steps.html
- ↑ https://www.todayshomeowner.com/video/building-deck-stairs/
- ↑ https://www.front-porch-ideas-and-more.com/how-to-build-steps.html
- ↑ https://www.thisoldhouse.com/how-to/how-to-build-deck-stairs
- ↑ https://www.popularmechanics.com/home/outdoor-projects/how-to/a3103/your-guide-to-working-with-pressure-treated-lumber-15655848/
- http://www.thisoldhouse.com/toh/video/0,,20046225,00.html
About This Article

If you want to build porch steps, measure from the top of the porch to the ground, then take the total height and divide it by the riser, which is usually between 6 and 8 inches. For example, divide 35 inches by a 7 inch riser to get 5 steps. Next, mark the steps on your stringers, cut out the steps with a saw, and attach the stringers to your porch. Connect the riser boards and treads, then finish your steps with a waterproof deck stain. To find out more about the parts of a set of steps, including what the run and stringers are, keep reading!