This article was co-authored by Yuka Arora. Yuka Arora is a self-taught makeup artist who specializes in abstract eye art. She has been experimenting with makeup art for over 5 years, and has amassed over 5.6K Instagram followers in just 5 months. Her colorful and abstract looks have been noticed by Jeffree Star Cosmetics, Kat Von D Beauty, Sephora Collection, among others.
wikiHow marks an article as reader-approved once it receives enough positive feedback. In this case, 90% of readers who voted found the article helpful, earning it our reader-approved status.
This article has been viewed 195,685 times.
If you're a little unsure how to use the makeup application technique called “baking,” don't worry. From contouring to strobing to highlighting, keeping up with all of the latest trends used by beauty gurus is difficult. Fortunately, baking your makeup isn't difficult – and it can give you the flawless look you want. With a little bit of time and some translucent powder, you can bake your makeup just like the pros.
Steps
Prepping Your Face and Eyes
-
1Apply your liquid foundation. If you use an all-over liquid foundation as part of your makeup routine, you should apply this before beginning the baking process. Do not apply any sort of powder foundation. Baking will only set any liquid products on your face. Use your liquid foundation to even out your skin tone, creating a smooth base.[1]
-
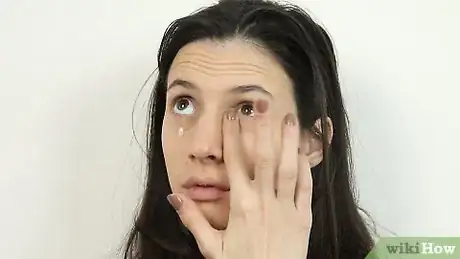
2Moisturize under your eyes. Use a hydrating eye cream or serum, which you can find at beauty supply stores or your local pharmacy. By applying this, you'll hydrate the delicate skin underneath your eyes, prepping them for makeup application. If you struggle with dark circles or bags under your eyes, a good eye product will help make your eyes look brighter and more awake.[2]
- Applying an eye cream or serum will also help to firm up your skin and smooth out any lines or wrinkles, which can cause makeup to crease up and look very unnatural.
- Gently dab the eye cream underneath your eyes and allow it to absorb into your skin for a couple of minutes.
Advertisement -
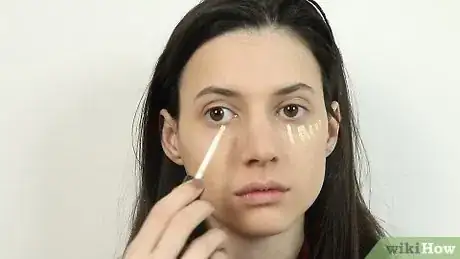
3Dab concealer under your eyes. After the eye cream has fully absorbed into your skin, it's time to begin applying makeup. To bake your makeup, it's great to use a thick, full-coverage concealer. If you already have a go-to favorite, you can use that. Using your finger or a concealer brush, begin dotting the concealer underneath your eyes.[3]
- Rather than bringing the concealer all the way up to your eye, start a couple of centimeters underneath your eye.
- Apply the concealer underneath your eye, along the apples of your cheeks, and upwards toward your temple.[4]
-
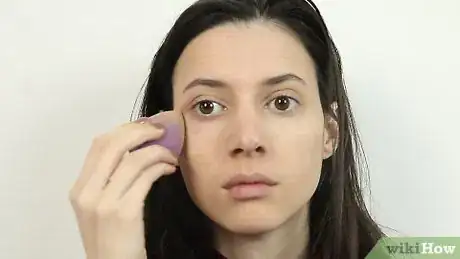
4Blend your concealer. First, dampen a makeup sponge or Beautyblender. Then, use quick patting motions to blend out your concealer. As you blend, bring the concealer up to your eye. By applying it this way, you will get lighter and more natural looking coverage closest to your eye.[5]
- You can purchase a Beauty blender online or at a beauty supply store, but most drug stores offer generic versions of the foam, tear-dropped shape makeup sponge.
-
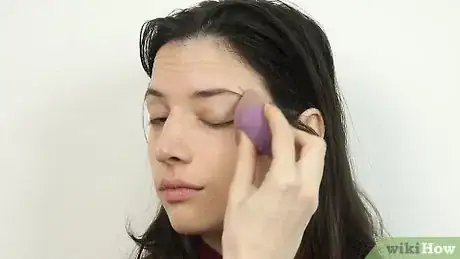
5Repeat this process with a second coat of concealer. A second coat can help to lock in the first coat, ensuring full-coverage all day.[6] This time, don't apply the concealer as heavily. Gently apply it with a concealer brush or your fingertip, again leaving a tiny bit of space between the concealer and your eye. Grab your damp makeup sponge and blend it out once again.[7]
-
6Apply concealer to any other parts of your face. While the skin under your eyes is typically the central focus of “baking,” you can and should apply concealer to any other area where you want a bright, flawless finish. Put concealer on your chin, the center of the forehead, the bridge of your nose, and underneath the hollows of your cheeks.
- These are the “highlight” areas, and you can add dimension to your face by baking these areas as well.
Baking Your Makeup
-
1Dust on translucent powder. Translucent powders are color-free and are used to set makeup. They even out your makeup and make sure that it will stay put through long days and nights.[8] You can purchase a translucent powder at your local drugstore or beauty supply store.[9]
- Using a blending brush, lightly apply the translucent powder everywhere that you applied concealer. Use minimal powder – just enough to set your makeup into place.
-
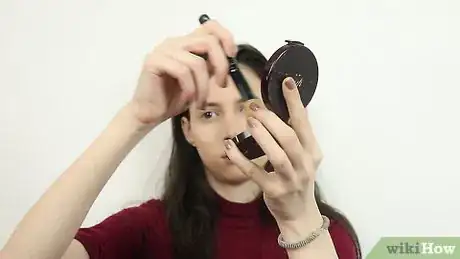
2Pack on loose powder generously. This is the step that is referred to as “baking,” although the application of the concealer is just as important. You can use your blending brush, your damp makeup sponge, or a clean makeup sponge or wedge. Spray your applicator of choice with a bit of makeup setting spray.
- Dip the brush, sponge, or wedge into the same translucent powder you used previously. Apply it thickly under your eyes, as well as any other areas of your face where you applied concealer.
- Apply the translucent powder extremely generously to underneath your eyes, as well as the concealer on your chin, under the hollows of your cheeks, the bridge of your nose, and your forehead.
- Continue dipping the brush into the translucent powder to pack plenty of product over your concealer.
-
3Allow the translucent powder to sit. After you're done applying the translucent powder, you will look silly. Don't worry – that's simply part of the baking process! It should look thick and clownish as it “bakes.” The translucent powder allows the heat from your face to set your liquid foundation and concealer firmly into place, so give it about five or ten minutes to bake fully.[10]
Finishing Your Look
-
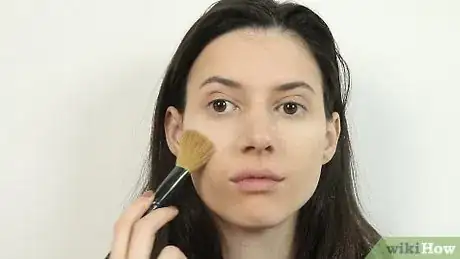
1Dip a brush in your favorite powder foundation. You can use the blending brush that you used to apply the translucent powder. Swirl your brush into the powder, and tap off any excess product. Don't worry, this powder will not be applied as generously as the translucent powder.[11]
-
2Dust away the translucent powder. Using the brush with foundation, brush away the translucent powder in light, gentle strokes. Do this to all of the areas you “baked”: under your eyes, your chin, underneath your cheek hollows, and your forehead. As you brush away the packed on translucent powder, the foundation on the brush will give you a little bit of extra coverage.[12]
- As you brush away the translucent powder, you will reveal smooth, even skin.
-
3Blend any harsh edges. After you've brushed away the excess translucent powder, double check that there are no harsh, unnatural edges anywhere on your face. If there are, use your blending brush and a bit of your powder foundation to correct this. Use a light hand to gently blend out any uneven spots without removing any product.[13]
Expert Q&A
-
QuestionWhat does baking your face do?
 Yuka AroraYuka Arora is a self-taught makeup artist who specializes in abstract eye art. She has been experimenting with makeup art for over 5 years, and has amassed over 5.6K Instagram followers in just 5 months. Her colorful and abstract looks have been noticed by Jeffree Star Cosmetics, Kat Von D Beauty, Sephora Collection, among others.
Makeup Artist Baking your makeup makes it last longer and gives you a flawless-looking complexion. The longer you let the powder sit on your skin, the longer your makeup has to sink into your skin and create a barrier. After your face "bakes," simply dust off the excess powder.
 -
QuestionI'm new to makeup. What the complete steps of makeup? YouTube tutorials are really confusing.
 Cecilia FloresTop AnswererWash your face and moisturize. Primer all over your face (and eye shadow primer if you want to do eye shadow). Foundation/BB cream/CC cream. Concealer only where you need it. Set your face with powder. Do you eye shadow, eyeliner, and mascara (if you want). Bronzer. Blush. Highlight. Lipstick. You don't need contour, falsies, or super-heavy foundation. That stuff is good for being on camera or in movies/videos, but too much and overdone in real life. You also don't need eye shadow, but liner and mascara is strongly recommended.
 -
QuestionIs it common to bake my concealer then begin to contour? And is it still necessary to use setting spray after baking? I have super oily skin.
 Cecilia FloresTop AnswererIt is common to bake then contour, but you don't have to bake to make your makeup flawless! Setting spray has nothing to do with how oily skin is, it's to prolong the wear of you makeup. There are different kinds of setting sprays as well. There are moisturizing (moisturizes as well as sets), dewy (has a dewy finish as well as sets), and mattifying (has a matte finish as well as sets). There are probably more, but those are the main three I've seen.
Things You'll Need
- Liquid foundation
- Moisturizing eye cream or serum
- Concealer
- Concealer brush (optional)
- Makeup sponge or Beautyblender
- Blending brush
- Translucent powder
- Powder foundation
References
- ↑ http://www.cosmopolitan.com/style-beauty/beauty/a42810/how-to-bake-your-makeup/
- ↑ https://www.youtube.com/watch?time_continue=61&v=_EgD31_XcSE
- ↑ https://www.youtube.com/watch?v=_EgD31_XcSE
- ↑ http://www.cosmopolitan.com/style-beauty/beauty/a42810/how-to-bake-your-makeup/
- ↑ https://www.youtube.com/watch?v=_EgD31_XcSE
- ↑ http://www.cosmopolitan.com/style-beauty/beauty/a42810/how-to-bake-your-makeup/
- ↑ https://www.youtube.com/watch?v=_EgD31_XcSE
- ↑ https://www.beautylish.com/a/vxqmv/six-ways-to-use-translucent-powder
- ↑ https://www.youtube.com/watch?v=_EgD31_XcSE
About This Article
To bake your makeup, start by applying two layers of concealer under your eyes or to cover blemishes. Next, apply translucent powder on the area very generously and allow it to sit for at least 5 minutes. Then dip a brush into powder foundation and use this brush to dust away the translucent powder. To finish, blend away any harsh make-up lines with a foundation brush for a smooth, even look. If you want to learn how to apply concealer to other blemishes on your face, keep reading the article!
