This article was co-authored by Mia Rubie. Mia Rubie is a Nail Artist and the Owner of Sparkle San Francisco, a nail studio based in San Francisco, California. She has over eight years of nail artist and management experience and is known for her push-the-envelope designs and artistic eye for colors. Her clients include Sephora, Target, and Vogue. Her work has been featured in the San Francisco Chronicle and StyleCaster. She holds a BBA focusing on Entrepreneurial and Small Business Operations from San Francisco State University. You can find her work on her Instagram account @superflynails.
There are 7 references cited in this article, which can be found at the bottom of the page.
This article has been viewed 103,873 times.
Nail tips give you the look of long nails without all the trouble of growing out your nails. They are easy to apply, so you do not need to make a trip to the salon. Just purchase some artificial nail tips and nail adhesive and you will be ready to start applying nail tips to your natural nails. Then, you can shape and decorate the nails however you like!
Steps
Applying the Nail Tip
-
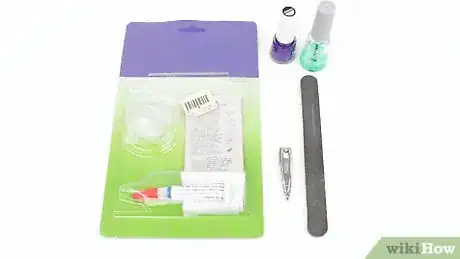
1Gather your materials. Anyone can apply nail tips at home, but you will need to have some special materials before you get started. To apply nail tips to your natural nails, you will need:[1]
- Nail tips
- Nail adhesive gel
- Nail clipper
- Nail file
-
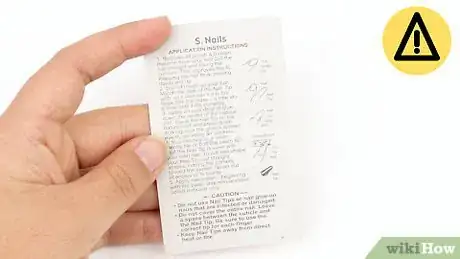
2Follow the safety instructions included with your nail tips. Your nail tips and nail adhesive should come with some instructions for proper use and safety. Read these instructions carefully and follow any safety precautions for the product.[2]
- For example, some nail products recommend working in a well-ventilated area.
Advertisement -
3Choose your nail tip size. Look through the nail tips and find one that matches each of your nails. The nail tips should be wide enough to cover your nail, but not so wide that they are overlapping the edges of your nails.[3]
- Hold up multiple tips to each nail to find the best fit and then lay them out in the order that you will need them.
-
4Brush a layer of topcoat onto your natural nails. Nail adhesive can wreck your nails, but applying a top coat before you apply the nail tips may help to protect them.[4] However, keep in mind that the nail tips may not bond as tightly with your natural nails.
- If you are concerned about the health of your natural nails, apply a layer or two of clear topcoat before you apply the nails.
-
5Apply the adhesive gel. Most nail tip sets include some adhesive gel with the nails, but if you can also buy nail adhesive separately. Pick up one of the nail tips by the end and apply a line of adhesive gel to the indented area of the tip.[5]
- If the nail does not have an indented area, then just apply the adhesive gel along the curved edge of the nail. This is the edge that will need to overlap the end of your natural nail.
- Keep in mind that nail adhesive gel bonds quickly and it is quite strong. Make sure that you have the right nail before you press it onto your finger.
- If you make a mistake, apply some nail polish remover that contains acetone to the edge of the nail tip.[6] This will help loosen it so that you can remove the nail tip and start over.
-
6Press on the nail. Press the nail tip against your natural nail to ensure that the adhesive bonds tightly with your nail. If the nail tip has an indent in it, then you will need to push the nail back so that the edge meets up with the end of your natural nail. If there is no indentation, then just apply the nail tip about ¼ inch from the end of your nail.[7]
- Press on the nail for about five seconds to give the adhesive gel a chance to bond.[8]
- Repeat this for all of your nails.
Trimming and Shaping the Nail
-
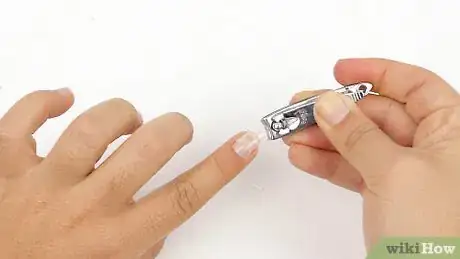
1Trim the nail. Nail tips are quite long, so you will probably want to trim them down a little before you shape them. Use clippers or a pair of nail scissors to trim the nail down to your desired length.[9]
- Make sure that you cut straight across. This is especially important if you want square tipped nails.
- If you want almond or stiletto tipped nails, then you can also cut off part of the sides of the nails.
- Try cutting a little less than you think you will need to cut. Filing your nails will also shorten them slightly, so you may end up with shorter nails than you’d like if you cut too much.
-
2Bend the nail on the sides. The nail tips may be a bit stiff and straight looking, which can look unnatural. To give them more curve and enhance their appearance, you can press gently on the edges of the nails as if you are trying to bend the sides of the nails together.[10]
- Place your index finger and thumb on either side of a nail and squeeze gently a few times.
- Repeat this for all of the nail tips.
-
3Shape the nail. After you are finished trimming and bending the nails into a pleasing curve, you will need to shape your nail tips. Use a file to shape your nails into your desired shape.[11] Some popular nail shapes include:[12]
- Square
- Almond
- Oval
- Round
- Stiletto
-
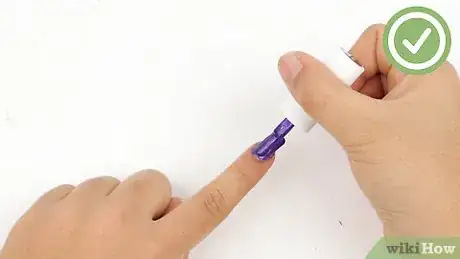
4Paint the nails. When you have achieve the shape that you want, you can paint your nails as desired.[13] Choose your color or colors and any special designs you want to add.[14]
- For example, you could try doing a French manicure, tie dye nails, or a try 3D design.
Expert Q&A
Did you know you can get expert answers for this article?
Unlock expert answers by supporting wikiHow
-
QuestionIf I want my nail tips to match anything I wear, what color should I paint them?
 Mia RubieMia Rubie is a Nail Artist and the Owner of Sparkle San Francisco, a nail studio based in San Francisco, California. She has over eight years of nail artist and management experience and is known for her push-the-envelope designs and artistic eye for colors. Her clients include Sephora, Target, and Vogue. Her work has been featured in the San Francisco Chronicle and StyleCaster. She holds a BBA focusing on Entrepreneurial and Small Business Operations from San Francisco State University. You can find her work on her Instagram account @superflynails.
Nail Artist
-
QuestionI use only tips, not a whole nail. Should I use a special filler?
 Community AnswerWhen you do that, you can file and buff to make it look like it's a part of your actual nail, then apply a coat of polish or do a layer of acrylic.
References
- ↑ https://www.youtube.com/watch?v=X4CQlz5ciDA
- ↑ http://www.mayoclinic.org/healthy-lifestyle/adult-health/expert-answers/acrylic-nails/faq-20057849
- ↑ https://www.youtube.com/watch?v=X4CQlz5ciDA
- ↑ http://www.self.com/beauty/nails/2015/10/fake-nails-manicure-tips/
- ↑ https://www.youtube.com/watch?v=X4CQlz5ciDA
- ↑ http://www.allure.com/story/acrylic-nails-removal
- ↑ https://www.youtube.com/watch?v=X4CQlz5ciDA
- ↑ http://www.hooked-on-nails.com/artificialnails.html
- ↑ https://www.youtube.com/watch?v=X4CQlz5ciDA
- ↑ https://www.youtube.com/watch?v=X4CQlz5ciDA
- ↑ Mia Rubie. Nail Artist. Expert Interview. 23 April 2020.
- ↑ https://www.youtube.com/watch?v=X4CQlz5ciDA
- ↑ Mia Rubie. Nail Artist. Expert Interview. 23 April 2020.
- ↑ https://www.youtube.com/watch?v=X4CQlz5ciDA
- Videos provided by Naio Nails
