This article was co-authored by Lindsay Yoshitomi. Lindsay Yoshitomi is the nail artist behind the blog, Lacquered Lawyer. She was featured as one of Nail It! magazine’s “Bloggers You Should Know,” and has been on the cover of Nail Art Gallery Magazine. She has been practicing nail art for over 15 years.
There are 11 references cited in this article, which can be found at the bottom of the page.
This article has been viewed 375,705 times.
Gel nail polishes have become increasingly popular for their quick drying time and long-lasting wear. While gel polish can keep your nails looking great for weeks, curing the polish with a UV light can be dangerous for your health. Thankfully, there are alternative ways to cure gel polish with less UV exposure. While only an LED lamp can cure your polish as quickly and effectively as a UV light, using a non-UV gel polish, applying a drying agent, or soaking your nails in ice water could work as well.[1]
Steps
Easy Home Methods
-
1Purchase a non-UV gel polish for an easy at-home option. There are several nail polish brands nowadays that make non-UV gel polishes you can use at home. These gel polishes are applied in the same manner as regular, non-gel polish and are made to cure on their own without light.[2]
- When purchasing a gel polish, make sure that it specifies on the label that the polish does not require a UV light or LED lamp to cure. If the polish doesn’t specify that it’s a non-UV polish, it likely won’t cure without a light or lamp.
-
2Apply a quick-drying nail polish spray to freshly painted nails. Lay one of your hands out on a flat surface covered with newspaper or paper towels. Hold the can of quick-drying nail polish spray about 6 inches (15 cm) away from your hand, and then spray a light coat over your nails while the polish is still wet. Repeat this to spray the nails on your other hand. Leave your nails to dry for several hours. Once the polish is dry and hardened, wash your hands with soap and water to remove any residual spray.[3]
- While quick-drying polish sprays are generally formulated for non-gel nail polishes, they might still help cure gel polish faster. Be aware, however, that it will still likely take several hours for the polish to harden.[4]
Advertisement -
3Spray just-painted nails with canola oil cooking spray. Lay some newspaper or paper towels out on a flat surface before laying your hand out with your fingers spread apart. Hold the cooking spray about 6 inches (15 cm) away from your hand and then spraying each of your fingers with the oil while the polish is still wet. Then, repeat this on your other hand. Leave the oil to dry for several hours, then wash your hands once the polish has hardened.[5]
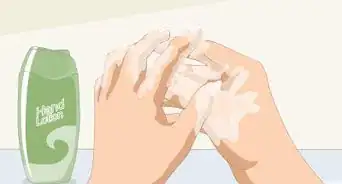
- Cooking spray can help cure the top layer of your gel polish faster while moisturizing your cuticles as well.[6]
- Try not to touch anything while your nails are drying, as the cooking spray can leave your fingers feeling a bit sticky.
-
4Hold your nails in ice cold water to harden gel polish. First, let your nails start to air dry for about 5 to 10 minutes. Then, fill a shallow bowl with cold water and a few cubes of ice. Stick your nails into the water, making sure that all the nails are completely submerged. Hold your nails under the water for about 3 minutes before removing them from the bowl. Let your fingers and nails air dry for at least an hour.[7]
- While your nails will likely feel completely hardened right when they come out of the ice water, they may not be completely cured for several hours. Therefore, it’s important that you’re careful with your nails for several hours after removing them from the water.
Using an LED Lamp
-
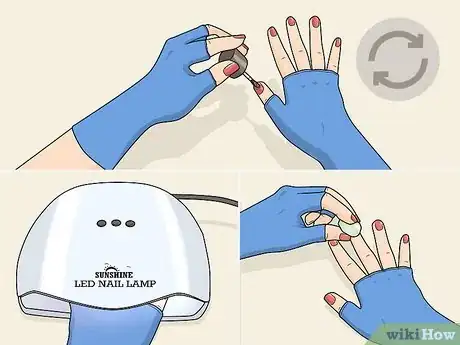
1Put on fingerless gloves or sunscreen to protect your skin. Before painting your nails and curing the polish with an LED lamp, protect your skin by wearing fingerless gloves or putting on a layer of sunscreen. While LED lamps may be less harmful than UV lights, they do emit some potentially harmful rays.[8] Therefore, it’s important to take precautions to ensure that your skin isn’t damaged as your polish cures.[9]
- You can buy professional nail gloves made out of a special polymer that contains titanium dioxide, a sun-protecting ingredient found in many sunscreens.[10]
- You can also use regular fingerless gloves. While they might not protect as well as professional nail gloves, they will protect your skin to a degree.
- LED lamps are generally preferable to UV lights because they cure polish in 45 seconds, versus the 8 or 9 minutes it takes a UV light. However, because they do still emit UV rays, it’s important to wear gloves or sunscreen to protect your skin as much as possible.
-
2Apply a thin layer of the gel base coat to the nails on one hand. Dip the nail polish brush into the gel base polish. Wipe the brush on the sides of the top of the polish to remove any excess polish. Then, paint a thin coat on each nail on one of your hands.[11]
- Make sure that the polish is applied evenly and that there aren’t any drips or clumps.
-
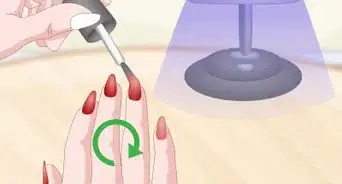
3Cure the base coat under the LED lamp for 45 seconds. Once each nail is painted, place your fingers in the LED lamp hand slot. Make sure your thumb is under the lamp as well. Then, set the lamp’s timer to 45 seconds and turn the lamp on.[12] Leave your hand under the lamp until the light shuts off.[13]
- Operating instructions will vary depending on the exact LED lamp you’re using, so make sure you follow the directions for your lamp.
- If your lamp doesn’t have a timer, you can set a timer on your smartphone to help you keep track of the time.
-
4Paint on a coat of the color gel polish. After the base coat has cured, dip the brush into the color gel polish and wipe it on the sides so it doesn’t clump. Then, carefully paint a coat of the color polish on each of your nails on top of the cured base coat.[14]
- Be careful not to get any polish on your cuticles, as this can impede the curing process and cause your polish to peel.
-
5Hold your hand under the LED lamp for another 45 seconds. Set the timer on your LED lamp to 45 seconds and slide your hand with the painted nails into the hand slot. Then, turn the lamp on, keeping your fingers under the light until the timer goes off and the polish has cured.[15]
-
6Apply additional coats of the color polish as needed. If you want your gel polish color to be more opaque, apply another thin coat of polish on each of your nails. Then, cure the gel again under the LED lamp after each additional coat.[16]
- If you get the color you want from the gel polish after 1 coat, you can skip this step.
-
7Use a gel top coat to protect the color polish. After applying and curing any additional gel color polish coats, apply a thin layer of a gel top coat to seal and protect the color polish. Cure the top coat under the LED lamp for another 45 seconds.[17]
-
8Rub each nail with rubbing alcohol to remove the sticky finish. Hold a clean cotton ball over the top of a bottle of rubbing alcohol and flip the bottle over to saturate the cotton. Then, rub the cotton ball over each of the painted nails. This will remove the sticky finish left on top of your nails after curing the top coat.[18]
-
9Repeat this entire process to paint your other hand. Paint the base coat, color coat(s), and top coat on your other hand, curing for 45 seconds after each coat. Since the polish is cured and hardened on the finished hand, you’ll be able to use it to paint your other hand without damaging the polish.
- As with UV-cured polish, gel polish cured with an LED lamp lasts up to 3 weeks.[19]
Community Q&A
-
QuestionI don't have a sunlight machine so how do I do it
 Asher MottCommunity AnswerEssentially you can't. You need a UV light to cure or dry the nails. Try checking the specific brand's helpful tips.
Warnings
- Like with a UV lamp, the sun also emits UV rays that can cure your gel polish in the sun. This method is generally not recommended, however, because it can be as harmful as using a UV lamp and takes significantly longer (several hours versus just a few minutes).[20]⧼thumbs_response⧽
- Both LED and UV lamps emit UV rays, but because LED lamps dry your nails faster, your exposure is less.[21]⧼thumbs_response⧽
- Avoid chipping off your gel polish since it can actually remove the top layers of your nails and weaken them.[22]⧼thumbs_response⧽
Things You’ll Need
Easy Home Methods
- Non-UV gel polish
- Quick-drying nail polish spray
- Newspaper or paper towels
- Cooking spray
- Cold water
- Ice
- Shallow bowl
Using an LED Lamp
- LED nail lamp
- Shellac or gel polish base coat
- Shellac or gel polish color
- Rubbing alcohol
References
- ↑ https://www.allure.com/story/make-gel-manicure-last-longer
- ↑ https://www.workingmother.com/7-gel-manicure-nail-polishes-without-light
- ↑ https://allbeautytoday.com/can-you-use-gel-nail-polish-without-uv-light/
- ↑ https://allbeautytoday.com/can-you-use-gel-nail-polish-without-uv-light/
- ↑ https://uvhero.com/how-to-cure-gel-nails-without-uv-light/
- ↑ https://youtu.be/Rf6vUxGb4Cg?t=44
- ↑ https://www.prevention.com/beauty/makeup/a20438703/manicure-tips-how-to-dry-nail-polish-faster/
- ↑ https://www.health.harvard.edu/staying-healthy/safety-of-led-nail-lamps
- ↑ https://www.self.com/story/gel-manicure-uv-nail-lamps-and-skin-cancer
- ↑ https://www.self.com/story/gel-manicure-uv-nail-lamps-and-skin-cancer
- ↑ https://www.theartofdoingstuff.com/led-nail-lamps-do-they-really-work-spoiler-alert-holy-crap-yes-they-do/
- ↑ https://www.allure.com/story/gel-manicure-led-uv-light
- ↑ https://www.theartofdoingstuff.com/led-nail-lamps-do-they-really-work-spoiler-alert-holy-crap-yes-they-do/
- ↑ https://www.theartofdoingstuff.com/led-nail-lamps-do-they-really-work-spoiler-alert-holy-crap-yes-they-do/
- ↑ https://www.theartofdoingstuff.com/led-nail-lamps-do-they-really-work-spoiler-alert-holy-crap-yes-they-do/
- ↑ https://www.theartofdoingstuff.com/led-nail-lamps-do-they-really-work-spoiler-alert-holy-crap-yes-they-do/
- ↑ https://www.theartofdoingstuff.com/led-nail-lamps-do-they-really-work-spoiler-alert-holy-crap-yes-they-do/
- ↑ https://www.theartofdoingstuff.com/led-nail-lamps-do-they-really-work-spoiler-alert-holy-crap-yes-they-do/
- ↑ https://www.allure.com/story/make-gel-manicure-last-longer
- ↑ https://uvhero.com/how-to-cure-gel-nails-without-uv-light/
- ↑ https://www.health.harvard.edu/staying-healthy/safety-of-led-nail-lamps
- ↑ Lindsay Yoshitomi. Nail Artist. Expert Interview. 12 July 2019.


