

PowerPoint 2013
Arranging Objects
Ordering objects
In addition to aligning objects, PowerPoint gives you the ability to arrange objects in a specific order. The ordering is important when two or more objects overlap, as it will determine which objects are in the front or the back.
Understanding levels
When objects are inserted into a slide, they are placed on levels according to the order in which they were inserted into the slide. In the image below, the rectangle is on the top level, but we can change the level to put it behind the other objects.
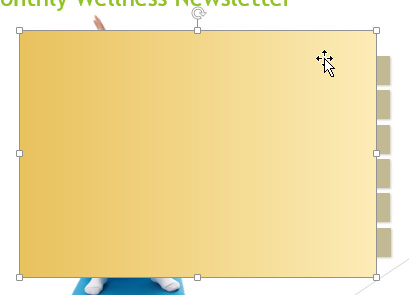 The top level
To change the ordering by one level:
- Select an object. The Format tab will appear.
The selected object - From the Format tab, click the Bring Forward or Send Backward command to change the object's ordering by one level. If there are multiple objects on the slide, you may need to click the command several times to achieve the desired ordering.
 Sending an object backward
 - The objects will reorder.
 The reordered objects
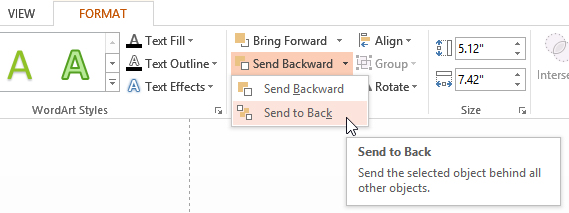
To bring an object to the front or back:
If you want to move an object behind or in front of several objects, it's usually faster to bring it to front or send it to back rather than clicking the ordering commands multiple times.
- Select an object.
- From the Format tab, click the Bring Forward or Send Backward drop-down box.
- From the drop-down menu, select Bring to Front or Send to Back.
 Sending an object to the back
 - The objects will reorder.
 The reordered objects
If you have many objects placed on top of each other, it may be difficult to select an individual object. The Selection Pane allows you to easily drag an object to a new location. To access the Selection Pane, click Selection Pane on the Format Tab.
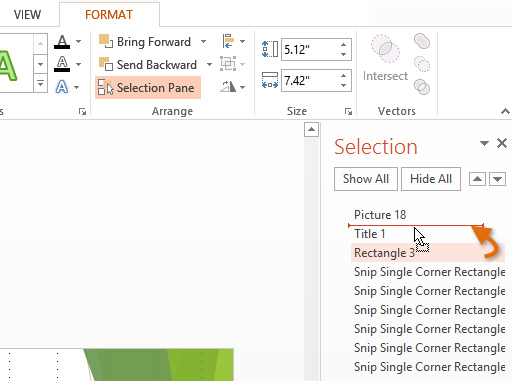 Arranging objects in the Selection Pane
Rotating objects
If you need to turn an object so it faces a different direction, you can rotate it to the left or right or flip it horizontally or vertically.
To rotate an object:
- Select an object. The Format tab will appear.
- From the Format tab, click the Rotate command. A drop-down menu will appear.
- Select the desired rotation option.
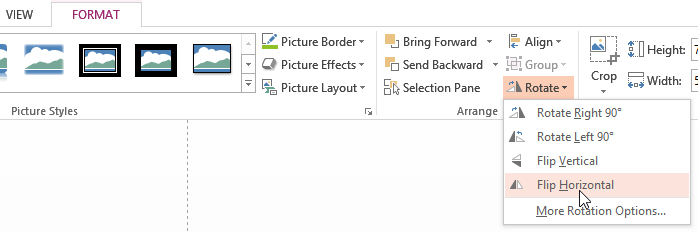 Selecting a rotation option
 - The object will rotate.
 The rotated image


