

PowerPoint 2013
Indents and Line Spacing
Fine-tuning indents
Sometimes you may wish to fine-tune the indents in your presentations. You can do this by adjusting the indent markers on the ruler. By default, the ruler is hidden, so you'll first need to show the ruler.
To show the ruler:
- Select the View tab on the Ribbon.
- In the Show group, check the box next to Ruler. The ruler will appear.
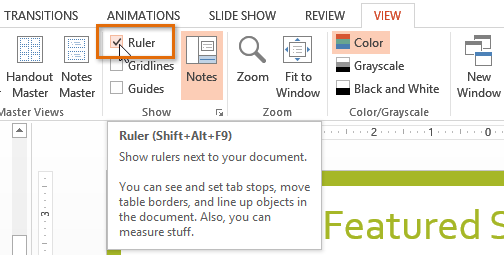 Showing the ruler
Indent markers
Indent markers are located to the left of the horizontal ruler, and they provide several indenting options:
- First-line indent marker
 : Adjusts the first line of a paragraph
 - Hanging indent marker
 : Adjusts every line of a paragraph except for the first line
 - Left indent marker
 : Moves both the first-line indent and hanging indent markers at the same time; this will indent all lines in a paragraph
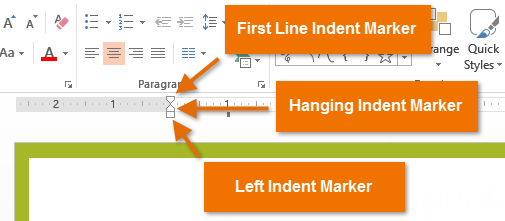 The three indent markers
To indent using the indent markers:
- Place the insertion point anywhere in the paragraph where you wish to indent, or select one or more paragraphs.
- Click, hold, and drag the desired indent marker. In our example, we'll drag the hanging indent marker.
 Moving a paragraph
 - Release the mouse. The paragraph will be indented.
 An indented paragraph


