This article was co-authored by Bill Holdenstern. Bill Holdenstern is a Baker and the Co-Owner of East Bay Pie Co. in San Francisco, California. With over 10 years of experience in the food industry, he specializes in making pot pies filled with flavors from around the world. Bill trained with chefs in multiple restaurants and studied business at Bunker Hill Community College. East Bay Pie Co has been profiled in The Manual, Purple List, and Nosh.
This article has been viewed 52,714 times.
Wrapping baked goods can be tricky, as you want to preserve their freshness and make sure they will travel well. You may be wrapping baked goods to give as a gift, to mail to a friend, or to simply keep them fresh so you can enjoy them at home. To wrap baked goods, you should select a type of wrapping and wrap the baked goods properly. You may then decide to decorate the wrapping for some added fun.
Steps
Selecting the Wrapping
-
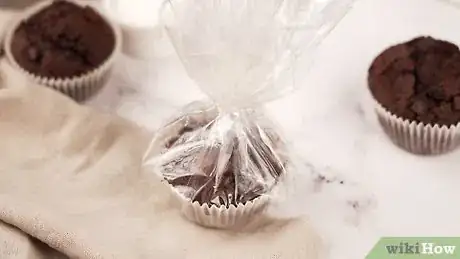
1Get cellophane bags. One fun way to wrap your baked goods is to buy cellophane bags at your local craft store or online. You can get clear cellophane for a simple look or go for colored cellophane for a more festive look.[1]
- If you are wrapping baked goods for Christmas, for example, you may get green and red cellophane bags. Or if you are wrapping baked goods for Easter, you may get pastel colored cellophane bags.
- You may opt for cellophane bags in different sizes if you are wrapping baked goods of various sizes, such as different sized cookies, or go for a pack of the same size if you are wrapping baked goods that are the same size.
-
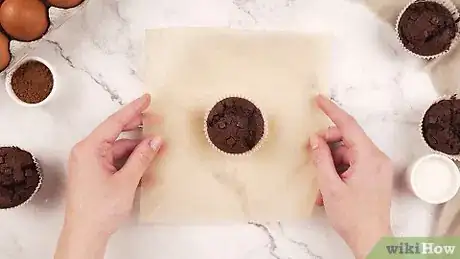
2Use butcher paper. A simple but effective way to wrap baked goods is to use butcher paper or parchment paper. You may wrap the baked goods up in the paper to transport to a friend's house for dessert or to give as a hostessing gift. Butcher paper is ideal if you are looking for a cheap, easy wrapping for baked goods that are a gift.[2]
- You can get butcher paper and parchment paper at your local supermarket or online.
- The paper will keep your goods from drying, but it is important to let them cool completely before wrapping, or they might become wet.
Advertisement -
3Try wax bags or brown paper bags. If you are more into paper over plastic, you may go for bags made of wax or brown paper. Wax bags are a good option if you are wrapping small baked goods like cookies as individuals servings. Brown paper bags are also a fun, cheap option for individually wrapped baked goods.[3]
- You can find wax bags and brown paper bags at your local supermarket or online.
-
4Go for small cardboard boxes. If you are planning to wrap baked goods that have icing or toppings on them, you may opt for small cardboard boxes that have a lid or a closure on top. Baked goods like cupcakes with icing or cakes with frosting may do better in a wrapping that has some room on top and a solid lid or closure.[4]
- You can find small cardboard boxes for baked goods at craft stores or online.
-
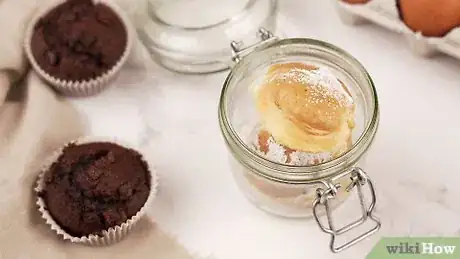
5Get glass jars. If you are planning to store the baked goods, you may try putting them in glass jars with a tight lid, such as mason jars. Mason jars also make a good gift wrapping for baked goods, especially if the baked goods are small, such as cookies.[5]
- You can find mason jars at your local craft store or online.
-
6Use plastic wrap. If you are wrapping the baked goods to preserve them at home, nothing beats plastic wrap. You can also opt for plastic wrap if you are planning to ship the baked goods in the mail, as plastic wrap helps to keep the baked goods fresh.[6]
- You can find plastic wrap at your local supermarket.
Wrapping the Baked Goods
-
1Allow the baked goods to cool to room temperature. Before you wrap the baked goods, it is important that you allow them to cool on your kitchen counter. You may use a cooling rack to ensure they cool properly. Allow them to come to room temperature so they no longer give off steam.[7]
- Wrapping hot, steaming baked goods will cause them to lose their freshness. Be patient and let them come to room temperature before wrapping them up.
-
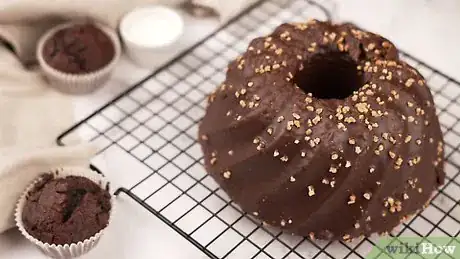
2Wrap the baked goods individually or whole. Once the baked goods have come to room temperature, they can be wrapped in your wrapping of choice. Make sure you wrap the baked goods themselves and do not wrap them on a plate or platter. Wrap the baked goods on their own, as this will preserve their freshness.[8]
- If you are wrapping baked goods like cookies or cupcakes, you may wrap them individually so they are single servings. If you are wrapping a cake, you may wrap it whole so it can then be cut once it is opened.
-
3Make sure the baked goods are sealed tight in the wrapping. Once you have wrapped the baked goods, you should examine the wrapping to make sure it is sealed tightly. If you are using wrapping like a wax bag, a cellophane bag, or butcher paper, you will need to secure the wrapping with tape.[9]
- Hold up the wrapped baked goods and make sure they do not slide out. Check that the baked goods are covered completely in the wrapping so no air can get in and dry them out.
- If you are planning to ship the baked goods, you should bake them and prepare them the day you are planning to mail them. Make sure you wrap each baked good individually and keep the same types of baked goods together so they stay fresh. For example, wrap cookies with cookies and cakes with cakes.
- If you're shipping the baked goods, it's important to take precautions to maintain the integrity of the pieces using styrofoam and ice. The shipping companies usually do not guarantee an impeccable delivery, so it's up to you to make sure your package is well protected.
Decorating the Wrapping
-
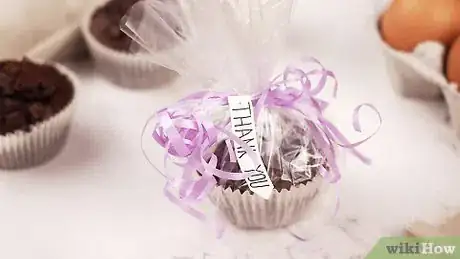
1Add ribbon or stickers. Once you have wrapped up the baked goods, feel free to get creative and add ribbons or stickers to the wrapping. You may tie the top of the cellophane bags with ribbon, for example, or use colorful string to decorate the butcher paper covering the baked good. Adding these details can make the baked good seem more festive, especially if it is meant to be a gift.[10]
- You can also put stickers on the baked good for an added touch. You may create your own stickers using a design program on the computer and attach personalized stickers on the baked goods, such as the name of your guests at a party you are hosting. The baked goods could then act as party favors.
- You may also opt for stickers or other decorations that fit a theme. For example, if you are giving the baked goods as gifts for Christmas, you may decorate them with Christmas stickers.
-
2Write a personal message on the wrapping. You can also decorate the wrapping by writing a personal message. If the baked goods are meant for someone in particular, you may write a nice message on the wrapping. You could also write the person's name on the wrapping so they know it is for them.[11]
- For example, if you are giving the baked goods to your sister for Christmas, you may write, “For the best sister ever, Merry Christmas, Love Always.”
-
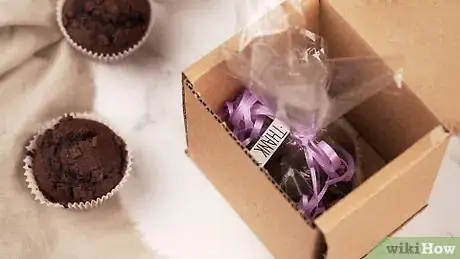
3Use a shipping box if you are planning to mail the baked goods. To ship the wrapped baked goods, place them in a shipping box made of cardboard. Use bubble wrap or packing peanuts on the top and bottom of the shipping box to ensure the baked goods are secure when they are mailed. Make sure everything is packed tightly in the box as you do not want the baked goods to shift or move around in transit.[12]
- Mark the box “perishable” on the outside so it is clear there is food inside. You should also let the person know you are sending them a package with food so they are home to accept it, as you do not want the package to end up sitting outside for too long.
Community Q&A
-
QuestionHow can I wrap cookies?
 Community AnswerMy favorite way is by arranging them on a plate. Cut a piece of cellophane and place the plate in the middle. Gather at the top and tie with a ribbon.
References
- ↑ http://www.lovefromtheoven.com/packaging-your-baked-goods/
- ↑ http://www.sugardishme.com/how-to-ship-baked-goods/
- ↑ http://www.brit.co/cookie-wrappers/
- ↑ http://www.sugardishme.com/how-to-ship-baked-goods/
- ↑ http://www.brit.co/cookie-wrappers/
- ↑ http://eats.coolmompicks.com/2015/10/01/how-to-store-baked-goods/
- ↑ http://eats.coolmompicks.com/2015/10/01/how-to-store-baked-goods/
- ↑ http://eats.coolmompicks.com/2015/10/01/how-to-store-baked-goods/
- ↑ http://eats.coolmompicks.com/2015/10/01/how-to-store-baked-goods/
About This Article
Before you wrap any type of baked goods, allow them to cool completely first. This will prevent your goodies from getting soggy due to steam getting trapped inside the wrapping. Next, decide whether you want to wrap the entire item whole or in separate servings. For instance, it’s often better to wrap a whole cake or loaf of bread and then cut it up once you’re ready to serve it. On the other hand, it’s easier to wrap things like cookies, cupcakes, or brownies individually. As you work, make sure the wrapping is tight and flush against the item, with no holes or gaps where air could get in. If you’re using something like wax paper or a cellophane bag, use tape to hold the wrapper closed. You probably won’t need any tape for materials like plastic wrap or aluminum foil. For baked goods that you’re planning to gift or sell to someone, add a little flare by decorating the wrapping with stickers or ribbons. For instance, if you’re packing a cupcake in a cellophane bag, tie off the bag with a colorful bow. You can also add a tag with a handwritten message, like “Thank You!” or “Happy Birthday!” If you’re shipping your baked goods, pack them in a cardboard shipping box and add some bubble wrap or packing peanuts to protect them from getting crushed or shifting around in transit. For more tips, like how to decide what kind of wrapping material to use, scroll down!
