This article was co-authored by Marrow Private Chefs. Marrow Private Chefs are based in Santa Rosa Beach, Florida. It is a chefs’ collaborative comprised of an ever-growing number of chefs and culinary professionals. Though regionally influenced primarily by coastal, traditional southern, cajun, and creole styles and flavors, the chefs at Marrow have a solid background in all types of cuisine with over 75 years of combined cooking experience.
This article has been viewed 55,854 times.
Fresh vegetables can pick up bacteria from the soil, water, or any surface they come in contact with (especially during transportation). It’s important to properly wash your brussels sprouts before eating them to keep you or your loved ones from getting sick. Wash them with regular cold water or use a baking soda soak.
Steps
Using Cold Water
-
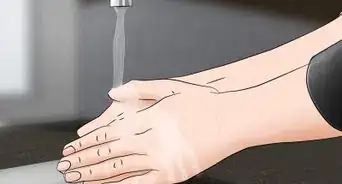
1Wash your hands with antibacterial soap and water. Wash your hands before handling any food. Wet your hands first then lather them with soap for at least 20 seconds before rinsing them off.[1]
- Clean your cutting board and knife blade with dish soap so you’re not exposing the sprouts to bacteria.
-
2Rinse the sprouts under cold running water. You can hold 3 or 4 in your hands at a time or place all of the sprouts in a colander. While the water pools over them, rub the outside of each sprout with your fingers to remove any dirt or debris.[2]
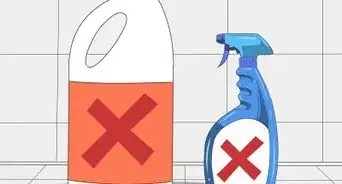
- Avoid using hot water—it might wilt some of the leaves or allow microorganisms to seep into the crevices between the leaves.
Advertisement -
3Use a sharp knife to cut off the stem. The stem is the part where the sprout connected to the stalk (the leaves grow outward from this end). Use a sharp paring or chef’s knife to cut a little less than 1 centimetre (10 mm) off, then discard or compost the small nubs.[3]
- Cutting off too much from the bottom might cause extra sprout leaves to fall off.
-
4Peel off a few of the outer layers that appear dirty or blemished. The outer few leaves are probably the dirtiest part of the sprout from soil, harvesting, and transportation. Pull off a few of the outermost leaves around the sprout, especially those that have brown or black spots. Discard these picked leaves in a compost bin.[4]
- You can also bury these leaves in your garden and let them compost underground.
- If you found a lot of leaves that are dirty or blemished, wash all of the sprouts under cool water again.
-
5Dry and refrigerate the clean sprouts in an airtight container for later use. If you’re not cooking the sprouts right away, pat them dry with a paper towel or let them air dry and store them in an airtight container. Place this container in your refrigerator’s crisper drawer and use them within 2 days for the freshest taste.[5]
- Washing produce ahead of time decreases its shelf life even when you store it properly, so it’s best to cook the sprouts right away.


Soaking with Baking Soda
-
1Use a sharp knife to slice off the stem-ends of the sprouts. Cut the white-brown nubs off of each sprout (the side where the sprout was once connected to the stem). Toss these small bits into a compost bin or garden.[6]
- Avoid cutting too much of the end off because that will cause the leaves of the sprouts to break apart.
-
2Fill a large bowl with cool water and stir in 1 teaspoon of baking soda. If you’re washing a lot of sprouts (around 15 or more) use a large mixing bowl and pour water into it until it’s filled about ¾ of the way. Add in 1 teaspoon (6 grams) of baking soda and stir it around with a clean spoon.[7]
- If you don’t have a teaspoon measuring tool, pour enough baking soda into the palm of your hand until the pile is about the size of a quarter.
-
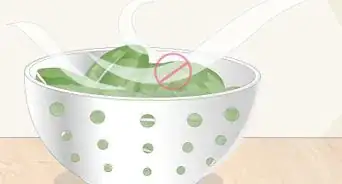
3Add the sprouts and let them soak for 2 minutes. Transfer the sprouts into the bowl, and make sure that there’s enough water to cover all of them completely. If there’s not, add enough water until they’re covered and add an additional pinch of baking soda. Let them soak for up to 2 minutes.[8]
- Baking soda has been shown to remove pesticides from the surface of produce.[9]
-
4Use a vegetable brush to scrub each sprout. After soaking, use a vegetable brush to scrub away any dirt and debris. Plan to scrub each sprout for about 10 seconds, making sure to cover the entire surface of each one. Inspect small crevices for any noticeable dirt. If you see blemished leaves, feel free to pick them off and compost them.
- If you don’t have a vegetable brush, you can also use clean, soft-bristled toothbrush.
- Place each sprout into a colander or a second bowl.
-
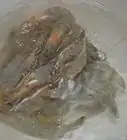
5Rinse off the sprouts under cold running water. Once each sprout has been scrubbed, rinse them all under cold water. You can use your hands to rinse a few at a time, rubbing the surface of each one with your fingers, or you can rinse them for about 30 seconds with a colander placed under the faucet.
- If you use a colander, mix the sprouts around and massage them with your hands to ensure each one gets a good rinse.
-
6Transfer the sprouts to a cutting board for immediate use or to let them dry. Your sprouts are ready to slice! But if you’re not using the sprouts right away, let them air dry before storing them in the refrigerator. You can blot them with a paper towel to speed up the process. Once they’re fully dry, place them in an airtight container and put it in the crisper.[10]
- Washed sprouts have a shorter shelf life, so use them within 1 to 2 days.


Warnings
- Not washing brussels sprouts puts you at a high risk of getting sick from E. coli.⧼thumbs_response⧽
Things You’ll Need
Using Cold Water
- Sharp knife
- Cutting Board
- Cold water
- Paper towels
- Colander (optional)
- Airtight storage container (optional)
Soaking with Baking Soda
- Sharp knife
- Cutting board
- Vegetable brush
- Baking soda
- Teaspoon measuring tool
- Clean spoon (or stirring utensil)
- Cold water
- Colander (optional)
- Airtight storage container (optional)


Expert Interview
Thanks for reading our article! If you'd like to learn more about washing brussels sprouts, check out our in-depth interview with Marrow Private Chefs.
References
- ↑ https://www.bestfoodfacts.org/food-safety-produce/
- ↑ https://www.bestfoodfacts.org/food-safety-produce/
- ↑ https://www.noreciperequired.com/technique/how-clean-brussel-sprouts
- ↑ https://www.noreciperequired.com/technique/how-clean-brussel-sprouts
- ↑ https://www.thekitchn.com/the-best-way-to-store-brussels-sprouts-237516
- ↑ https://foodrevolution.org/blog/how-to-wash-vegetables-fruits/
- ↑ https://foodrevolution.org/blog/how-to-wash-vegetables-fruits/
- ↑ https://foodrevolution.org/blog/how-to-wash-vegetables-fruits/
- ↑ https://www.consumerreports.org/pesticides-herbicides/easy-way-to-remove-pesticides/
About This Article