What you can expect a plumber to do when fixing a washer’s drain vent (and how to know it needs fixing)

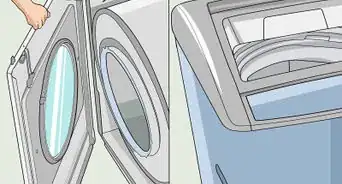
Is your washing machine making funny gurgling noises or smelling funky? If so, it may be because the pipes don’t have enough ventilation. Venting a washing machine’s drain pipe is extremely important and can keep your laundry room from flooding. But how do you vent it? In this article, we’ll explain what an expert would do to vent a washing machine properly.

Things You Should Know

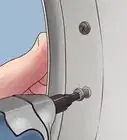
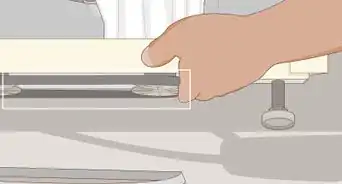
  • Install a P-trap in your washing machine's plumbing if you have a venting issue. This U-shaped pipe prevents sewer smells from leaking into your home.
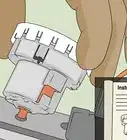
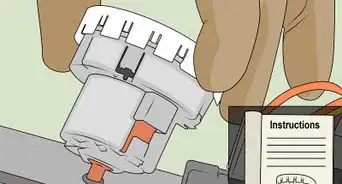
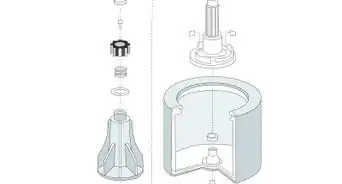
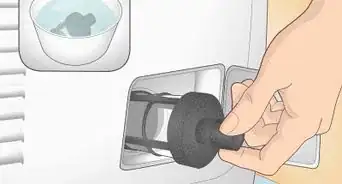
  • Add an air admittance valve (AAV) to help direct gasses out of a washing machine’s pipes and into a well-ventilated area.
  • Unpleasant odors, gurgling sounds, and slow drainage could be signs that your washing machine isn’t properly ventilated.
Section 1 of 4:

How do you vent your washing machine?

  1. 1
    Hire a plumber to vent the washer for you. Believe it or not, a lot goes into venting a washing machine drain pipe. Removing drywall, cutting pipes, and adhering to plumbing and building codes can be a lot of work. Whether you need to vent a drain on an existing washing machine or install a new machine, it’s always best to call a plumber or contractor to help.
    • Talk to a licensed expert, even if you’re a handy person, as they can tell you about building codes to ensure your installation is up to current standards.
  2. 2
    Run the drain pipe into an existing vent stack. This is the easiest and best way to vent a washing machine because every home must have at least 1 vent stack to be up to code.[1] A plumber or contractor can connect your washing machine’s drain pipe to a new pipe that attaches to your home’s vent stack, helping gasses travel out of your home.
    • A vent stack (also known as a waste stack) is a vertical pipe that connects to a home’s plumbing system and goes to the roof. The pipe brings sewer gasses and built-up air pressure out of the house.[2]
    Advertisement
  3. 3
    Install a P-trap. P-traps are U-shaped pieces of piping designed to prevent gasses from traveling up a sewer pipe into an appliance. Installing a P-trap requires access to the vent stack, which may involve tearing down drywall. Once you’ve found the vent stack, use a T adapter to connect the P-trap to the vent stack—one end of the P-trap attaching to the washing machine’s standpipe and the other end to the vent stack.[3]
    • Per plumbing codes, a P-trap needs to be between 6 to 18 inches (15 to 46 cm) above the floor.[4]
    • Every state has specific regulations for how long a P-trap should be. For instance, a P-trap must be at least 4 inches (10 cm) in Kentucky.[5]
    • A standpipe is a vertical pipe behind the washing machine that a drain hose flushes water into.
  4. 4
    Add an air admittance valve (AAV). An AAV is a one-way valve that lets air enter drains when there’s built-up pressure. The valve attaches to plumping to allow adequate airflow while water is drained or added to an appliance. Installing an AAV usually requires a vent pipe to an outdoor space, or it can be added to the top of a drainage pipe with a T adapter.[6]
    • AAVs may not be allowed in your area, so always check with a plumber or contractor before installing one.
  5. Advertisement
Section 3 of 4:

Signs of Poor Ventilation

  1. 1
    Unpleasant odorsOne of the leading signs of poor drain pipe venting is a foul sewer smell coming from your washing machine. P-traps and AAVs help prevent gas from traveling up your pipes. Without them, smells from your home’s waste pipe can leak into your washing machine and escape into the laundry room.[7]
    • P-traps keep at least 2 inches (5.1 cm) of water in pipes at all times, which acts as a buffer between the clean and stinky air.
    • AAVs redirect foul-smelling gasses that escape into an outdoor or enclosed area of your home.
  2. 2
    Gurgling noisesIf you hear a gurgling or spurting nose when your washing machine drains, it could be because there’s not enough ventilation in the pipes. This may also cause gurgling from other sinks or appliances in your home. There’s too much air pressure in the pipes, and with no way to escape, it has to mix with the water.[8]
  3. 3
    Slow drainageA slow-draining washing machine could indicate a venting problem. Typically, this only happens in severe cases, so if your washer drains incredibly slowly after a wash cycle, contact your plumber immediately.[9]
    • If you have a sink in your laundry room, you may also notice water coming up through the drain because there’s nowhere else for it to go.
  4. Advertisement
Section 4 of 4:

Washing Machine Maintenance

  1. 1
    Keep the washer’s lint trap clean. Your dryer isn’t the only thing that catches lint. A full washing machine filter can prevent the machine from draining properly at the end of a wash cycle, so make sure to clean the filter at least twice a year.[10]
    • Wash a removable filter by soaking it in a water and dish liquid solution and scrubbing it with a soft-bristle brush.
    • Clean a fixed filter by scrubbing the mesh with a toothbrush and running the washer on a short cycle.
  2. 2
    Check the drain hose for clogs, leaks, and kinks. If your washing machine isn’t draining properly, take a look at the drainage system. Is the hose connecting the machine to the pipes kinked or punctured? Are there any seals or connections in the pipes leaking? These could be signs that your drainage system is blocked.
    • Remove the drain hose from the back of the machine and blow air through it to see if it’s clogged.
    • Inspect the hose for any breaks or tears. Repair any small leaks with waterproof flex tape, or replace the hose if it has an unfixable kink.
    • If your machine has a P-trap and an AAV and still shows signs of a blockage, contact a plumber, as there could be a problem with the pipes or the machine itself.
  3. 3
    Keep at least 12 inch (1.3 cm) between the drain hose and standpipe. The hose extending out of your washing machine and into the wall is the drain pipe, where the water flows out of the machine after a washing cycle. Having 12 inch (1.3 cm) of space between the curved hose and standpipe can help prevent a drain from overflowing.[11]
    • Why 12 inch (1.3 cm)? This minimum requirement allows enough water and air pressure to prevent the hose from releasing water into the drain too fast.
    • Always check with a plumber or contractor about the position of your washing machine’s hoses and pipings, as they can offer solutions if a problem arises.
  4. Advertisement

About This Article

Aly Rusciano
Co-authored by:
wikiHow Staff Writer
This article was co-authored by wikiHow staff writer, Aly Rusciano. Aly Rusciano is a Creative Writer based outside of Nashville, Tennessee. She has over ten years of experience in creative, academic, and professional writing. Aly’s writing has been nationally recognized in the Sigma Tau Delta Rectangle and featured in Blue Marble Review, The Sunshine Review, PopMatters, and Cathartic Literary Magazine. She graduated from The University of Tennessee at Martin with a BA in English, focusing in Creative Writing and minoring in Theatre. This article has been viewed 1,140 times.
How helpful is this?
Co-authors: 3
Updated: March 13, 2023
Views: 1,140
Advertisement