X
This article was co-authored by Luigi Oppido and by wikiHow staff writer, Jack Lloyd. Luigi Oppido is the Owner and Operator of Pleasure Point Computers in Santa Cruz, California. Luigi has over 25 years of experience in general computer repair, data recovery, virus removal, and upgrades. He is also the host of the Computer Man Show! broadcasted on KSQD covering central California for over two years.
This article has been viewed 75,521 times.
This wikiHow teaches you how to use a Virtual Private Network (VPN) while in public. A VPN encrypts all information passed in between your computer and the Internet, making it much harder for attackers to sabotage or take advantage of your connection.[1]
Steps
Part 1
Part 1 of 5:
Preparing to Use a VPN
-
1Subscribe to a VPN if you haven't already done so.[2] Virtual private networks (VPNs) typically require you to set up an account in order to access a server's name and address. You will need the VPN's name and address, as well as login credentials, to connect to a VPN.
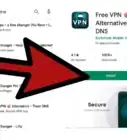
- VPN services usually aren't free, but there are some reliable ones too, such as ProtonVPN, Cyber Ghost or Tunnel Bear. But if you need more security features, then you'll likely have to pay a monthly or yearly fee to continue access to the VPN.
- Be sure to research your VPN choice thoroughly in order to ensure the host isn't malicious.[3]
- Many universities have dedicated VPNs for students.
-
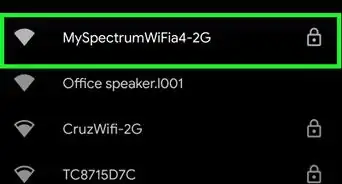
2Make sure you're connected to the Internet. If you're using a public Wi-Fi server, this will usually entail asking the network manager for the network name and/or password.
- For example, if you're in a coffee shop, you may need to ask a member of the staff for the login credentials.
Advertisement -
3Close any existing browsers. It's wise to re-open your browsers once your VPN is established rather than keeping them open.
- You may also want to close any apps that have Internet access (e.g., Twitter or Google Drive).


Advertisement
Part 2
Part 2 of 5:
Using a VPN on iPhone
-
1
-
2
-
3Scroll down and tap VPN. This option is near the bottom of the page.
-
4Tap Add VPN Configuration. It's near the top of the screen.
-
5Tap Type, then select a connection type. Tap one of the following connection types:
- IKEv2
- IPSec
- L2TP
- The connection type will likely depend on the VPN server itself. Look for an indication of the connection type in the VPN server's details.
-
6Enter your VPN's information. Depending on the connection type you choose, this step will vary; it usually includes filling out the following fields:
- Description - The network's description.
- Server - The VPN's address.
- Username - Your username for the VPN service.
- Password - Your password for the VPN service.
-
7Tap Done. It's in the top-right corner of the screen. Doing so will sign you into your VPN.
-
8


Advertisement
Part 3
Part 3 of 5:
Using a VPN on Android
-
1
-
2Scroll down and tap More. It's below the "Wireless & networks" section.
-
3Tap VPN. You'll find this in the drop-down menu below the "Wireless & networks" heading.
-
4Tap +. It's in the top-right corner of the screen.
- On a Samsung Galaxy, tap ADD VPN here instead.
-
5Enter your VPN's information. This will vary depending on your VPN's settings, but you will typically need to add the following:
- Connection type - The type of connection (e.g., PPTP) that your VPN uses. Check the details of your VPN subscription if you don't know this value.
- Server - Your VPN's server address or name.
- Username - The username or email address you use to sign into your VPN subscription account.
- Password - The password you use to sign into your VPN subscription account.
-
6Tap Save. It's in the bottom-right corner of the screen. Doing so will create your VPN.
-
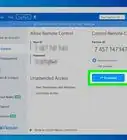
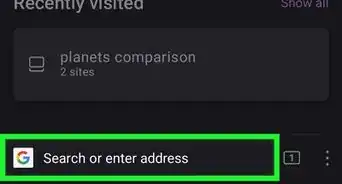
7Tap your VPN's name. It should appear on the VPN page.
-
8Enter your username and password, then tap CONNECT. This will sign you into your VPN service; your browsing traffic should now be hidden from other public network users.


Advertisement
Part 4
Part 4 of 5:
Using a VPN on Windows
-
1
-
2
-
3
-
4Click VPN. It's a tab on the left side of the window.
-
5Click Add a VPN connection. You'll see this option at the top of the page.
-
6Click the "VPN provider" box, then click Windows (built-in). Do this in the field at the top of the pop-up window.
-
7Enter your VPN server's information. Doing so will entail filling out the following fields:
- Connection name - The name of your VPN connection. Name this whatever you like.
- Server name or address - The VPN's address.
- VPN type - Your VPN's connection type. This will usually be PPTP.
- Type of sign-in info - You'll typically select Username and password here, but you can also set up a one-time password or a smart card.
- User name (optional) - Your VPN username.
- Password (optional) - Your VPN password.
-
8Click Save. It's at the bottom of the page. Doing this saves your VPN and adds it to your computer's VPN page.
-
9Click your VPN's name. It should now be on the VPN page of the Settings window.
-
10Click Connect. This option is at the bottom of the VPN's name card.
-
11Enter your username and password if prompted. Doing so will log you into the VPN, though you may need to confirm this step by logging into the VPN online and approving your computer. Your browsing traffic should now be hidden from other public network users.


Advertisement
Part 5
Part 5 of 5:
Using a VPN on Mac
-
1
-
2Click System Preferences. This option is near the top of the Apple drop-down menu.
-
3Click Network. This purple, globe-shaped icon is in the middle of the System Preferences page.
-
4Click +. It's in the bottom-left corner of the Network page.
-
5Select the VPN option. Click the box to the right of "Interface:", then click VPN in the drop-down menu.
-
6Select a VPN connection type. Click the box to the right of "VPN Type", then select your VPN's connection type (e.g., L2TP over IPSec).
- The VPN's site should provide this information.
- Keep in mind that MacOS Sierra does not support PPTP connections.
-
7Enter a name for your VPN. It can be whatever you want to name the network.
-
8Click Create. Click the blue button in the bottom-right corner of the window.
-
9Configure your VPN. Enter the following information:
- Configuration - Select the "Default" option.
- Server Address - Type in your VPN's address here.
- Account Name - Type in your VPN's account name here.
-
10Click Authentication Settings. It's below the Account Name text field.
-
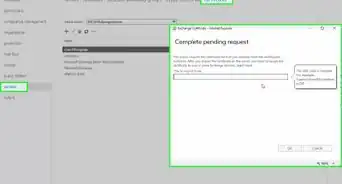
11Enter your User Authentication information. Check the box to the left of your VPN's User Authentication option (e.g., Password) and then type the answer in.
-
12Type in your Machine Authentication information. This section is near the bottom of the window. If you don't know which authentication your VPN uses, consult the details of your VPN subscription.
- Most VPN's use the "shared secret" option.
-
13Click OK. It's near the bottom of the Authentication Settings window.
-
14Click Advanced. You'll see this near the bottom of the window.
-
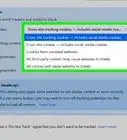
15Check the "Send all traffic over VPN connection" box, then click OK. Doing so will ensure that all sites you visit use the VPN connection.
-
16Click Apply. This saves your VPN settings and creates your network.
-
17Click Connect. It's below the Authentication Settings option. Doing so will prompt your Mac to connect to the VPN. Any traffic between your computer and the Internet should now be encrypted.


Advertisement
Expert Q&A
-
QuestionWill a VPN give me 100% privacy protection?
 Luigi OppidoLuigi Oppido is the Owner and Operator of Pleasure Point Computers in Santa Cruz, California. Luigi has over 25 years of experience in general computer repair, data recovery, virus removal, and upgrades. He is also the host of the Computer Man Show! broadcasted on KSQD covering central California for over two years.
Computer & Tech SpecialistVPNs will only allow you to be so anonymous because you have to give whatever company you're using the endpoints in order to go online. You're shifting the usage from your ISP to another company, which then can still be subpoenaed by law enforcement if you're doing something malicious. Make sure you're using a trusted company. -
QuestionAre VPNs safe?Luigi OppidoLuigi Oppido is the Owner and Operator of Pleasure Point Computers in Santa Cruz, California. Luigi has over 25 years of experience in general computer repair, data recovery, virus removal, and upgrades. He is also the host of the Computer Man Show! broadcasted on KSQD covering central California for over two years.
Computer & Tech SpecialistIt depends on the VPN. It's important to research the VPN you plan to use to make sure it isn't malicious. -
QuestionWhat does a VPN actually do?Luigi OppidoLuigi Oppido is the Owner and Operator of Pleasure Point Computers in Santa Cruz, California. Luigi has over 25 years of experience in general computer repair, data recovery, virus removal, and upgrades. He is also the host of the Computer Man Show! broadcasted on KSQD covering central California for over two years.
Computer & Tech SpecialistA VPN encrypts your information while you're using the Internet so it's harder for hackers to sabotage or take advantage of your Internet connection.
Advertisement
Warnings
- Be careful of fraudulent VPN providers. Reading reviews and customer feedback online can help you avoid bad VPN providers.⧼thumbs_response⧽
Advertisement
-Step-7.webp)


References
About This Article

Luigi Oppido
Computer & Tech Specialist
This article was co-authored by Luigi Oppido and by wikiHow staff writer, Jack Lloyd. Luigi Oppido is the Owner and Operator of Pleasure Point Computers in Santa Cruz, California. Luigi has over 25 years of experience in general computer repair, data recovery, virus removal, and upgrades. He is also the host of the Computer Man Show! broadcasted on KSQD covering central California for over two years. This article has been viewed 75,521 times.
How helpful is this?
Co-authors: 24
Updated: June 11, 2021
Views: 75,521
Categories: Internet Security
Advertisement