This article was co-authored by wikiHow staff writer, Glenn Carreau. Glenn Carreau is a wikiHow Staff Writer, currently based in Los Angeles. With over four years of experience writing for several online publications, she has covered topics ranging from world history to the entertainment industry. Glenn graduated with honors from Columbia College Chicago, earning a B.A. in Interactive Arts and Media and a minor in Professional Writing. Today, Glenn continues to feed her lifelong love of learning while serving wikiHow's many readers.
There are 11 references cited in this article, which can be found at the bottom of the page.
This article has been viewed 32,690 times.
Learn more...
Are you the proud owner of a new Peloton bike and hoping to master all its features? You've come to the right place! There's a lot to learn about a Peloton bike, from adjusting its seat and handlebars to riding the bike and selecting suitable Peloton classes. Read on for a comprehensive guide to the ins and outs of using your Peloton bike.
Things You Should Know
- Adjust the bike before riding it. Position the seat's height and depth, plus the handlebars, and test them all to ensure you're comfortable on the Peloton.
- Clip into the bike with cleats and practice pedaling in all 3 positions before taking your first class. Stick to low-intensity workouts before intensifying.
- Try out Peloton's classes, including live, Power Zone, HIIT, and themed rides. Set a screen name so you can interact with other riders.
Steps
Set up the bike in a safe spot.
-
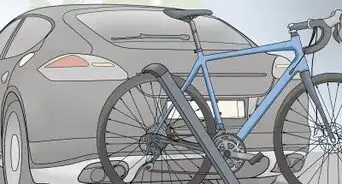
Find a spot with a stable surface and plenty of room for riding. Place the bike somewhere with a flat, even floor so it won't rock or move around while you're using it. Lay a bike mat underneath your Peloton to protect your floors. Leave 4.5 feet (1.4 m) by 6 feet (1.8 m) of clearance around your bike to ensure nothing gets caught in the flywheel, and you have space to move.[1] X Research source
- If you place your Peloton on a carpet, lay a sheet of plywood over the floor and cover it with a bike mat, so there's a more stable surface for the bike to rest on.
- Get a mat big enough to leave some extra floor space around the bike for other Peloton workouts—like strength training and yoga.

Position your seat height.
-
Adjust the seat's height to ensure a comfortable ride. Turn the lever below the seat to the left, and then reposition the seat to your desired height. To ensure your Peloton seat is positioned optimally, align the seat with the height of your hip bone when standing next to the bike. Once the seat is set to your preferred height, tighten it by turning the same lever to the right.[2] X Research source
- There are 2 levers below the seat of the Peloton, controlling its height and depth. The lever that controls depth is directly underneath the seat, while the height lever is further down near the bike's base.
- If your lever sticks out at an angle, just pull it out and let it drop naturally into the 6 o'clock position. It'll then be out of your way!

Adjust the seat depth.
-
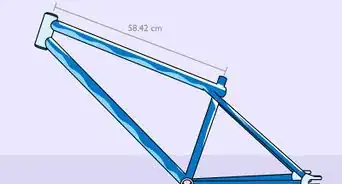
A comfortable seat depth also makes riding the bike easier. Loosen the depth lever (located directly underneath the seat) by turning it to the left, then slide the seat into your preferred position. Measure your ideal seat depth by placing your elbow at the nose of the seat and then pushing it forward until your fingertips touch the handlebars. Afterward, tighten the seat by turning the lever to the right.[3] X Research source
- Peloton recommends simply starting with the seat placed in the center position if you're a beginner.
- Remember, you can always adjust the seat's depth and height later to get a more comfortable fit!

Adjust the handlebars.
-
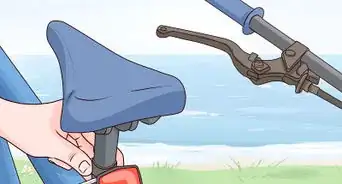
Ensure that you can rest your hands comfortably on the handlebars. If you feel like you're straining to reach the handlebars, adjust their height by loosening the lever at the front of the bike. Then, stand in front of your seat and place your forearms under the handlebars so you can gently lift them up. When they're at the desired height, hold them in place with one arm and tighten the lever with the other.[4] X Research source
- Seat height is the vertical distance between the seat and the base of the bike, whereas seat depth is the seat’s horizontal distance from the bike handlebars.
- On your first time adjusting the handlebars, set them to their highest level and then continually reduce the height until your arms feel comfortable.
- Sit on the bike and place your hands at the bottom of the handlebars. When positioned right, you should be able to comfortably grip the bars with room for a slight bend in your arms.

Clip into the bike.
-
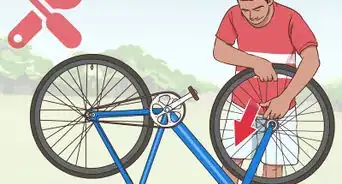
Clipping your feet into the bike keeps you in place while you ride. While your hands are on the handlebars in the riding position, put one foot on each side of your bike and ensure the pedals are flat with the Peloton logo facing upward. Fit your cleats into the pedal by angling your toes downward, then push down through your heel until you hear a click. Unclip by kicking your heel outward and your toes inward.[5] X Research source
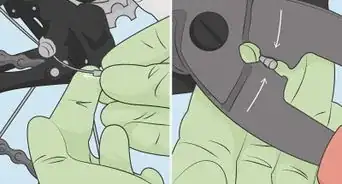
- You’ll need Peloton shoes and cleats to ride the bike. To attach the cleats, position them over the three holes on the bottom of your shoes and screw them into place with the 4-millimeter hex key (which comes with the bike).
- If you have any experience putting boots into skis or wearing high heels, you'll find that the motion of clipping your feet into the Peloton feels very similar!
- Never try to clip out while the pedals are still spinning, or you could seriously injure yourself.

Ride the bike to confirm your adjustments.
-
Ensure your adjustments feel comfortable before trying a full workout. Clip into the bike, move your right foot into the 6 o'clock position, and check the seat height by verifying that you feel a slight bend in your knees. Then, move your foot into the 3 o'clock position and ensure your knee rests directly above the ball of your foot. Finally, begin pedaling to ensure that it's comfortable for you.[6] X Research source
- Seat height: If your knee is completely straight in the 6 o'clock position, lower your seat. If your knee is bent too far, raise up the seat.
- Seat depth: If your knee is behind the ball of your foot while in the 3 o'clock position, move your seat forward. If your knee is ahead of your foot, move the seat back.
- Pedaling: If your legs feel strained while pedaling or your hips start rocking, lower your seat. If your knees go out to the sides, raise your seat.

Practice pedaling in 1st position.
-
The 1st position is a relaxed, seated stance on the bike. Peloton workouts feature 3 bike positions with increasing intensity. Take a seat on the bike and lean forward with your back flat and straight, your shoulders relaxed, and your chest open. Place your hands at the widest part of the handlebars and pedal. This is the 1st (and easiest) position.[7] X Research source
- Whenever an instructor tells you to return to 1st position in a ride, gently return to this position.

Pedal in 2nd position.
-
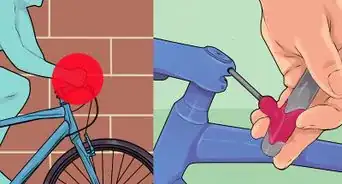
The 2nd position is used for lower-speed jogs and sprints. Start by turning up the resistance (using the red knob below you on the bike) until it takes more effort to pedal. Then, raise yourself out of the seat and position your hips directly over the pedals, placing your hands on the bend of the handlebars to support your upper body.[8] X Research source
- While pedaling in this position, keep your head up, chest open, and shoulders back and down.
- You should not be standing straight up or leaning far forward. Your core muscles will naturally activate to support your body without your hands!

Master pedaling in 3rd position.
-
The 3rd position is used for steep climbs or accelerating to high speeds. Keep increasing the resistance (using the red knob) until you feel an effort when you pedal. Rise up from the seat with your head high, your chest open, and position your hips in front of the pedals as you continue to turn them. Place your hands at the top of the handlebars for stability.[9] X Research source
- Maintain a slight bend in your knee and make sure your shoulders don't creep up into your ears.
- If this position isn't comfortable, slow your pace or return to the seat and try it again after you're more used to the Peloton.

Set up your Peloton account and screen name.
-
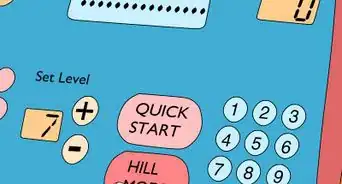
Interact with Peloton's community and save your metrics with an account. Press the power button on the touchscreen to turn on the bike, then enter your subscription information to activate it. When you log onto the bike's home screen for the first time, you'll be prompted to create a screen name that'll appear on the leaderboard and the class roster.[10] X Research source
- Entering subscription information is easy! Follow the onscreen prompts for information, such as your time zone and the email you used to pay for your subscription.
- Choose a screen name that tells a little bit about yourself and is relatively simple. For example, if you're a mom, you could choose the name "FitMomEmma." If you're an early riser, you could use "ZeroDarkThirtyRider."

Watch the Peloton 101 tutorial.
-
The tutorial series will familiarize you with the bike if you're a beginner. Once you're logged into the home screen, look for the video series labeled "Peloton 101" in the list of menu options. If you're just getting started riding your Peloton bike, spend some time reviewing the videos to get even more familiar with your bike.[11] X Research source
- You don't have to watch all of the tutorials at once if you're ready to get riding. You can always check them out later!

Calculate your Power Zone.
-
Find your Power Zone so you can push yourself on rides. “Power Zone” training is designed to have you work at seven different levels (or zones) of exertion based on output power (measured in watts). Select an "FTP" test ride from the library on your monitor and complete it to find your specific zones so you can use them to go on Power Zone rides.[12] X Research source
- Knowing your specific zones will help you understand how hard you should push yourself to stay in the zone and get the most out of your rides.
- Focusing on Power Zone rides will also allow you to track your progress as you improve.
- Look for instructors Denis Morton and Matt Wilpers in the library to find FTP test rides you can use to find your zones.

Start with a beginner-level class.
-
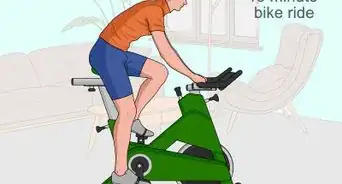
Low-intensity workouts are best if you aren't used to the bike yet. Since your body is still getting the hang of the Peloton, start small and build up the intensity gradually. For your first ride, select a short, low-impact session between 10 and 20 minutes long and see how you feel after. Stick to beginner-level classes for a little while, then do longer sessions as your body strengthens.[13] X Research source

Take a live class on the Peloton.
-
Live classes are great for anyone who wants to participate in real-time. Check the Peloton's home screen for the times of all upcoming live rides. Live classes appear at the top right corner of the display and in the Schedule tab. Tap on 'Count Me In' or 'Join' when you've found the class you want to take, and join in about 10 minutes before the ride starts so you can participate in the warmup and class discussion.[14] X Research source
- To navigate your Schedule tab, tap on it at the bottom of the display and tap on the date you want to do a live class. Scroll down the available classes and select one to join.
- Live rides sometimes involve a shoutout from your instructor, and you'll definitely get one on your first day of a live class!

Try different on-demand rides.
-
Peloton has various options, from beginner rides to themed classes. On-demand rides are available in addition to live rides, so you can work out when it's convenient for you. Once you're logged in, look through the onscreen menu for lists of rides. Scroll through the options and pick one that sounds appealing.[15] X Research source To ensure you don't get confused, here's a list of Peloton classes and terminology:
- Low-Impact means the bike's resistance and cadence won't go too high, and there are minimal (if any) standing sections.
- Groove workouts are more focused on riding to the beat of the music and sometimes involve extra movement on the bike.
- Live DJ means there's a DJ at the studio, mixing songs for the class.
- HIIT stands for high-intensity interval training; this is periods of intense effort broken up by short rests. "Tabata" rides are a type of HIIT with a more specific pattern.
- Power Zone rides are based on your calculated Functional Threshold Power (FTP). They're broken up into 7 different "zones," ranging from super easy to maximum effort.
- Theme rides are workouts based on a specific genre of music. Some Peloton themes include the '70s, '80s, Y2K, classic rock, EDM, country, jazz, and Broadway music.

Give high-fives to other riders.
-
Connect with riders in your class by sending them a friendly high-five. During a live or encore ride, you can congratulate another rider for their progress (or simply say hello) by sending them a "high-five." Locate the profile picture of the person you want to high-five next to their leaderboard name on your home screen and double-tap the picture with your finger to send them the virtual high-five.[16] X Research source
- The other rider will be notified that you send them a high-five, and they may send one in return.
- If someone breaks their own record or if you both just survived a tough steep climb, a high-five is a great way to motivate each other!

You Might Also Like


References
- ↑ https://support.onepeloton.com/hc/en-us/articles/5228275973140-Setting-Up-Your-Peloton-Guide
- ↑ https://support.onepeloton.com/hc/en-us/articles/360048240392-Adjusting-Your-Peloton-Bike-
- ↑ https://support.onepeloton.com/hc/en-us/articles/360048240392-Adjusting-Your-Peloton-Bike-
- ↑ https://support.onepeloton.com/hc/en-us/articles/360048240392-Adjusting-Your-Peloton-Bike-
- ↑ https://support.onepeloton.com/hc/en-us/articles/203325915-Adjusting-Your-Bike-Settings
- ↑ https://support.onepeloton.com/hc/en-us/articles/360048240392-Adjusting-Your-Peloton-Bike-
- ↑ https://support.onepeloton.com/hc/en-us/articles/115001080006-Peloton-Bike-Riding-Positions#h_01G54HERNPQ7BVD4V8WJ1WVTVJ
- ↑ https://support.onepeloton.com/hc/en-us/articles/115001080006-Peloton-Bike-Riding-Positions#h_01G54HERNPQ7BVD4V8WJ1WVTVJ
- ↑ https://support.onepeloton.com/hc/en-us/articles/115001080006-Peloton-Bike-Riding-Positions#h_01G54HERNPQ7BVD4V8WJ1WVTVJ
- ↑ https://support.onepeloton.com/hc/en-us/articles/7582860738836-Activating-Your-Peloton-Product-and-Membership
- ↑ https://www.businessinsider.com/are-peloton-bikes-worth-the-cost-2019-3
- ↑ https://support.onepeloton.com/hc/en-us/articles/360000906963-Power-Zones
- ↑ https://connectthewatts.com/2021/07/28/peloton-beginners-guide-to-every-class-category/
- ↑ https://millennialhawk.com/peloton-live-classes/
- ↑ https://support.onepeloton.com/hc/en-us/articles/5230772816148-Finding-a-Class-on-Peloton-Guide-
- ↑ https://support.onepeloton.com/hc/en-us/articles/360046166092-How-To-Send-A-High-Five
About This Article