This article was co-authored by wikiHow staff writer, Sophia Latorre. Sophia Latorre is a Content Manager on the wikiHow team. Before joining wikiHow, Sophia worked as a technical editor and was published in six International Energy Agency (IEA) Wind Annual Reports. Now, she writes, edits, and reviews articles for the wikiHow Content Team, working to make the content as helpful as possible for readers worldwide. Sophia holds a BA in English from Colorado State University.
wikiHow marks an article as reader-approved once it receives enough positive feedback. This article received 13 testimonials and 87% of readers who voted found it helpful, earning it our reader-approved status.
This article has been viewed 818,385 times.
Learn more...
An electric bike is a lot easier to build than you might think! All you need is a bike in good working order, a conversion kit, and a battery. Using a conversion kit makes the process super simple and fast. And if you shop online to find the best deal on the kit and repurpose a bike you already own, this can be an inexpensive project.
Steps
Materials
-
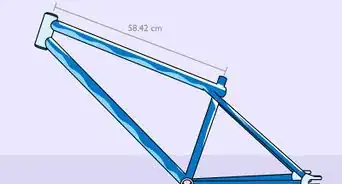
1Select a mountain bike front disc brakes and wide handlebars. If you don't own a bike already, search online or in your local area to find a second-hand bike at a good price. Luckily, you can use just about any bike you have on hand, though certain features will yield the best results:[1]
- Choose a bike with wheels that are 26", 20", or 16" as these are the most common off-the-shelf wheel sizes. The smaller the wheels are usually found on folding bikes and will accelerate more quickly, be bumpier, and be less efficient at cruising speed.
- Mountain bikes are most commonly converted to electric bikes, though you could use a different type as long as it has a strong frame and standard bottom bracket. Don’t use a bike with a carbon fiber frame or forks, as these aren’t strong enough to support the extra weight or handle the extra torque.[2]
- Wider handlebars are best as they give you plenty of room for all your accessories and lights.
- Front disc brakes will make it easier for you to stop on steep hills.
-
2Pick up an electric bicycle conversion kit. If you’ve never built an electric bicycle before, a conversion kit will make the process much simpler. These bolt-on kits contain a throttle, speed controller, and a wheel with a hub motor. Some also come with gauges, displays, and brake levers, though these are not strictly necessary.[3]
- Ensure the kit comes with a wheel that is the same size as the existing wheels on your bike! It’s much easier to replace the front wheel than the back, due to the position of the gears, so opt for a kit in which the hub motor is on the front wheel.
- In most cases, the battery doesn’t come with the conversion kit. For ease of installation, though, it’s best to purchase the battery and the conversion kit from the same manufacturer.
Advertisement -
3Choose a 36- or 48-volt battery with a capacity of 10Ah or 20Ah. Choose a battery designed for use on an electric bicycle, as it will come with a charger and be much easier to install. Make sure the voltage and capacity of the battery you choose are compatible with the conversion kit you purchased. The higher the voltage of your bike's battery, the more powerful your bike will be. When building an electric bike, choose a 36- or 48-volt battery to allow for speed and comfort.[4]
- The capacity of the battery defines how long it'll last. If you’ll be taking short trips, a 10Ah will suit you well, while a 20Ah battery will provide you with extra capacity for slightly longer journeys.[5]


Wheel Replacement
-
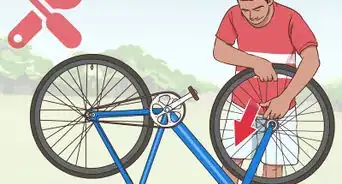
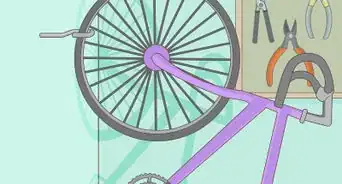
1Remove the wheel you need to replace. Begin by opening the rim or cantilever brake using the lever (if applicable). If the bike has disc brakes, remove the retaining or cotter pin or the clips or springs that hold the pads in place. Pull the pads out with needle-nose pliers and set them aside.[6]
- To remove the front wheel, turn the bike over so it’s sitting on the seat and handlebars, then flip the quick-release lever over to the “open” position. Then, simply lift the front wheel off of the bike.[7]
- To remove the back wheel, crouch behind the bike. Hold the frame with your non-dominant hand and use your dominant hand to pull the derailer backward. Then lift the bike frame up and off of the rear wheel with your non-dominant hand and unhook the chain with your dominant hand.[8]
-
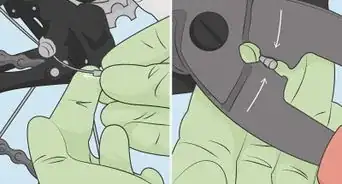
2Transfer the tire and inner tube from the old wheel to the new wheel. Let the air out of the old tire and use a tire lever to separate the tire from the wheel. Pull off both the tire and the inner tube. Reverse the process to install the tire and inner tube on the wheel that came with the conversion kit.[9]
-
3Put the wheel with the electric hub on your bike and connect the brake components. Simply reverse the process you used to remove the wheel in order to reinstall it. Be sure to adjust the chain so it fits properly if you’re replacing the back wheel. If the bike has rim or cantilever brakes, simply close them over the new wheel using the lever. If the bike has disc brakes, put the pads back in place and secure them using the clips, springs, or cotter or retaining pin.[10]
- Adjust the brakes as needed, either by aligning the calipers (for mechanical brakes) or pumping the brake lever (for hydraulic brakes).


Final Installations
-
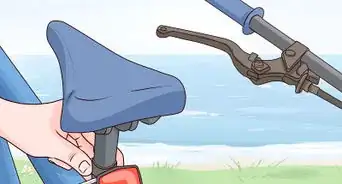
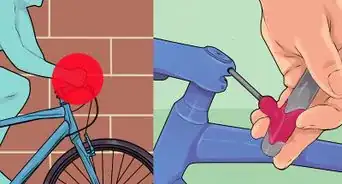
1Attach the speed controller and the throttle. Follow the directions in the conversion kit for installing these 2 parts using the included hardware. Use the provided bolts to secure the speed controller to the frame of the bike above the chain. Then, attach the throttle to the handlebars so it’s easy to reach.[11]
- If you have any other accessories, attach them as well. Secure the speed sensor to the back wheel and connect any displays and gauges to the handlebars with the included hardware.[12]
-
2Connect the battery to the speed controller and the throttle. Follow the instructions included with the kit to connect each part. Typically, you’ll only need to plug the connector on the speed controller into the connector on the battery, then repeat the process for the throttle. Be sure not to touch the battery wires together, as this could create a dangerous spark! [13]
-
3Mount the battery onto the bike. Most e-bike batteries are designed to fit on the frame in place of a water bottle holder. This is the ideal placement since it keeps the center of gravity low. Use the included hardware to attach the battery to the frame as indicated by the instructions that came with the battery.[14]
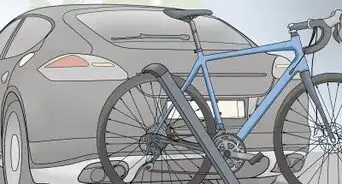
- Alternatively, you could place the battery in a box or basket on the front or back of the bike, particularly if it is too large to fit well on the frame (such as if it’s more than 60 volts).
-
4Secure any loose cables. Use zip-ties to attach any loose parts to the frame. Keep safety in mind as you don’t want any cables to get caught while you’re riding.[15]
-
5Ride your electric bike. That’s it! You can now cruise around on your e-bike. Just press down gently on the throttle when you’re ready to ride. Go for a test drive in a less populated area so you can get used to it before you take it out on the road.
-
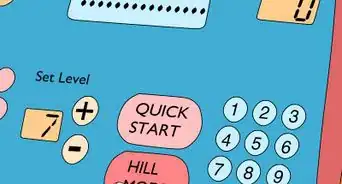
6Charge the bike when necessary. The e-bike battery comes with a charger, making the process super simple. Follow the instructions for connecting the battery to the charger and plug it into a compatible outlet whenever you need to.[16]


Community Q&A
-
QuestionWhat’s the best kind of motor for a DIY electric bike?
 wikiHow Staff EditorThis answer was written by one of our trained team of researchers who validated it for accuracy and comprehensiveness.
Staff AnswerwikiHow Staff EditorStaff AnswerMid-drive motors are lighter than hub motors and make it easier to climb hills or start from a stop. They also make it easier to change your tires. However, hub motors are a lot less expensive, sturdier, and less hard on your chains. It all depends on your needs and preferences. -
QuestionCan I get an electric bike kit?wikiHow Staff EditorThis answer was written by one of our trained team of researchers who validated it for accuracy and comprehensiveness.
Staff AnswerwikiHow Staff EditorStaff AnswerYes, there are lots of kits on the market that allow you to easily convert a regular bike into an electric bike. You can get them online, from department stores, or from stores that specialize in DIY bike supplies. -
QuestionHow do you make an electric bike with a drill?wikiHow Staff EditorThis answer was written by one of our trained team of researchers who validated it for accuracy and comprehensiveness.
Staff AnswerwikiHow Staff EditorStaff AnswerYou’ll need to secure a cordless electric drill to the bike frame so that the chuck is in contact with the rear tire, then connect a bike hand brake to the trigger on the drill with a bike cable. Install the hand brake on the handlebars. When you squeeze the hand brake, the cable will pull on the trigger of the drill and activate it, causing it to move your bike forward (at a very slow speed!).
Things You'll Need
- Bike
- Battery
- Conversion kit
- Needle-nose pliers
- Tire lever
- Zip ties


References
- ↑ https://makezine.com/2015/01/14/how-i-built-my-first-electric-bike/
- ↑ https://electrek.co/2018/04/21/weekend-project-build-your-own-budget-friendly-electric-bicycle-for-under-500/
- ↑ https://electrek.co/2018/04/21/weekend-project-build-your-own-budget-friendly-electric-bicycle-for-under-500/
- ↑ https://electrek.co/2018/04/21/weekend-project-build-your-own-budget-friendly-electric-bicycle-for-under-500/
- ↑ https://electrek.co/2018/04/21/weekend-project-build-your-own-budget-friendly-electric-bicycle-for-under-500/
- ↑ https://www.bikeradar.com/us/gear/article/how-to-change-disc-brake-pads-25208/
- ↑ https://www.liv-cycling.com/global/campaigns/removing-and-reinstalling-a-bike-wheel-for-transport/19059
- ↑ http://www.madegood.org/bikes/repair/remove-rear-wheel-with-wheel-nuts/
- ↑ https://electrek.co/2018/04/21/weekend-project-build-your-own-budget-friendly-electric-bicycle-for-under-500/
- ↑ https://www.bikeradar.com/us/gear/article/how-to-change-disc-brake-pads-25208/
- ↑ https://electrek.co/2018/04/21/weekend-project-build-your-own-budget-friendly-electric-bicycle-for-under-500/
- ↑ http://www.mrmoneymustache.com/2016/05/25/recipe-for-a-badass-diy-electric-mountain-bike/
- ↑ https://electrek.co/2018/04/21/weekend-project-build-your-own-budget-friendly-electric-bicycle-for-under-500/
- ↑ https://electrek.co/2018/04/21/weekend-project-build-your-own-budget-friendly-electric-bicycle-for-under-500/
- ↑ https://electrek.co/2018/04/21/weekend-project-build-your-own-budget-friendly-electric-bicycle-for-under-500/
- ↑ https://makezine.com/2015/01/14/how-i-built-my-first-electric-bike/
- ↑ https://makezine.com/2015/01/14/how-i-built-my-first-electric-bike/
About This Article

To build an inexpensive electric bicycle, you'll need a bike with front-disc brakes and wide handlebars, an electric bicycle conversion kit, and a 36- or 48-volt battery. Once you have your supplies, start by putting the tire from the old bike wheel on the new wheel with the hub motor that came with your conversion kit. Then, attach the speed controller that came with the kit to the frame of your bike above the chain, and attach the throttle to the handlebars. Finally, connect the battery to the speed controller and throttle and mount the battery on your bike. To learn how to ride and charge your electric bicycle, scroll down!