This article was co-authored by wikiHow Staff. Our trained team of editors and researchers validate articles for accuracy and comprehensiveness. wikiHow's Content Management Team carefully monitors the work from our editorial staff to ensure that each article is backed by trusted research and meets our high quality standards.
There are 31 references cited in this article, which can be found at the bottom of the page.
This article has been viewed 26,994 times.
Learn more...
EndNote is an online or desktop program that can help you organize references while you research. Once you've imported a list of references into the program, you can use EndNote to put ready-made citations and bibliographies into your papers. You can also share your reference lists with friends and colleagues. While the downloadable version of this extremely useful program is a bit pricey, the online-only (EndNote Basic) system is free for all users!
Steps
Adding References and PDFs
-
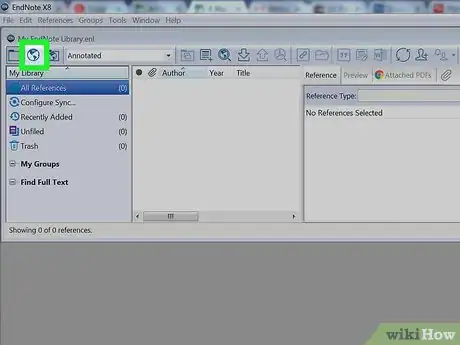
1Use the online search tab or button to import citations. This will allow to search through the databases that are directly linked to your EndNote program. This is the easiest way to find and retrieve citations.[1]
- In the Desktop version, online search is the button represented by a small globe.
- For EndNote Basic, look for a tab labeled “Collect.” Under this tab, the leftmost option is “Online Search.”[2]
-
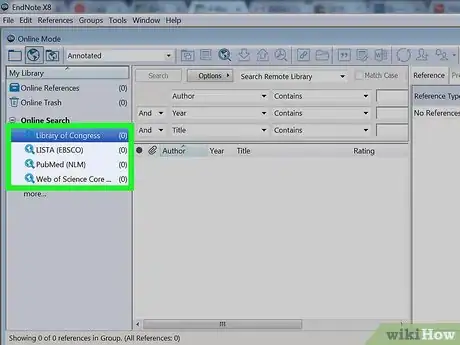
2Select a database and start your search. Use the drop-down menu to pick your desired database. Then, fill in your search terms. You can look for a specific citation using the title of the piece and its author. You might also want to find a series of references by doing a general keyword search.[3]
- EndNote Basic only gives you 4 database search options: the British Library, the Library of Congress, the National Library of Medicine, or PubMed.
- EndNote Desktop has thousands of database search options.
Advertisement -
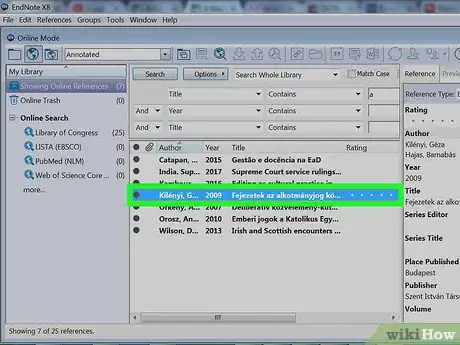
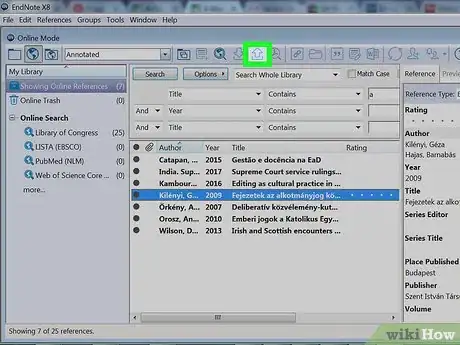
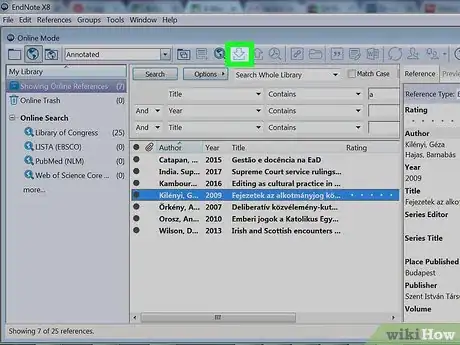
3Add citations to a group. Once your search generates results, glance through and check the boxes of the ones you want to save to your library. For EndNote Desktop, click the “Copy to Local Library” button. For EndNote Basic, select which group you want to save the citations to from the drop-down menu.[4]
- For EndNote Desktop, you can then navigate to your local library, view the references you just added in the “Copied References” list, and either make a new group or add them to a current group. Note that “Copied References” is just a temporary list.
- If you don't save your references to a group, they'll automatically go to a folder labeled “Unfiled.”
-
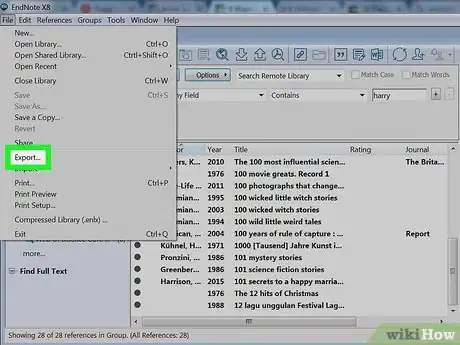
4Direct export references from databases during your searches. Many databases, including PubMed and Google Scholar, give you the option of exporting citations from their websites to EndNote. When you've searched and found the citations you want to save, check the boxes and look for an “Export” or “Send To” button. Then click on “Citation Manager,” “EndNote” or “Direct Export.”[5]
- This option is available for both Basic and Desktop.
- This is a useful option if you're doing research in just one database.
- Each database will have its own links for exporting citations. Generally, look for something that mentions exporting or sending. Once you've clicked that link, choose the export option that mentions citations or EndNote.
- It's best to use Mozilla Firefox for these searches. This browser supports direct export to both Mac and Windows versions of EndNote.
-
5Import references as files once they've been exported. The direct export option will create a file that's downloaded to your computer. Import that file into EndNote by clicking on “Collect” and “Import References.” Select the file and specify which database it came from in the drop-down menu. You might also need to choose the file type if your reference isn't from one of EndNote's commonly used databases. Finally, pick which group you want the citation to go to.[6]
- If you have EndNote Desktop, the citations will automatically transfer to your library. You just need to select “Open with EndNote” when the file is downloaded.[7]
-
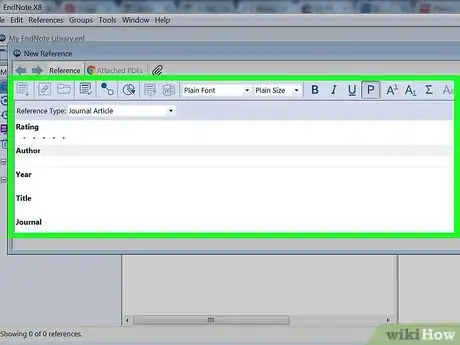
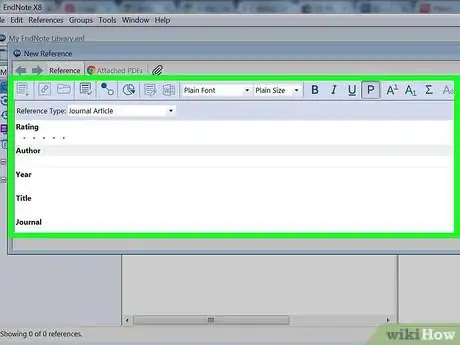
6Manually enter references if the formatting doesn't translate. There may be times when you'd prefer to type out and add your own citation to your EndNote library. You can do that, too! For Basic users, just choose the “New Reference” option under “Collect.” For Desktop-ers, click the “New Reference” button on your toolbar.[8] Then enter in all the information you need for a complete citation in the blank boxes.[9]
-
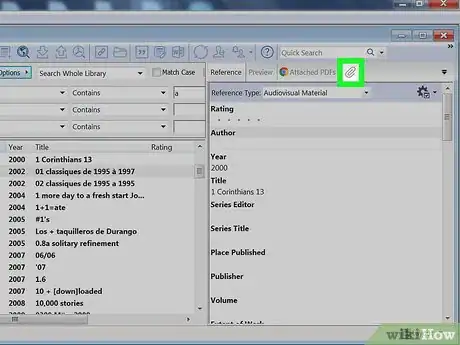
7Link PDFs to citations by attaching files or searching for them. If you already have PDF copies of articles on your computer, link them to the EndNote citation by clicking on the little paper clip under the reference. If you have the Desktop version of EndNote, you can also click on a button labeled “Find Full Text” in your toolbar. If EndNote can find the files, it'll automatically link them to your citations.[10]
Exporting Citations to Your Documents
-
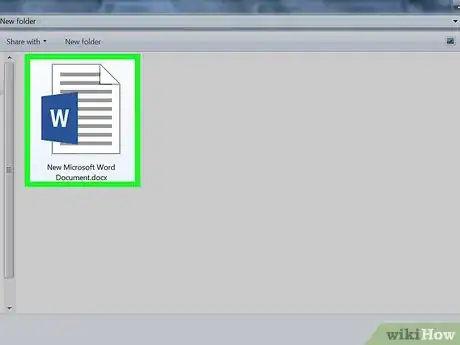
1Add the Cite While You Write plugin to Word if you have Basic. Go to the “Downloads” tab. Then click on whichever version of Cite While You Write (CWYW) is compatible with your operating system. This will add an EndNote toolbar to the top of your Word documents.[11]
- This plugin will be automatically added to Word when you download EndNote Desktop to your computer.[12]
- To use this feature with Basic, you must have Microsoft Word. If you have the latest version of EndNote Desktop, you can also use CWYW on Apple Pages or Wolfram Mathematica 8. These programs also have plug-ins for EndNote.[13]
-
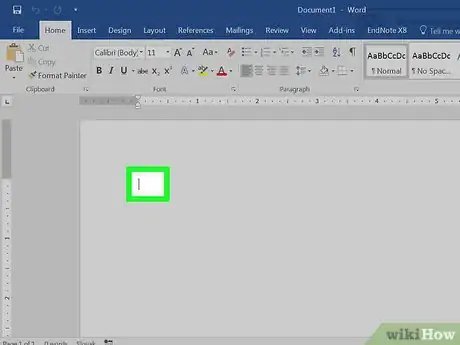
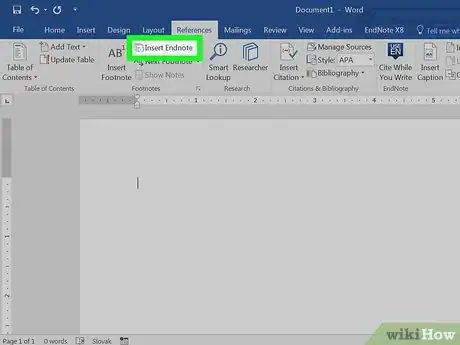
2Place your cursor where you want to add the citation. Make sure your cursor is blinking in the spot you'd like the citation to go. Then, click on “Go to EndNote” in the EndNote menu tab in the Word toolbar. This will allow you to access your EndNote library.[14]
-
3Choose the citation you want to add and insert it. Select the reference(s) you want to add by clicking the empty boxes next to them. This will send the references to your Word document. EndNote will automatically generate both a citation in the spot you've selected and a bibliography at the end of your document.[17]
- For Wolfram Mathematica 8, once you've pressed “Insert,” choose “Citation,” then “Bibliographical Reference.” Next, click on the reference you want to add. Hold down the control button to select and insert more than one reference at a time.[18]
- For Apple Pages, select the reference you'd like to add from the list that'll come up once you've chosen “EndNote Citation.”[19]
-
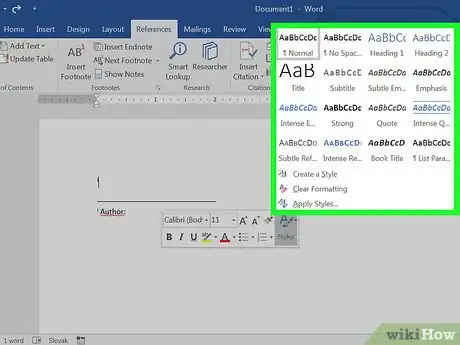
4Change the style of the citations if you need to. Your citations might be appearing in MLA, for example, and you need them to be in Chicago. In Word, click the small box at the bottom of the toolbar under the bibliography group. This will bring up a drop-down menu with style options. Choose your desired style, then click “OK.” This will re-format your citations and bibliography.[20]
- For Wolfram Mathematica 8, you can select the citation style you want from the drop-down menu that'll come up when you click “Set/Change Citation Style” in the Citation menu.[21]
- For Apple Pages, click “Edit,” then “EndNote Citations.” Next, click 'Bibliography Format,” and choose which citation style you prefer to use.[22]
-
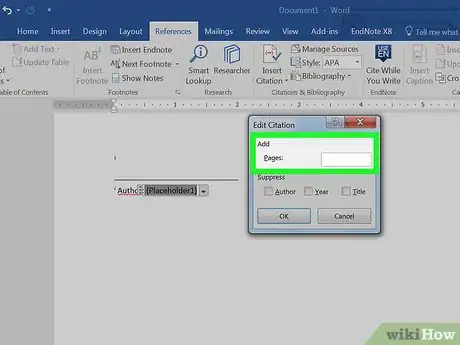
5Add page numbers using the “Edit and Manage Citations” button. Highlight the citation you want to modify. Then, add the pages you'd like to cite to the pages field in the box that pops up on your screen. These will then be automatically generated in your citation.[23]
- For Mathematica 8 and Apple Pages, add page numbers (if necessary) when you're inserting the citation.[24]
-
6Create independent bibliographies if you need to. In Basic, choose “Format,” then “Bibliography” and pick which style of bibliography you want. You can also hit “Format” and “Export References” to make a list that can be emailed or printed. For Desktop users, you can copy and paste selected citations. Select multiple references by holding down the control button, then choose “Copy Formatted” in the “Edit” menu. Open a new document and paste them in![25]
- EndNote Basic will generate an HTML, text, or rich text file. To make the bibliography compatible with Word, Pages, or Wolfram Mathematica, select “rich text” and save the list to your computer.[26] [27]
- While EndNote will automatically create and update your bibliography each time it adds a citation to your paper, you might also want a separate bibliography document, or even an annotated bibliography.
-
7Proofread citations and bibliographies for formatting errors. While EndNote will definitely cut down on your citation and bibliography-writing workload, it's not foolproof! It can make mistakes. To avoid looking sloppy or lazy, read through each citation and reference in your bibliography. If you notice strange symbols or formatting problems, clean those up before finalizing your paper.[28]
Sharing Your EndNote Groups
-
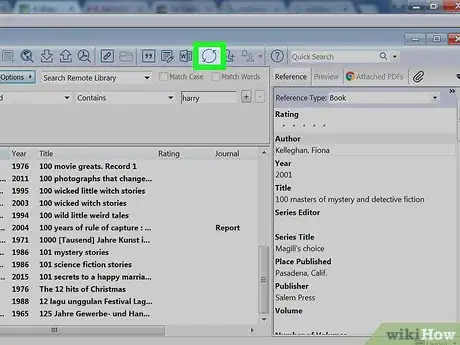
1Click the sync button in the toolbar if you're using Desktop. In order to share references, you need access to your EndNote online library. Basic users will always be online and don't need to worry about syncing anything. However, if you've got Desktop and haven't yet set up an EndNote online account, you'll need to do it now.[29]
- The sync button will bring up a pop-up window that will allow you to click “Sign Up.” You can then create an online EndNote account using the email address of your choice.[30]
-
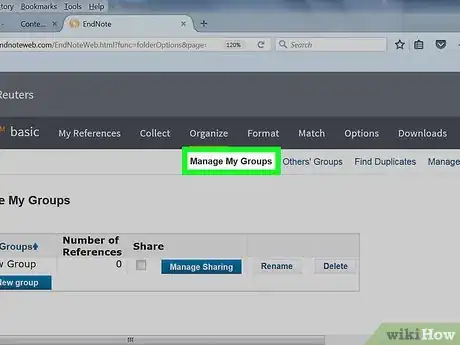
2Click the “Organize” tab, then “Manage My Groups.” Once you've navigated to your online account, go to your groups. References can only be shared if they're in groups.[31]
-
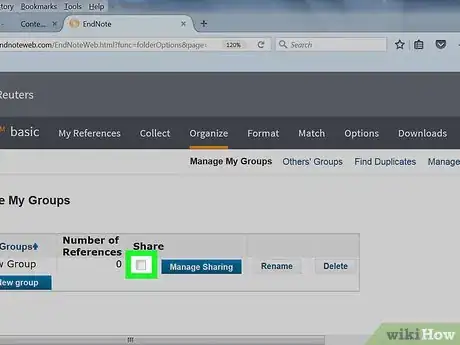
3Click the empty box under “Share.” Each group has a sharing option represented by a tiny box. Once you've clicked it, hit “manage sharing,” then “start sharing this group.” You can then enter the email address of the person you'd like to share with.[32]
- It must be the email address that someone uses to log into their EndNote online account. If your colleague doesn't have an EndNote account, you can't share your group with them!
- You can type in multiple email addresses if you'd like to share the group with more than one user. If you have emails saved to a file on your computer, you can also use this to share the group.
-
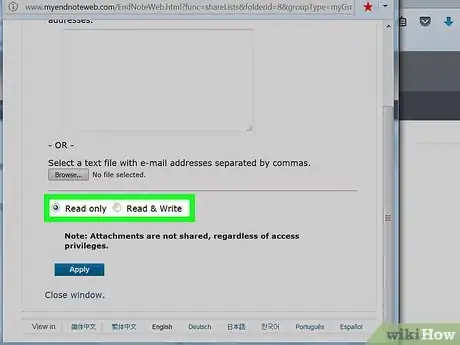
4Allow your group to be edited by others. When you share your group, you can select either “Read Only” or “Read and Write.” Selecting “Read and Write” lets the people you've shared the group with add and delete references, and use the list to generate citations and bibliographies.[33]
- The “Read Only” option will allow your fellow EndNote users to just view the list.
- Groups that have been shared with you that you can edit will have a little book-and-pencil icon next to them.
-
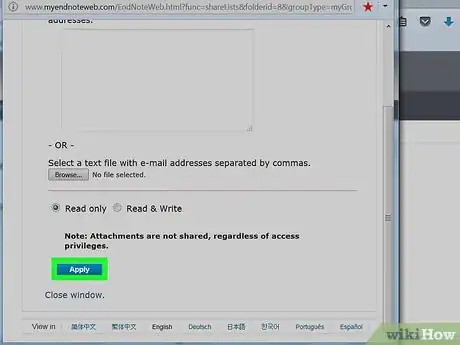
5Hit apply to finish sharing. Once you've selected which users you'd like to share the group with and decided whether you want them to edit or just read what you're sending, click the “Apply” button. Your group is now shared![34]
- Groups that you've shared will have a little “people” icon next to them in your list of groups.
- Be aware that any file attachments you've got linked to your citations will not be shared.[35]
-
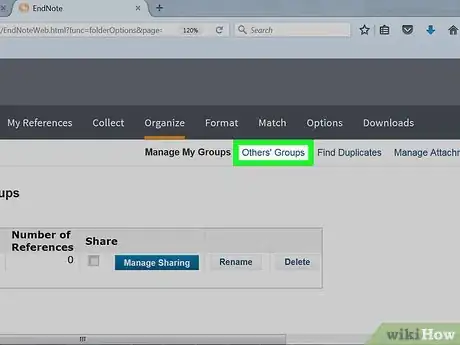
6Look for groups shared to you under “Groups Shared by Others.” Groups that are sent to you are kept separate from groups that you've created. Look for the new list underneath your current list of self-generated references.[36]
Downloading and Setting up EndNote
-
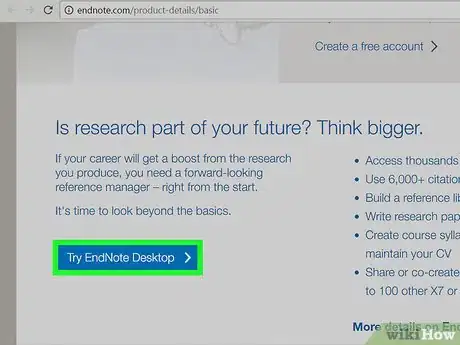
1Choose EndNote Basic for a free but limited version. To get EndNote Basic, all you need to do is navigate to http://endnote.com/product-details/basic and click on “Create a Free Account.” It'll prompt you to make an online account using a valid email. You'll need to access that email account to verify the account, and then you'll be all set![37]
- Unless you're a professional researcher or academic, EndNote Basic should serve all your needs. It provides the ability to directly search within 4 popular databases, and it can format citations in 21 styles. You can also save up to 50,000 references in your online library.
- EndNote Basic has less storage, as well as fewer database search options and citation styles than the Desktop version.
-
2Use your Web of Science subscription to access EndNote Basic. If you're a student, academic, or government worker, this account is likely accessible through your library or institution's website. If you sign up for EndNote Basic through this account, you'll have access to more databases to search through for references. Go to Web of Science and click on the EndNote tab. Click on “Register” and follow the prompts to create your account.[38]
- An integrated Web of Science account also gives you unlimited storage for references.[39]
- Contact your institution if you're unsure whether you have access to Web of Science.
-
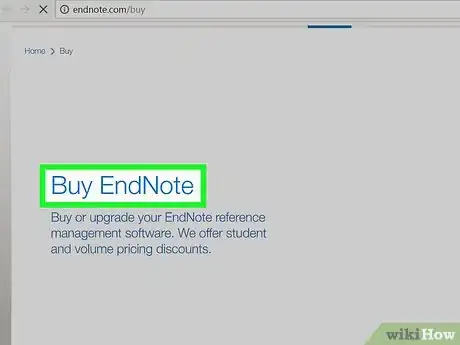
3Download the most recent version of EndNote Desktop. Navigate to http://endnote.com/buy. If you already own an older version of EndNote and want to upgrade to the newest version, it'll cost about $100 USD. If you're purchasing the newest version outright, you'll pay about $250 USD for the downloadable option or $300 USD for the disk copy.[40]
- EndNote Desktop gives you unlimited storage, the ability to directly search over 6,000 databases for references, and access to over 6,000 citation styles.[41]
- EndNote is compatible with both Windows and Mac operating systems. Be sure to buy the right version!
- There are student pricing options available for EndNote Desktop. However, you can only make this purchase at your campus bookstore.[42]
-
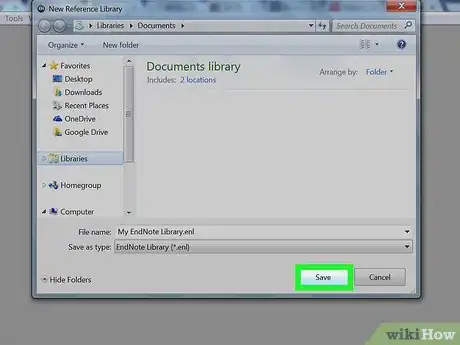
4Create one new EndNote library for EndNote Desktop. You only need one library for all of your references. Click “File” and then “New” to get started. You can sort references for different projects within this library by making new groups.[43]
- Once you've created an EndNote library, you'll see two files in whichever folder you choose to save the library in on your computer. Do not merge or delete either of these files, as one stores your data, and the other is the actual library file. The data file will have a folder icon, and the other will be represented by an EndNote icon.
- It's recommended that you save your EndNote library to a folder in “My Documents” on your computer.
Warnings
- You may occasionally need to remove what are called “field codes” from your citations. These are little bits of coding that allow EndNote to format citations within Word. To remove them, click “Convert Citations and Bibliography” and then “Convert to Plain Text” in the EndNote toolbar. This will make a new document without field codes.[44]⧼thumbs_response⧽
References
- ↑ https://www.youtube.com/watch?v=lnqPjjKwEPk&feature=youtu.be&t=43
- ↑ https://www.youtube.com/watch?v=shIDX4Io8KQ&feature=youtu.be&t=142
- ↑ https://www.youtube.com/watch?v=lnqPjjKwEPk&feature=youtu.be&t=53
- ↑ https://www.youtube.com/watch?v=lnqPjjKwEPk&feature=youtu.be&t=94
- ↑ https://www.youtube.com/watch?v=lnqPjjKwEPk&feature=youtu.be&t=158
- ↑ http://www.lib.uiowa.edu/hardin/endnotebasic/
- ↑ http://guides.lib.unc.edu/c.php?g=8426&p=43398
- ↑ http://guides.lib.unc.edu/c.php?g=8426&p=43399
- ↑ http://www.lib.uiowa.edu/hardin/endnotebasic/
- ↑ https://www.youtube.com/watch?v=lnqPjjKwEPk&feature=youtu.be&t=240
- ↑ http://www.lib.uiowa.edu/hardin/endnotebasic/
- ↑ http://guides.lib.unc.edu/c.php?g=8735&p=44461
- ↑ http://unimelb.libguides.com/c.php?g=403235&p=2744653
- ↑ https://www.youtube.com/watch?v=lnqPjjKwEPk&feature=youtu.be&t=266
- ↑ http://reference.wolfram.com/language/tutorial/CitationManagement.html
- ↑ https://support.apple.com/kb/PH23641?locale=en_US&viewlocale=en_US
- ↑ http://guides.lib.unc.edu/c.php?g=8735&p=44461
- ↑ http://reference.wolfram.com/language/tutorial/CitationManagement.html
- ↑ https://support.apple.com/kb/PH23641?locale=en_US&viewlocale=en_US
- ↑ https://www.youtube.com/watch?v=lnqPjjKwEPk&feature=youtu.be&t=296
- ↑ http://reference.wolfram.com/language/tutorial/CitationManagement.html
- ↑ https://support.apple.com/kb/PH23641?locale=en_US&viewlocale=en_US
- ↑ https://www.youtube.com/watch?v=lnqPjjKwEPk&feature=youtu.be&t=317
- ↑ https://support.apple.com/kb/PH23641?locale=en_US&viewlocale=en_US
- ↑ http://libguides.utoledo.edu/c.php?g=284330&p=1895338
- ↑ https://support.apple.com/en-us/HT202227
- ↑ http://reference.wolfram.com/language/guide/ListingOfAllFormats.html
- ↑ http://www.lib.uiowa.edu/hardin/endnotebasic/
- ↑ https://www.youtube.com/watch?v=hSExPuxdbcM&feature=youtu.be&t=36
- ↑ https://www.youtube.com/watch?v=xjsJaKRp3s4&feature=youtu.be&t=126
- ↑ https://www.youtube.com/watch?v=hSExPuxdbcM&feature=youtu.be&t=62
- ↑ https://www.youtube.com/watch?v=hSExPuxdbcM&feature=youtu.be&t=62
- ↑ https://www.youtube.com/watch?v=hSExPuxdbcM&feature=youtu.be&t=113
- ↑ https://www.youtube.com/watch?v=hSExPuxdbcM&feature=youtu.be&t=116
- ↑ https://www.youtube.com/watch?v=hSExPuxdbcM&feature=youtu.be&t=170
- ↑ https://www.youtube.com/watch?v=hSExPuxdbcM&feature=youtu.be&t=146
- ↑ http://endnote.com/sites/en/files/m/pdf/en-online-qrc.pdf
- ↑ http://guides.lib.unc.edu/c.php?g=8735&p=3800035
- ↑ http://libguides.lib.msu.edu/ld.php?content_id=27418937
- ↑ http://endnote.com/buy
- ↑ http://libguides.lib.msu.edu/ld.php?content_id=27418937
- ↑ http://endnote.com/buy
- ↑ https://www.youtube.com/watch?v=DR1QW3XjxSk&feature=youtu.be&t=13
- ↑ http://guides.lib.unc.edu/c.php?g=8735&p=44461
About This Article
To use EndNote, sign up for EndNote Basic online if you're looking for a free version. If you're a professional researcher or academic who needs more features than the free version offers, download the most recent version of EndNote Desktop on your computer, which is available for both Windows and Mac operating systems. If you're a student, you may be able to get a discount through your campus bookstore. To learn how to add references and PDFs using EndNote, keep reading!




-Step-18.webp)

