This article was co-authored by wikiHow Staff. Our trained team of editors and researchers validate articles for accuracy and comprehensiveness. wikiHow's Content Management Team carefully monitors the work from our editorial staff to ensure that each article is backed by trusted research and meets our high quality standards.
There are 12 references cited in this article, which can be found at the bottom of the page.
The wikiHow Video Team also followed the article's instructions and verified that they work.
This article has been viewed 26,883 times.
Learn more...
Glazes have a wide range of applications in the culinary arts, from lending sweet and tangy notes to meats and vegetables to providing a delicious decorative touch for homemade desserts. Every now and then, however, you’ll whip up a mouth-watering glaze recipe, only to discover that its too thin and soupy to properly coat the item it’s intended for. When this happens, it’s useful to know how to thicken up the type of glaze you’re working with without affecting its flavor.
Steps
Adding Cornstarch to Cooked Glazes
-
1Leave your glaze simmering on low heat as you prepare the slurry. Don't take your glaze off the cooktop, even if you've already heated it for the duration specified by the recipe you're following. Instead, keep it warm enough to produce a small amount of steam.[1]
- If you allow your glaze to cool off too much, you'll have a much harder time getting your thickening agents fully incorporated.
- When thickening glazes after the fact, low, steady heat is the key to achieving a smooth, consistent texture and unobtrusive flavor.
-
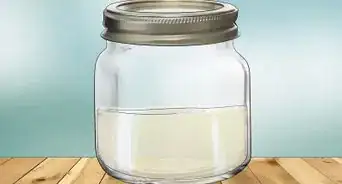
2Fill a small container with 1⁄2 cup (120 mL) of cold water. Run the water into a liquid measuring cup, adjust the quantity as needed, and transfer it from there to your mixing container. That way, you can be sure that you're using just the right amount.[2]
- You can mix your ingredients in a bowl, a cup, a jar, or any other handy piece of cookware or dining ware you happen to have lying around.
- Make sure the water you're using is no warmer than room temperature. Corn starch granules puff up when exposed to heat, which means that putting them in warm water will kick-start the thickening process prematurely.
Advertisement -
3Add 1-2 tablespoons (15-30 g) of cornstarch to the water. Portion out the cornstarch using a dry measuring cup or measuring spoon that's clearly labelled. Shake in the chalky powder a little at a time, using your free hand to gently stir the mixture with a fork or whisk as you do so.[3]
- Adding the water to the cornstarch rather than the other way around is more likely to produce undesirable lumps.
- In culinary lingo, this solution of water and starch is known as a “slurry.” Slurries are commonly used as thickening agents for soups, stews, sauces, and other liquid-based foods.[4]
Alternative: You can also use ordinary flour in place of corn starch . Just increase the recommended measurement by about 30% (from 15-30 g to 20-39 g).
-
4Whisk the mixture until it’s smooth and free of lumps. Take your fork or whisk and stir the slurry vigorously for about 20-30 seconds. Afterwards, examine the mixture and whisk it again, if needed. Repeat this process as many times as it takes to get it nice and velvety.[5]
- By the time you’re finished, your slurry should have a texture almost identical to milk.
- If there are lumps in your slurry, there will be lumps in your glaze.
-
5Add the slurry to your glaze little by little until it reaches the desired thickness. Pour in roughly one-quarter to one-third of the mixture. Then, stir the glaze thoroughly and let simmer for a few minutes. If it’s still not thick enough, pour in another one-quarter to one-third, stir, and simmer for another 5-10 minutes.[6]
- You may not need to use all of the slurry, depending on how thick you want your glaze to be.
- Keep in mind that most glazes will continue to solidify a bit as they cool, as well.[7]

Adjusting the Texture of Other Glazes
-
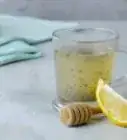
1Use powdered sugar to thicken sweet glazes prepared at room temperature. When you’re putting together a quick glaze for a cake or similar confection and it turns out a little too thin, the simplest way to rectify the situation is to stir in a little more sugar. The dry, dusty sweetener will absorb some of the overabundant liquid, resulting in a glossier glaze with more body.[8]
- Needless to say, the more sugar your add to your glaze, the sweeter it will be. For this reason, it may be wise to use slightly less when it comes time to decorate your item.
- These types of glazes are most often made using only powdered sugar and a liquid base, such as water, milk, cream, or fruit juice.[9]
-
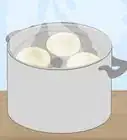
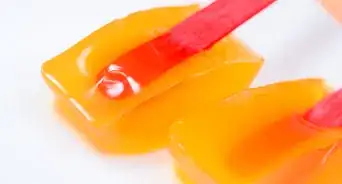
2Let pour-over glazes cool until they're slightly warmer than room temperature. It can be tough to get that luscious, effortless-looking drip pattern with simmered chocolate glazes or icings while they’re still piping hot. Luckily, there’s an easy solution—just wait a few minutes. You’ll have an easier time drizzling them once they've reached a more workable texture.[10]
- Depending on what exactly is in your glaze and how much you’re working with, it could take anywhere from 15 minutes to an hour to reach optimal pouring temperature.
- Keep a close eye on the consistency of your glaze throughout the cooling process. Temperature will be your primary means of controlling thickness, since it’s much harder to add other ingredients to a glaze after cooking it without impacting its taste.
-
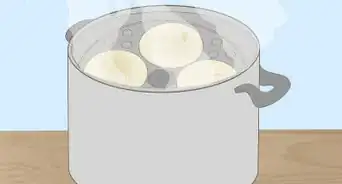
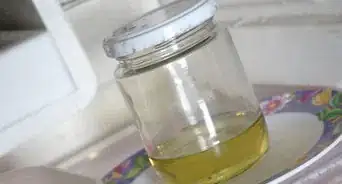
3Reduce watery glazes to do away with unwanted moisture. If you’ve got a stock-, vinegar-, fat-, or juice-based sauce on the stove that’s lacking in substance, simply turn the cooktop down to medium-low heat and simmer it for several hours. Once it’s reduced by about half, it will be ready to spoon over your favorite dishes.[11]
- To “reduce” something means to cook it over low heat until the excess moisture evaporates out of it.
- Low, slow reduction is the key to perfecting rich, flavorful sauces like the traditional French demi-glace.[12]
Tip: In a pinch, it can also help to incorporate a small amount of a secondary thickening agent, like flour or cornstarch slurry, though these components are more likely to dull the flavor of the reduction.


References
- ↑ https://www.youtube.com/watch?v=kFj2HjwJ3vc&feature=youtu.be&t=143
- ↑ https://www.food.com/recipe/sweet-sticky-ham-glaze-419115
- ↑ https://louisiana.kitchenandculture.com/kitchen-tips/about-using-corn-starch-and-flour-thickening-agents
- ↑ https://rouxbe.com/tips-techniques/361-what-is-a-slurry
- ↑ https://www.youtube.com/watch?v=_88pnsBGlAE&feature=youtu.be&t=20
- ↑ https://www.youtube.com/watch?v=kFj2HjwJ3vc&feature=youtu.be&t=125
- ↑ https://cafedelites.com/balsamic-glaze/
- ↑ https://www.thekitchenmagpie.com/how-to-make-an-orange-icing-glaze/
- ↑ https://food52.com/blog/20661-drip-consistencies-101-how-to-give-any-dessert-that-look
About This Article