This article was co-authored by wikiHow staff writer, Darlene Antonelli, MA. Darlene Antonelli is a Technology Writer and Editor for wikiHow. Darlene has experience teaching college courses, writing technology-related articles, and working hands-on in the technology field. She earned an MA in Writing from Rowan University in 2012 and wrote her thesis on online communities and the personalities curated in such communities.
This article has been viewed 184,572 times.
Learn more...
If you're suspicious of your PS4 controller's functionality and suspect that it is not working properly, you can always connect it to your Windows 10 computer and diagnose any issues. This wikiHow article will teach you how to test your PS4 controller's functionality with a Windows 10 computer.
Steps
-
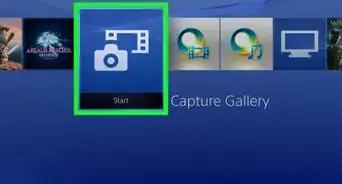
1Connect your PS4 controller to your computer. Using a USB to Micro-USB cable, connect your controller to a USB port on your computer. You can usually find these ports on the front or back of your computer tower, on the back of your monitor (if you're using an all-in-one), and along the sides of laptops. The Micro-USB cable plugs in at the top of your PS4 controller.
-
2Right-click the Start logo . You'll see this logo in the bottom left corner of your screen if you haven't moved the location of the taskbar.
- A menu will pop up from your mouse.
Advertisement -
3Type "Control Panel." As you type, the search window will show you results.
-
4Click Control Panel to launch the app. You should see this listed as an app under "Best Results."
- If you don't see it here, you can open the Run dialog (⊞ Win+R, enter "control panel" and press ↵ Enter.
-
5Click View Devices and Printers. You'll see this under the header, "Hardware and Sound."
- You'll see a listing of all your connected devices.
-
6Right-click Wireless Controller. You'll see this with the picture of a controller that closely resembles your PS4.
-
7Click Game controller Settings. This is usually the first listing in the drop-down menu.
- Another window should pop up.
-
8Click Properties. You'll see this in the lower right corner of the window that pops-up.
-
9Press the buttons on your controller to see their reaction on the computer screen. You'll see a bar that slides to show how hard you're pressing the button on your remote.
- For example, the graph on your computer screen should tell you how hard you're pressing the trigger buttons on your controller.[1]


References
About This Article

1. Connect your PS4 controller to your computer.
2. Right-click the Start logo.
3. Type "Control Panel."
4. Click Control Panel to launch the app.
5. Click View Devices and Printers.
6. Right-click Wireless Controller.
7. Click Game controller Settings.
8. Click Properties.
9. Press the buttons on your controller to see their reaction on the computer screen.