This article was co-authored by wikiHow Staff. Our trained team of editors and researchers validate articles for accuracy and comprehensiveness. wikiHow's Content Management Team carefully monitors the work from our editorial staff to ensure that each article is backed by trusted research and meets our high quality standards.
wikiHow marks an article as reader-approved once it receives enough positive feedback. In this case, 96% of readers who voted found the article helpful, earning it our reader-approved status.
This article has been viewed 250,322 times.
Learn more...
Stringing your bow is not difficult with the proper equipment. It still requires attention and caution, however, to avoid whacking yourself with a bow limb under stress. You can start shooting as soon as you've strung the bow, but tuning will help a great deal if your bow is new.
Steps
Stringing Your Bow
-
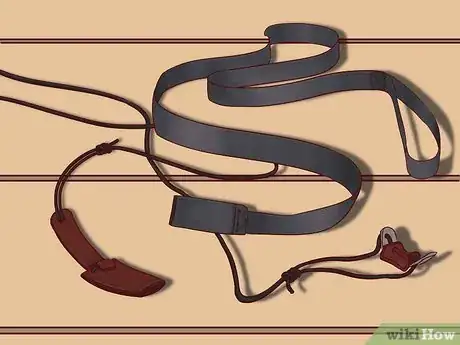
1Purchase a bow stringer. This cheap tool is 100% necessary to string your recurve bow without damaging the limbs. Choose one designed for a recurve bow (not a longbow), and intended for your bow's length and draw weight. Confirm that the ends of the stringer fit snugly over your bow's limb tips.
- Some sources recommend the "pocket and saddle" design for recurve bows, but "double pocket" stringers are also common.[1] This guide covers both types.
-
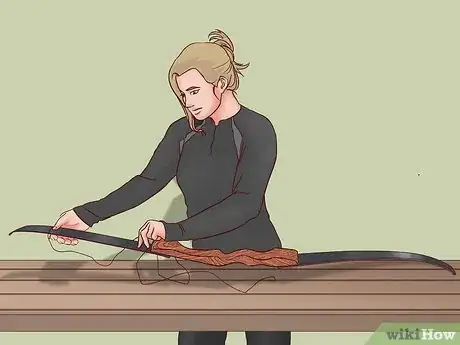
2Place the string over the bow tips. Slide the string's large loop over the bow's upper limb, positioning the string on the correct side of the bow. Fit the smaller loop into the notch on the lower limb, double-checking that it fits snugly. Since the bow is in a relaxed position, the string should have plenty of slack.
- The lower limb is on the heavier side of the handle. The bow's draw weight is usually marked on the lower limb.
-
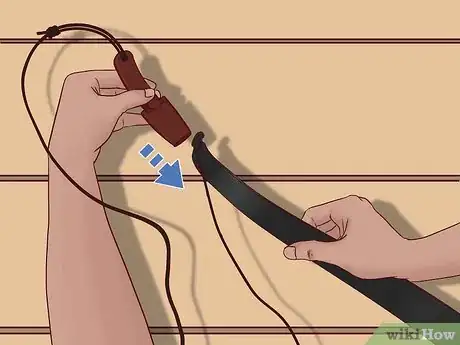
3Fit the stringer pocket over the lower limb tip. If your stringer has two pockets, the larger one fits over the lower limb. This should cover the small string loop, keeping it secure in the groove.
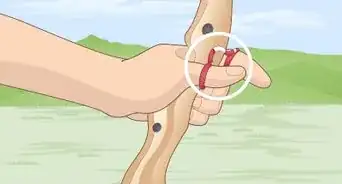
- If this doesn't feel secure, wrap a rubber band tightly around the string loop.[1]
-
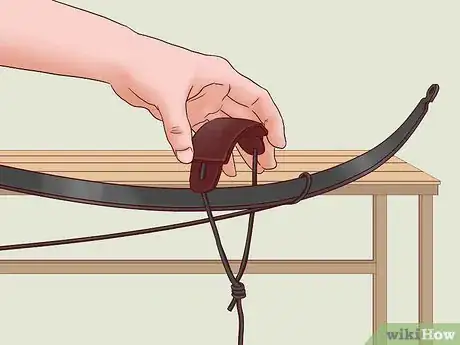
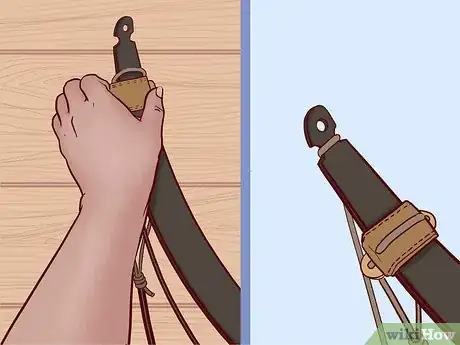
4Place the small pocket or saddle onto the upper limb. If your stringer has two pocket, place the small pocket over the upper limb tip. If your stringer has a saddle (a leather or rubber pad) on one end, slide this over the top limb and just behind the string loop. Position the saddle about 3 inches (8 cm) from the tip, just behind the string loop.[1]
- Some saddles can be secured against the bow, while others require you to hold it in place. The dimpled surface should press against the limb to reduce friction.
-
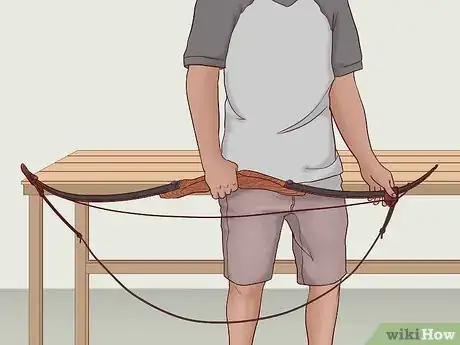
5Hold the bow horizontally. Hold the bow grip with your non-dominant hand. Hold it horizontally so your dominant hand is near the upper limb, holding the loose string loop in place. Position the bow so its limb tips point upward, with the bowstring and stringer underneath.
-
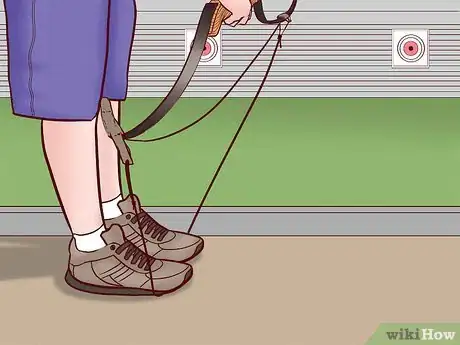
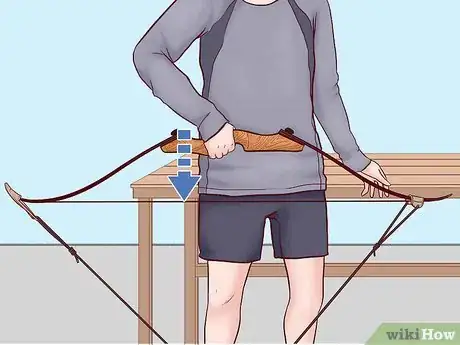
6Step on the bow stringer. Bend at the waist to lower the bow until the stringer (but not the string) touches the ground. Step on it with both feet, about shoulder-width apart.[1] Use the balls of your feet, not the arches, or the cord may slip.
- If using a saddle bow stringer, use one hand to keep the saddle in place.
- You may use one foot, but planting both feet gives you extra stability. This is particularly helpful for children and shorter adults.
-
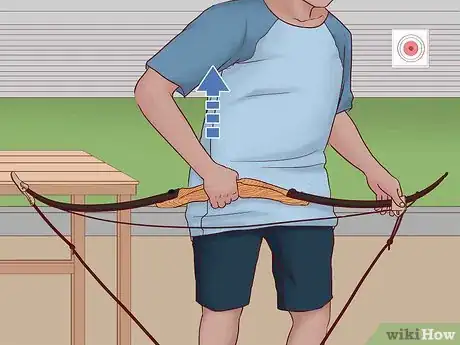
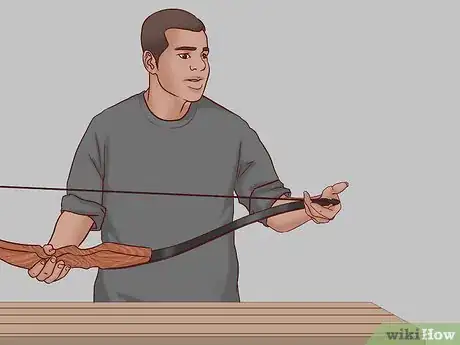
7Draw up on the bow. Take up the slack in the bow stringer and confirm you have a secure grip. Be prepared to pull upward, bending the bow limbs back toward the ground. Read the next step before you start this motion.
-
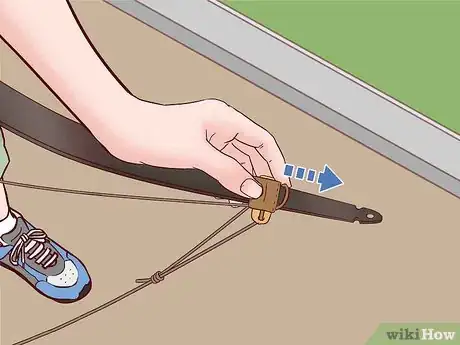
8Slide the large loop onto the notch. At the same time you pull up on the bow, slide the loose string loop up until it fits into the notch near the tip of the bow.
- If you have trouble with this, the stringer may be too long. Shorten it by tying knots near the bottom pouch.
-
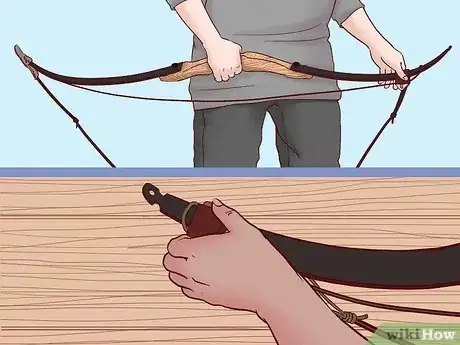
9Confirm the string is secure. Run your finger over the string loop to confirm it's secure in the groove. Keep your finger over the string for the rest of this process, so you can stop if the string starts to slip off.[2]
-
10Lower the bow slowly. Slowly lower the bow until the stringer is slack. Do not rush this step, or a loose string could slip off and slingshot the limb into your face.
-
11Check the string. Immediately turn the bow so its limbs face away from you. Double check the string loops once again. If they aren't secure, stand on the stringer again to repeat this process. Keep your head back and turn it away from the string, in case the loose string snaps off.[1]
- Do not point the limbs at a nearby person, or a mishap could cause an injury.
-
12Remove the bow stringer. If you used a rubber band in an earlier step, remove this as well. For best results, adjust your bow according to the instructions below before you shoot.
- When you're ready to unstring the bow, attach the bow stringer the same way you did before. Step on the stringer and draw the bow up, then slide the upper string loop off the notch and down onto the limb. Slowly relax the bow.
Tuning the Bow
-
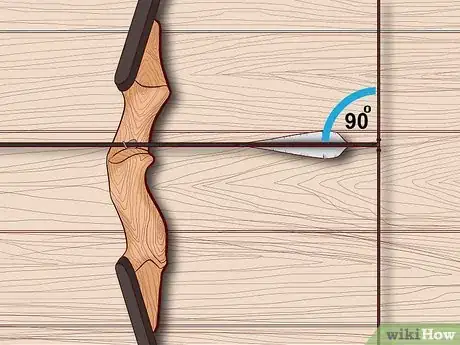
1Adjust the nocking point height. Imagine a line running from the top of your arrow rest to your bowstring, hitting the string at a 90º angle. Position your nocking point on the string about ½" (1.25 cm) above this line, so your arrows are perfectly horizontal when nocked.[3]
-
2Shoot in a new string. If your bow or string are brand new, the string will stretch out a little. Expect it to adjust to its final stretch over the course of your first one or two shooting sessions. Alternatively, you can leave the bow strung overnight once to help it settle.[4] Don't spend too much time adjusting the brace height (described below) until the string had adjusted.
- Flemish twist strings stretch out more than endless loop strings.
-
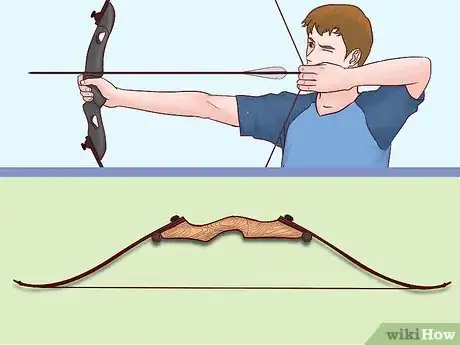
3Test the brace height. The brace height is the distance between the handle of the bow and the string. Measure this distance, then shoot a few arrows to see how your bow feels. A high brace height will slow down your arrows, while a lower brace height will make a loud, jarring noise on release.[5]
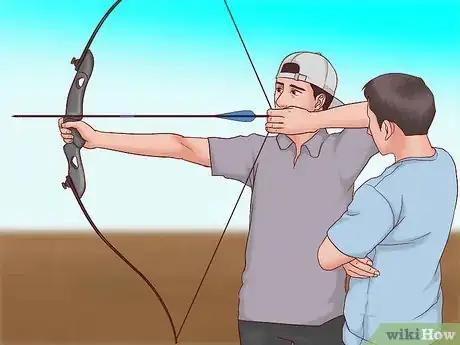
- Ask someone to stand on the side and watch as you shoot. The noise and vibration are easier to judge from the side.
-
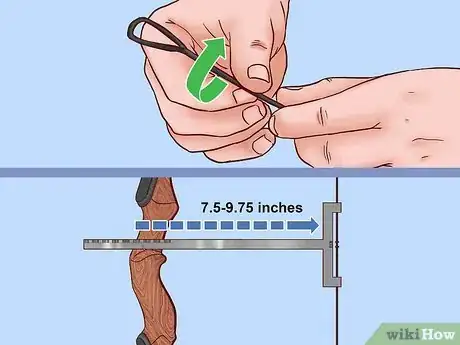
4Adjust brace height. If you think brace height needs adjustment, unstring the bow. Twist the string a few times to flex the limbs further, increasing brace height. Untwist the string a few times to lower brace height.[6] Measure carefully and write down the number each time, along with notes about how the bow fires. You'll probably have to make several adjustments to find the perfect point, but after that you're set.
- Most recurve bows shoot best with a brace height between 7.5 and 9.75 inches (19–25 cm).[7] Replace the string with a smaller or larger string if you can't get it near this range, or if you have to twist more than 20 or 30 times.[8]
- If you're having trouble getting your arrows to fly straight, buy a T-square to measure nocking point height and brace height more accurately.
Community Q&A
-
QuestionHow long will this take?
 Community AnswerIt mostly depends on your experience level. I have been shooting for years and it only takes me 1-2 minutes, it takes my friends anywhere from 5-10 minutes. It will often take longer if you're stringing an unfamiliar bow or using a new stringer or string.
 -
QuestionWhy would I need to string a bow?
 Community AnswerYou need to attach the string to the bow, or else it will not be able to shoot.
 -
QuestionWhere do I get a bow stringer? I'm in Australia.
 Meulin CatCommunity AnswerIf there are no archery shops nearby, you could always look at ordering one online from a dealer (I only suggest a dealer because they should have all the information on the stringer, such as bow length and pull weight).
Warnings
- Replace your stringer once it starts to fray. You do not want it to snap when your face is bent over the bow.⧼thumbs_response⧽
- Take your time and examine the string and bow before you start shooting. If the string isn't secured properly, it could snap off and injure you.⧼thumbs_response⧽
- Never string your bow without a bow stringer. This will seriously damage your bow's limbs, and increases the risk of injury.⧼thumbs_response⧽
Things You'll Need
- Recurve bow
- Bowstring
- Bow stringer
- Rubber band (recommended)
References
- ↑ 1.01.11.21.31.41.51.6Johnson, Teresa. Archery Fundamentals, 2nd edition. Human Kinetics, 2015. https://books.google.com/books?id=DAgABQAAQBAJ
- ↑ https://www.youtube.com/watch?v=ariz17USvao
- ↑ http://www.bestrecurvebowguide.com/tuning-your-recurve-bow-part-1/
- ↑ http://www.3riversarchery.com/blog/longbow-and-recurve-set-up/
- ↑ https://books.google.com/books?id=_0CLP-NbOXgC
- ↑ http://www.bestrecurvebowguide.com/tuning-your-recurve-bow-part-1/
- ↑ http://www.bestrecurvebowguide.com/tuning-your-recurve-bow-part-1/
- ↑ http://archery.uchicago.edu/documents/RecurveBowSetup.pdf
- ↑ https://www.archerytalk.com/threads/flemish-twist-vs-endless-loop-strings.1437565/
About This Article
Before you string a recurve bow, make sure to purchase a bow stringer if you don’t already have one. Then, fit the string’s large loop over the bow’s upper limb, the smaller loop into the lower limb, and the stringer pocket over the tip of the lower limb. Afterwards, hold the bow horizontally in your non-dominant hand, then bend at the waist so you can step on the bow stringer with both feet. Finally, pull up the bow while sliding the string loop into the notch near the bow tip at the same time. To learn more, including how to tighten or loosen your bow strings, read on.
