This article was co-authored by Susan Stocker. Susan Stocker runs and owns Susan’s Green Cleaning, the #1 Green Cleaning Company in Seattle. She is well known in the region for outstanding customer service protocols — winning the 2017 Better Business Torch Award for Ethics & Integrity —and her energetic support of green cleaning practices.
This article has been viewed 35,637 times.
Whether you have a baggy, beloved old flannel shirt or just picked up an ill-fitting one from the thrift shop, there are a few tricks that can shrink it. Try boiling a large pot of water, soaking the shirt for five minutes, then running it in the dryer. You can also use a washing machine on its hottest setting. Go for top loaders over front loaders for the best luck. If boiling and washing don’t do the trick, you can cut away excess fabric and resew the shirt to bring it down to your size.
Steps
Boiling Your Shirt
-
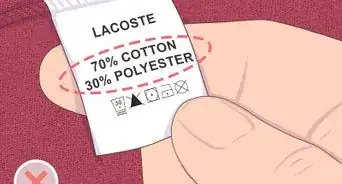
1Check your shirt’s care instructions. Before trying to shrink your shirt, double check to make sure it can be washed. Make sure the flannel is made from either wool or cotton.[1]
- You’ll have more luck shrinking loose natural fibers, like wool or cotton.[2] Synthetic fibers will be more difficult to shrink.
- If the care label says the garment is pre-washed, you might have to take it down a size instead of shrinking it by washing and drying.
-
2Add a cup of vinegar to a large pot of water and boil. Fill the largest pot you have on hand with water. Add a cup of vinegar, and bring it to a rolling boil.[3]
- Adding vinegar will help retain your shirt’s color by minimizing the amount of dye that bleeds out from the heat.
Advertisement -
3Soak your shirt for five minutes. When the water and vinegar begins to vigorously boil, remove the pot from heat. Place your shirt into the pot, and use a wooden spoon to soak and agitate it. Keep the shirt in the pot for five minutes.[4]
- Be careful not to burn yourself.
-
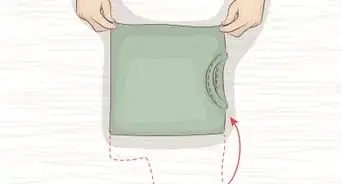
4Dry your shirt after it’s cool enough to touch. If you can pick up the heavy pot of water, drain the water carefully into the sink. When the shirt is cool enough to touch, pick it up and put it in the dryer for 45 to 60 minutes on a medium setting.[5]
- If the pot is too heavy for you to pick up, just let the water cool until it’s safe to lift the shirt. Use the spoon to help get the shirt of out the water.


Using a Washing Machine
-
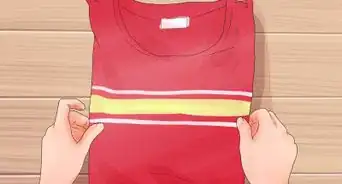
1Wash shirts individually and with a cup of vinegar. If you have multiple flannel shirts to shrink, be sure to wash them one at a time. There will be some dye bleeding due to the heat, so you wouldn’t want multiple shirts discoloring each other.[6]
- Adding a cup of vinegar to the wash will help reduce color loss.
-
2Wash your shirt using your machine’s hottest setting. Put your machine on its hottest water setting. Use the heavy wash cycle available so the machine will agitate the shirt as much as possible.[7]
- If you have a front-loading machine, see if you can wash the shirt in a friend or family member’s top loader. A top loader provides more agitation, which helps to shrink the shirt.[8]
-
3Dry the shirt immediately. As soon as the wash cycle has finished, remove the shirt from the washing machine. Transfer it to the dryer and dry it using a medium setting. Repeat the washing and drying process if the shirt hasn’t shrunk as much as you’d like.[9]


Taking It Down a Size
-
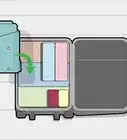
1Place a shirt that fits well over the flannel shirt. Smooth out the flannel shirt flat on the floor. Place a button up shirt that fits you well over the flannel shirt. Tuck one of the well-fitting shirt’s sleeves all the way into the armhole so you can see the seam that connects it to the body.[10]
- Make sure to smooth out wrinkles and get the shirts as flat as you can.
-
2Trim off the flannel shirt’s sleeves and excess fabric. Grab a pair of fabric shears or sharp scissors. Using the well-fitting shirt as a guide, trim off the baggy flannel shirt’s sleeves, trim away their excess fabric, and remove the extra fabric from the sides of the shirt’s body.[11]
- Use the seam between the well-fitting shirt’s body and sleeve to help you create a new armhole in your flannel shirt.
- Be careful when using scissors and other sharp tools. If necessary, get help or supervision from a parent.
-
3Cut the removed sleeves using the well-fitting sleeves as guides. Spread out your well-fitting shirt and look at the seam that connects the sleeve to the body. You should be able to make out an “S” shape. Use the “S” shape to help you cut the flannel shirt’s sleeves so you can sew them back into your new armholes.[12]
-
4Turn the shirt inside out and sew the sides. Turn the flannel shirt inside out so you can sew its new side seams. Then turn the sleeves inside out and sew them back together. You can hand sew or use a sewing machine, depending on your preferences.[13]
-
5Sew the sleeves back into the armholes. Leave the shirt inside out, but turn the sleeves right side out. Slide a sleeve cuff-first all the way into the appropriate armhole (either left or right), then match up the edges of the shoulder side of the sleeve with the armhole. Pin them together, sew to create the new shoulder seam, then repeat on the other sleeve.[14]


Expert Q&A
Did you know you can get expert answers for this article?
Unlock expert answers by supporting wikiHow
-
QuestionDo flannels shrink in the wash?
 Susan StockerSusan Stocker runs and owns Susan’s Green Cleaning, the #1 Green Cleaning Company in Seattle. She is well known in the region for outstanding customer service protocols — winning the 2017 Better Business Torch Award for Ethics & Integrity —and her energetic support of green cleaning practices.
Green Cleaning ExpertIf it's cotton and it's brand new, you can expect it to shrink about 20% after a hot-water wash cycle. If it's a wooly material, it may shrink even more. It depends on the material and how many times it has been previously washed, though.
Support wikiHow by unlocking this expert answer.
Things You’ll Need
- Large pot
- White vinegar
- Wooden spoon
- Washing machine (preferably top loader)
- Dryer
- Fabric shears or sharp scissors
- Hand sewing kit or sewing machine
- Fabric pins


References
- ↑ https://www.youtube.com/watch?v=sAKzPHAgQL4&feature=youtu.be&t=10
- ↑ Susan Stocker. Cleaning Professional. Expert Interview. 8 November 2019.
- ↑ https://www.qualitylogoproducts.com/blog/shrink-shirts-baseball-caps-to-fit-you/
- ↑ https://www.qualitylogoproducts.com/blog/shrink-shirts-baseball-caps-to-fit-you/
- ↑ http://www.washingtonpost.com/wp-dyn/articles/A28623-2004Nov5.html
- ↑ https://www.qualitylogoproducts.com/blog/shrink-shirts-baseball-caps-to-fit-you/
- ↑ Susan Stocker. Cleaning Professional. Expert Interview. 8 November 2019.
- ↑ http://www.washingtonpost.com/wp-dyn/articles/A28623-2004Nov5.html
- ↑ https://theidleman.com/manual/advice/shrink-a-jumper/
- ↑ http://www.itsalwaysautumn.com/2014/12/17/take-size-shirt-right-way.html
- ↑ http://www.itsalwaysautumn.com/2014/12/17/take-size-shirt-right-way.html
- ↑ http://www.itsalwaysautumn.com/2014/12/17/take-size-shirt-right-way.html
- ↑ http://www.itsalwaysautumn.com/2014/12/17/take-size-shirt-right-way.html
- ↑ http://www.itsalwaysautumn.com/2014/12/17/take-size-shirt-right-way.html
About This Article