This article was co-authored by Travis Page and by wikiHow staff writer, Jessica Gibson. Travis Page is the Head of Product at Cinebody. Cinebody is a user-directed video content software company headquartered in Denver, Colorado that empowers brands to create instant, authentic, and engaging video content with anyone on earth. He holds a BS in Finance from the University of Colorado, Denver.
There are 7 references cited in this article, which can be found at the bottom of the page.
This article has been viewed 75,935 times.
Whether you have your own YouTube channel or an Instagram following, knowing how to film delicious-looking videos can gain you a wider audience. Fortunately, you don't need a lot of equipment to shoot eye-catching clips. The key to filming cooking videos is to be prepared before you start! We'll walk you through the process with these easy-to-follow tips.
Steps
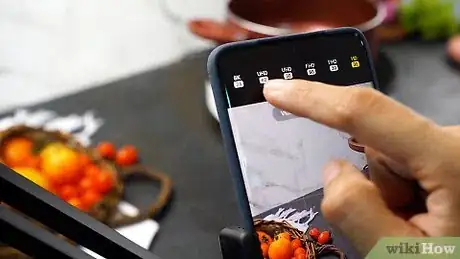
Use a phone with a high-resolution 1080p camera.
-
The high pixel count makes your cooking video clear and detailed. Since a lot of food videos rely on crisp, detailed images of delicious food, a quality phone camera is really important. The easiest way to find out your camera resolution is to do an online search of your phone's camera specifications.[1] X Research source
Set your phone on a tripod with a swing arm.
-
This keeps the phone from shaking and lets you get overhead shots. You've probably seen the really popular cooking videos that are shot directly above the food. To film this way without dropping your phone, you attach your phone to a mobile rig that has a swing arm.[2] X Research source
- Securing your phone to a tripod also makes it easier if you'll be the one preparing the food.
Diffuse your light source.
-
Film in bright light with a diffusing screen to soften the light. Whether you're using natural light like a window, a house lamp, or a lightbox kit, it's important to diffuse the light so you don't get harsh shadows in your video. To do this, place a diffuser screen in front of the light to soften it.[3] X Research source
- Don't have a diffuser? Hang a sheer white sheet over your window or in front of your light.
Storyboard your video.
-
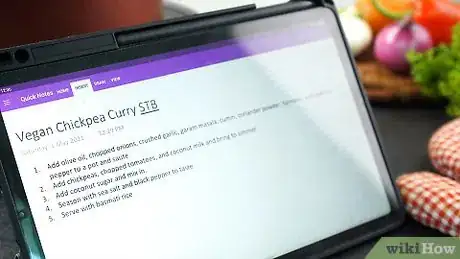
Make a list of all the steps and shots you want to film so you're prepared. You're essentially breaking down the recipe steps into smaller clips that you'll film and edit together. For example, if you're filming a video where you make a simple chocolate mousse, your list or storyboard of frames might show:[4] X Research source
- Chopping chocolate
- Melting chocolate
- Pouring cream in a bowl
- Whipping the cream
- Folding the chocolate into the cream
Prepare the food to save time while you're filming.
-
Measure or chop foods so you're not wasting time. Sometimes, a recipe has a time-consuming step like marinating something or chopping a lot of an ingredient. Instead of filming all of that or waiting, do these things in advance so you can streamline the shooting process.[5] X Research source
- For example, measure out all of your ingredients and place them in bowls on your workstation. Try to prep anything that you think would be boring for the viewers to sit through.
Practice the steps in your video before you start filming.
-
Do a walk-through where you make the food and set up the camera. By doing a practice run before you film, you'll be able to make adjustments if something doesn't work out. You'll probably make fewer mistakes when you film, too![6] X Research source
- You might find that you need to change a camera angle to show action like pouring, for example.
Play around with different shooting styles.
-
Shoot directly above the food for the most popular angle. If you position the phone right over the food, you'll get a fresh, modern style for your video. If you'd rather have a classic cooking show angle, arrange the phone on the tripod so the lens points to the food at a 45-degree angle. For a little variety, shoot clips in both angles so you can edit them together later.
- If you really want to show the texture on food, get a few extreme close-up shots.
- Have fun with your shooting style! Try filming in slow motion to capture sizzling or steaming food, for instance.
Keep your video clips short.
-
Shoot each step in 15- to 20-second clips so you have less video to edit. Refer back to your storyboard and keep the overall length of your video in mind. For instance, if you're aiming for a 2-minute cooking video and you want to show 15 steps, each clip will only be around 8 seconds. Instead of editing down lots of footage, spend 15 to 20 seconds filming each step so there's less to cut down.[7] X Research source
- Using shorter clips to create your video gives it a sense of energy so it's more interesting to watch.
Record the audio after filming.
-
You'll get better sound quality and won't be as distracted. This is a great trick if your phone doesn't have a very good microphone. By waiting to record your description of the food or cooking process until you can be in a quiet space with the microphone close to your mouth, you'll get the best audio possible.[8] X Research source
- If you'll be filming someone speaking while they cook, you may want to buy an external microphone that plugs into your phone. This can make the sound quality a lot better.
- Keep in mind that a lot of trendy cooking videos skip narration altogether. It's perfectly fine to stick to background music and informational text.
- Want to add music to your cooking video? Sounds great! Just ensure that the background music doesn't drown out narration or distract from the video.
Edit your videos using a video maker or phone app.
-
Check if your phone has an automatic video maker or download an app. If you're new to filming cooking videos, try out an automatic video maker, which will turn your clips into a film with music and transitions. For more control, use an editing app that lets you select which clips to use. You can also add music or voiceovers, and trim the video to the length you want it.[9] X Research source
- Need some editing app suggestions? Try Quik by GoPro, Apple's iMovie, or Adobe Premiere Rush to polish your video.[10] X Research source iMovie especially is a great first platform for beginners.
Add informational text about the food.
-
Give your viewer the recipe details for each step. When you're editing the video, add text to the shots where you give measurements, temperatures, or cooking times. Most editing apps have a template that you can use to type out the information. This way, the text shows up with the step it matches. Informational text is a great way to make your viewers feel like they could follow the recipe and make it themselves.[11] X Research source
- If you're not including narration, go ahead and give short, easy-to-follow text along with the ingredients. For example, after putting butter in a skillet, put the text, "Gently melt, but don't burn it!"
You Might Also Like
 How to Write a Music Video Script




References
- ↑ https://nofilmschool.com/how-to-make-cooking-shows
- ↑ https://nofilmschool.com/iphone-overhead-camera-setup
- ↑ https://youtu.be/rR1kzFz8NSo?t=127
- ↑ https://youtu.be/H070PxgoeAM?t=28
- ↑ https://www.macprovideo.com/article/apple/shooting-and-editing-a-recipe-video
- ↑ https://www.macprovideo.com/article/apple/shooting-and-editing-a-recipe-video
- ↑ https://www.cnet.com/how-to/use-your-phone-to-make-pro-looking-home-videos-8-tips-for-filming-and-editing/
- ↑ https://www.macprovideo.com/article/apple/shooting-and-editing-a-recipe-video
- ↑ https://www.cnet.com/how-to/use-your-phone-to-make-pro-looking-home-videos-8-tips-for-filming-and-editing/
About This Article

