This article was co-authored by Stephen Cardone. Stephen Cardone is the COO of NY Headshots, a New York City-based studio that specializes in shooting and producing headshots for individuals and businesses. Stephen has over four years of professional photography experience and over six years of documentary filmmaking experience. Stephen also works extensively as a photographer at NY Headshots. His work includes events, environmental photography, as well as headshots for actors, models, and corporate. He holds a BA in Non-fiction Writing from The New School.
There are 10 references cited in this article, which can be found at the bottom of the page.
This article has been viewed 127,311 times.
Green screen studios are an amazing way to create environments that are not there when filming. With a green screen, you can create new backgrounds, add effects, or even include animation into your scene. Best of all, green screens are easy to create, even if you’re on a budget! By getting the right materials, setting it up carefully, choosing your shots, and mastering the digital element of green screen productions, you can transport your actors, and your audience, anywhere in the world!
Steps
Getting the Equipment
-
1Choose a room with a bare wall. Your green screen studio needs one flat, spare wall and a clear space around it. Choose a spare room and remove all furniture and clutter. You’ll be hanging your green screen on the bare wall, so make sure the room is long enough that you can film. If possible, choose a larger room, so you have more space for acting and camera work.[1]
-
2Purchase green screen paper for a cheaper option. The cheapest way to set up a temporary green screen is to buy neon-colored construction paper. You can tape, tack, or glue your construction paper to a wall, and set your scene in front of it. If you need to cover a whole wall, you can tape multiple poster boards together using clear packing tape.[2]Advertisement
-
3Use green cloth for irregularly-shaped spaces. Iron the cloth before setting it up, in order to remove any wrinkles that might cast shadows on your space. Then, drape your cloth from the wall. If necessary, pin it to the floor, in order to prevent wrinkling or distortion as your actors move around.[3]
-
4Paint your studio if you have a permanent space. If you plan on using your green screen frequently, and you’re filming in a space you can paint, consider purchasing green screen paint. You can purchase specialty-made green screen paint online, or purchase regular paint that is the same tone. The following shades work well for green screen studios:[4]
- BEHR Sparkling Apple, Deep Base #13
- Sikkens RAP 6018, Chromakey[5]
-
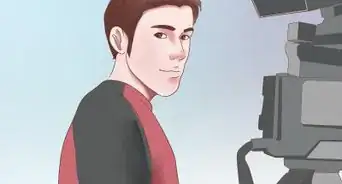
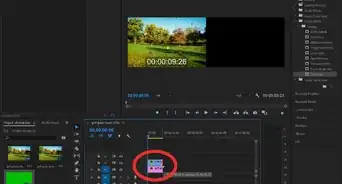
5Purchase a professional-grade video camera for the best effect. Use whatever camera you already own if you are on a budget, or purchase a new camera online or at an electronics store. Your camera will dictate the quality of the project, but choose a camera that is within your budget. Find a camera with digital recording so that you can bring the content onto a computer and edit the video in post production.[6]
- If you use a professional-grade camera the image quality will be better and the green screen effect will be more realistic.


Setting Up the Space
-
1Hang the green screen material on a wall. Use tacks or pins to anchor the green screen material to the wall. Smooth out any wrinkles on the cloth or paper keeping the material taut when hanging it, pulling it as tight as possible. Make a distinct crease where the green screen meets the bottom of the wall, pinning down with tacks, too.[7]
- If the green screen is not pulled tightly there will be shadows throughout the screen and the image you use in post production will be distorted.
- If you do not plan to record or photograph your subjects lower body, you will not need to let the green screen fall to the floor.
-
2Set up your three-point lighting. The best way to make sure your lighting is even, and make green screen filming easier down the road is to set up three-point lighting. To do that, have one light facing the subject, and then organize the other two lights so they form a triangle. This enables you to provide illumination from the sides, and reduces the amount of shadows your lights create![8]
-
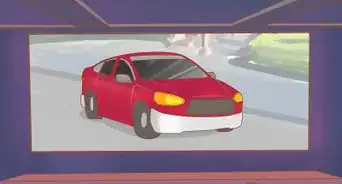
3Match your lighting to your scenario. Your entire green screen should be one consistent shade of green. However, make sure you also match your foreground lighting to the background image you’ll be adding to the frame in post production. This will help your green screened image look more natural.[9]
- If your background image is on a bright beach, create a bright, even light setting.
- If your background image is set in a dark cave, try matching your foreground lighting to this environment by diffusing the light more.
- If you are using more than two lights, be sure to distribute the other lights equally apart as well, avoiding particularly bright spots or inconsistencies.
- Consider using an extra light source to light the subject of your project, setting the light source far away to maintain the consistent, even lighting.
-
4Position your actors or subjects during the lighting process. Whether you are recording video or photographing your subjects, ask them to stand in the center of the frame. Ask them to stay in this position during the lighting process and camera set up. Determine where your actors will be standing for the majority of the shoot, and ask them to stand in several different positions if they will be moving around a lot.[10]
- Make sure your actors are aware of the space, and that they’re careful to never move their body outside of the green screen.[11]
- Have your actors stand 8 to 10 feet (2.4 to 3.0 m) away from the screen, in order to avoid shadows.
-
5Avoid green clothing or jewelry. Make sure your actors aren’t wearing anything green, since ths video editing software might try to replace that color as well. Additionally, avoid reflective jewelry or glasses, since they might cause issues in post production.[12]


Expert Q&A
Did you know you can get expert answers for this article?
Unlock expert answers by supporting wikiHow
-
QuestionWhy does my replacement background always look off?
 Stephen CardoneStephen Cardone is the COO of NY Headshots, a New York City-based studio that specializes in shooting and producing headshots for individuals and businesses. Stephen has over four years of professional photography experience and over six years of documentary filmmaking experience. Stephen also works extensively as a photographer at NY Headshots. His work includes events, environmental photography, as well as headshots for actors, models, and corporate. He holds a BA in Non-fiction Writing from The New School.
Professional PhotographerIt's possible that there are artifacts on your green screen. That's why it's super important to keep your green screen clean. If there are any hairs or shadows or anything like that, you may end up with a bunch of artifacts in your final product.
Support wikiHow by unlocking this expert answer.
-
QuestionCan you use a green screen with photography?Stephen CardoneStephen Cardone is the COO of NY Headshots, a New York City-based studio that specializes in shooting and producing headshots for individuals and businesses. Stephen has over four years of professional photography experience and over six years of documentary filmmaking experience. Stephen also works extensively as a photographer at NY Headshots. His work includes events, environmental photography, as well as headshots for actors, models, and corporate. He holds a BA in Non-fiction Writing from The New School.
Professional PhotographerYes. They're super popular for moving images, but you can absolutely use a green screen to take still photos.Support wikiHow by unlocking this expert answer.
-
QuestionWhat's the best program for doing green screen editing?Stephen CardoneStephen Cardone is the COO of NY Headshots, a New York City-based studio that specializes in shooting and producing headshots for individuals and businesses. Stephen has over four years of professional photography experience and over six years of documentary filmmaking experience. Stephen also works extensively as a photographer at NY Headshots. His work includes events, environmental photography, as well as headshots for actors, models, and corporate. He holds a BA in Non-fiction Writing from The New School.
Professional PhotographerThere are few options out there that will do the trick, but I'm a fan of Photoshop. That's what I learned how to do it on, so that's what I'd recommend.Support wikiHow by unlocking this expert answer.


References
- ↑ https://www.youtube.com/watch?v=CiCh1IAL8HE&feature=youtu.be&t=14
- ↑ https://www.youtube.com/watch?v=iAHX2dbXtjw&feature=youtu.be&t=27
- ↑ https://www.youtube.com/watch?v=CiCh1IAL8HE&feature=youtu.be&t=110
- ↑ https://www.youtube.com/watch?v=FTeVwBgJJxY&feature=youtu.be&t=10
- ↑ https://www.youtube.com/watch?v=SJuXcyrkRe8&feature=youtu.be&t=18
- ↑ https://www.fabathome.org/best-green-screen-backgrounds/
- ↑ https://www.youtube.com/watch?v=9bFvXWLalBM&feature=youtu.be&t=1m44s
- ↑ https://www.nyfa.edu/student-resources/how-to-create-a-green-screen-on-a-budget/
- ↑ https://www.youtube.com/watch?v=9bFvXWLalBM&feature=youtu.be&t=2m26s
About This Article