This article was co-authored by Ryaan Tuttle. Ryaan Tuttle is a Home Improvement Specialist and the CEO of Best Handyman, Inc. in Boston, Massachusetts. With over 17 years of experience, he specializes in building home service businesses, focusing on creating scalable and efficient brands. With the help of his global team, the companies have achieved over 10+ million in sales and received recognition through magazine features, and enjoy partnerships with wikiHow and Jobber field service software. Boston Magazine and LocalBest.com have named Best Handyman Boston the Best Handyman in Boston. Ryaan holds Construction Supervisor and Home Improvement Contractor Licenses.
There are 9 references cited in this article, which can be found at the bottom of the page.
This article has been viewed 94,890 times.
If you want to know how to sand a ceiling, chances are you have a ceiling from the 1970s or 80s. It was popular in those decades to have stipple or popcorn ceilings: ceilings with a raised textured look. Popcorn ceilings are still a cheap alternative for builders to finish their ceilings but if you do not like the look, you are going to need to know how to sand a ceiling.
Steps
-
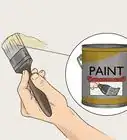
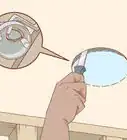
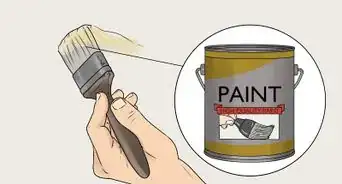
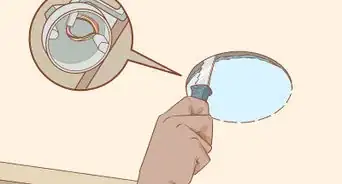
1Check your ceiling for asbestos. Though asbestos was no longer legal to use after the late 1970s, it was not uncommon for drywall compounds used in textured ceilings to contain asbestos. Carefully send a sample by scraping the ceiling into a plastic bag to an asbestos lab. If your ceiling does contain asbestos, professionals will have to do the sanding job for you.[1]
-
2Prepare the area where the ceiling will be sanded.
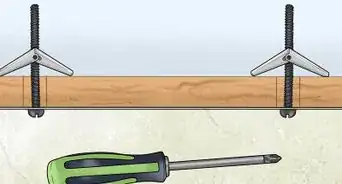
- Make sure all electrical outlets are covered well.
- Cover the floor in heavy duty plastic and bring it up the wall about 1 foot (0.3 m). Tape it in place.
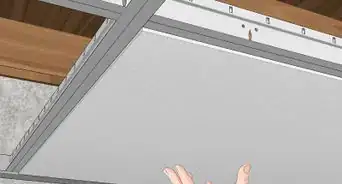
- Cover the walls with heavy duty plastic and keep it in place with painter's tape all along the top so no dust can fall through. Make sure the plastic is long enough to reach the floor.
- Cover the floor with plastic for sanding a stipple ceiling and resin paper for sanding a popcorn ceiling.
Advertisement -
3Protect yourself with eye goggles, respirator mask and protective clothing. Sanding can get very dusty and you do not want to breathe it in or get it in your eyes.[2]
-
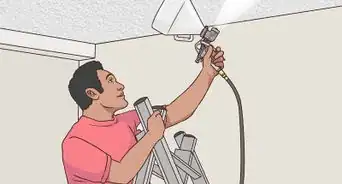
4If you are sanding a popcorn ceiling, wet the ceiling with water using a garden sprayer. Do not saturate the ceiling but wet it thoroughly. Start with a 4 foot (1.2 m) area so the ceiling does not dry before you get to it.
-
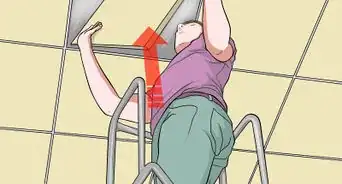
5Scrape the popcorn ceiling with a rounded joint knife, which is required when sanding a popcorn ceiling. You may need to apply more water if it is difficult to scrape.[3]
-
6Use a long pole with a sanding pad to sand the ceiling once the popcorn has been scraped off.[4]
-
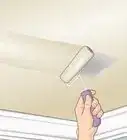
7If you are sanding a stipple ceiling, use an electric sander with dust bag. It should be lightweight as you will be holding this over your head. Use 80 grit sandpaper. Move the sander over an area back and forth slowly. This will knock down the stipple.
-
8Smooth out the stipple ceiling with a pole sander after using the electric sander. Use 120 grit sandpaper, followed by 200 grit.[5]


Expert Q&A
-
QuestionHow do you tell if you sanded evenly?
 Ryaan TuttleRyaan Tuttle is a Home Improvement Specialist and the CEO of Best Handyman, Inc. in Boston, Massachusetts. With over 17 years of experience, he specializes in building home service businesses, focusing on creating scalable and efficient brands. With the help of his global team, the companies have achieved over 10+ million in sales and received recognition through magazine features, and enjoy partnerships with wikiHow and Jobber field service software. Boston Magazine and LocalBest.com have named Best Handyman Boston the Best Handyman in Boston. Ryaan holds Construction Supervisor and Home Improvement Contractor Licenses.
Home Improvement SpecialistCheck the ceiling with a straight edge to see if there are any bumps or divots. You could also put a laser around the room and check from the laser to see if there's different heights. -
QuestionMy popcorn ceiling has been painted with latex paint several times. Will it still scrape off?
 Community AnswerMine did, but I used a wallpaper steamer to steam off the layers of paint first. It took three days to do a 250 sf ceiling.
Warnings
- Do not sand a ceiling that has asbestos; it is extremely dangerous and hazardous to your health.[7]⧼thumbs_response⧽
Things You'll Need
- Plastic
- Painter's Tape
- Goggles
- Mask
- Resin Paper
- Garden Sprayer
- Ladder
- Joint Knife
- Poll Sander
- Electric Sander
- Sandpaper


References
- ↑ https://www.youtube.com/watch?v=IL2xq29CSrI
- ↑ https://medicine.yale.edu/intmed/prep/worker/protection/surface/
- ↑ https://www.thisoldhouse.com/ideas/3-ways-to-deal-popcorn-ceiling
- ↑ https://todayshomeowner.com/removing-textured-popcorn-ceilings/2/
- ↑ https://www.bobvila.com/articles/how-to-sand-drywall/
- ↑ https://www.youtube.com/watch?v=lBOcDJLIRVg
- ↑ https://todayshomeowner.com/removing-textured-popcorn-ceilings/
- http://www.ronhazelton.com/article/home/ceilings/UDIyMA/
- http://www.oneprojectcloser.com/removing-a-stipple-ceiling-by-sanding-reducing-stalactites/
About This Article