This article was co-authored by Ryaan Tuttle. Ryaan Tuttle is a Home Improvement Specialist and the CEO of Best Handyman, Inc. in Boston, Massachusetts. With over 17 years of experience, he specializes in building home service businesses, focusing on creating scalable and efficient brands. With the help of his global team, the companies have achieved over 10+ million in sales and received recognition through magazine features, and enjoy partnerships with wikiHow and Jobber field service software. Boston Magazine and LocalBest.com have named Best Handyman Boston the Best Handyman in Boston. Ryaan holds Construction Supervisor and Home Improvement Contractor Licenses.
There are 14 references cited in this article, which can be found at the bottom of the page.
This article has been viewed 118,951 times.
If your glass sliding doors move in a stiff or unwieldy manner, it may be time to replace the rollers on the bottom of the door. Replacing rollers is not super difficult, but you will need to remove the door from its frame to access the rollers and track. In this article, we’ll show you how to remove any sliding glass door and replace rollers on both vinyl and aluminum models. If you’re ready to have that door gliding like new, read on!
Steps
Removing the Door
-
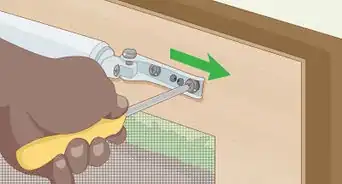
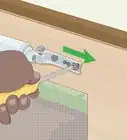
1Remove the screen door if you have one. First, lift the rollers off the track by sliding a flat head screwdriver or putty knife under the roller and pushing up. Grasp both sides of the frame and lift the door up off of its tracks. Place the screen doors safely off to the side until you are ready to put them back.
- When handling large and heavy doors, it is always a good idea to have someone help you. The other person can hold the doors steady while you lift the rollers off the track.
-
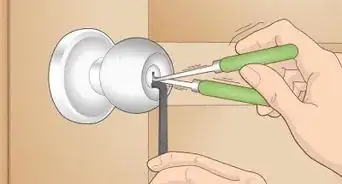
2Remove the plate or track in front of the glass door. For most glass doors, there will be a strip of metal in front of the glass door to keep it secure. Some plates may be screwed in; you will need to remove the screws before taking the plate out. Others can simply be lifted up.[1]
- If you cannot find this plate, your door may not have one.
- You can use a drill instead of a screwdriver if you have one. To remove screws, set the drill to reverse.
Advertisement -
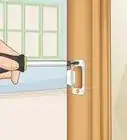
3Uninstall the headstop with a screwdriver. The headstop is a strip of metal next to the top of the door that keeps it standing upright. Screws on either end of the headstop keep it in place. Turn the screws counterclockwise until you can pull them from the headstop. Once all of the screws are removed, the headstop should come down.[2]
- Some doors may have brackets instead of a strip at the top of the door. In this case, remove the brackets by undoing the screws and taking the bracket off the wall.
- Have another person hold onto the door once you remove the headstop. Without the headstop, the door may fall over and break.
-
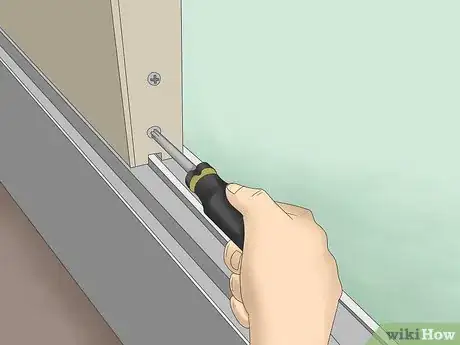
4Raise the rollers by turning the adjustment screw counterclockwise. In most doors, there will be 2 screws on the bottom next to the rollers. The bottom screw is typically the adjustment screw. Use a Phillips head screwdriver to turn the screw counterclockwise as far as it will go. This will raise the rollers up into the door, making it easier to remove the door from the track.[3]
- If you only see 1 screw, it will be the adjustment screw.
- The adjustment screw is usually the same color as the rollers whereas other screws may be a different color.
-
5Lift the door up and off of the track. Hold each side of the door before tilting the top part of the door towards you. Once the top is out of the frame, lift the door up and out of the bottom track. You may want to have someone help you so that you do not break the glass door.[4]
- If the door will not lift up, check for any screws on the top or bottom track that might be keeping the door in place.
-
6Place the door on a large table. You can use a folding table or a pair of sturdy workbenches. It should be large enough to support the entire door. This will keep the door flat while you replace the rollers.[5]
Replacing Rollers on Vinyl Doors
-
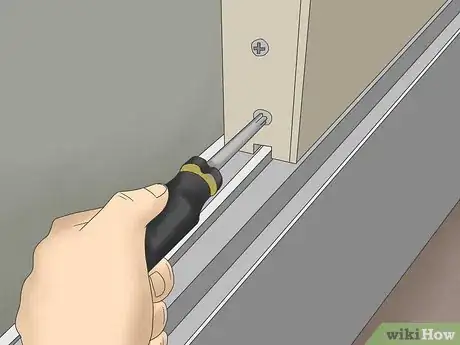
1Remove the screw keeping the rollers in place with a Phillips head screwdriver. In most doors, this will be the screw above the adjustment screw. You do not need to remove the adjustment screw. Turn the screw counterclockwise as far as you can to release the rollers from the door.[6]
- Some newer doors may not have a screw above the adjustment screw. Instead, the screws may be located on the bottom of the door directly next to the wheels.
-
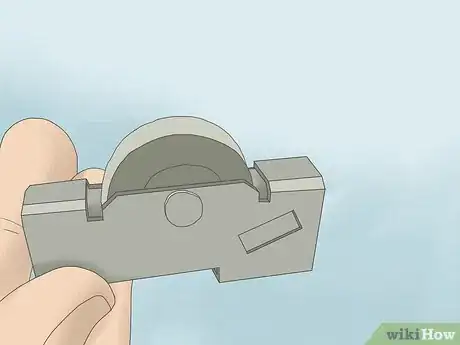
2Pull the rollers from the door to identify their type. The only way to tell what kind of rollers you need is to look at what kind of rollers are currently in the door. Rollers vary in shape, size, and brand. You can take the rollers to a hardware store or a glass shop to find a perfect match.[7]
- If you can’t get to the hardware store right away, you may need to put the door back on its track until you are ready.
- It may be a good idea to take a picture of the rollers in case you need to replace the rollers again at a later date.
- Most doors will have one set of rollers on each end. It is a good idea to replace both rollers at the same time.
-
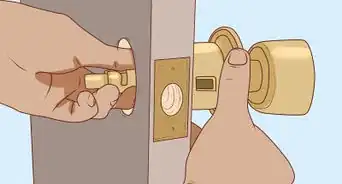
3Screw the new rollers into the bottom of the door. Insert the rollers into the door. The side with the holes or countersink screws should line up with the holes on the door. Insert the screws and turn them clockwise until they are tight. Make sure that the wheels are facing down towards the bottom of the door.[8]
- Since the design of doors and rollers can vary, use the older rollers as a guide for how to install the new rollers.
- Make sure to repeat this process for the rollers on the other end of the door.
-
4Put the door back onto its track. Set the door with the rollers against the track. Tighten any screws that you loosened or removed when taking the door out. Return the metal strip, headstop, and the screen door if necessary.[9]
- Anything that you removed or loosened when removing the door must be returned and reinstalled properly when putting the door back.
-
5Turn the adjustment screw clockwise to lower the rollers. Try moving the door back and forth on the track to make sure that the rollers are working. For most doors, turning the screws counterclockwise will lift the rollers and turning the screws clockwise will lower them.[10]
- If the door is not rolling smoothly, the rollers may be too high. If the door rolls too quickly, the rollers may be too low.
- Make sure that rollers at each end of the door are the same height. If one side moves more easily than another, the rollers may be uneven.
Replacing Rollers on Aluminum Doors
-
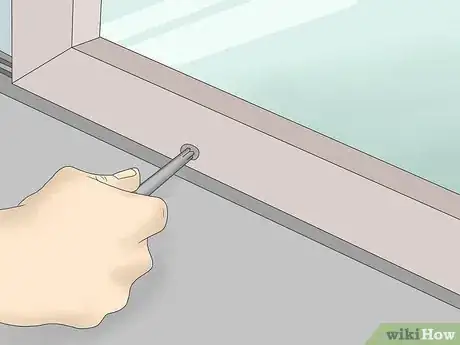
1Remove any screws on the rollers with a Phillips head screwdriver. These are the screws keeping the rollers and aluminum frame together. They will be along the bottom or lower side of the door next to the rollers. Turn each screw counterclockwise as far as you can. The rollers may come out on their own, but in most cases, you will have to remove the bottom panel to get to them.[11]
- Do not remove the adjustment screw. The adjustment screw is attached only to the rollers and not to the door itself.
-
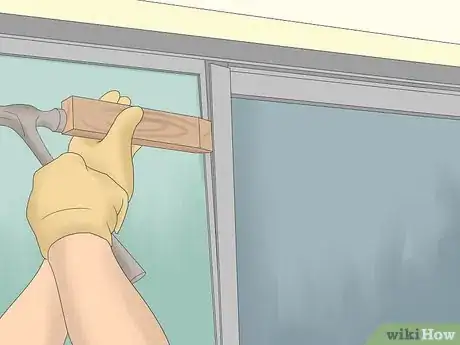
2Remove the bottom panel of the door with a hammer and wood block. Set the narrow edge of the wood block against the upper lip of the panel containing the rollers. Try not to rest the wood on the glass. Tap the top of the block with the hammer to gently ease the panel off of the glass.[12]
-
3Identify what type of roller you need. Each brand of door may have their own type of roller that needs to be used. The only way to identify what type of rollers you need is to take the old rollers out. Go to the hardware or glass store to find an exact match. You may need to put the door back on the track until you are able to find a replacement.[13]
- Make sure to get 2 rollers so that you can replace both rollers at the same time.
- Take a picture of the rollers once you find them. This will help you easily buy them again if you need to replace them at a later date.
-
4Slide the new rollers into the bottom of the panel. Use the old rollers as a guide for installing the new rollers. The holes for the screws should line up with the holes on the door so that you can screw the rollers into the door. The wheels should face downwards.[14]
-
5Tap the panel back onto the glass with a hammer or rubber mallet. Line the panel back up with the bottom of the glass. Use gentle taps on the bottom of the panel to slide it back into place. Start at one end of the panel and work your way over to the other.[15]
-
6Screw the rollers into the side of the door. Take the same screws you removed before and reinsert them into the holes on the side of the roller. Use a drill with a Phillips head bit or a Phillips head screwdriver to turn the screws clockwise as far as they will go.[16]
-
7Place the door back on its track. Lift the door back into the upper track before setting it down onto the bottom track. If you need to, replace the metal plate, headstop, and screen door back into their proper places.[17]
-
8Adjust the rollers until the door moves smoothly. Turn the adjustment screw to move the rollers either up or down until the door moves smoothly. If the door doesn’t move, the rollers may be too high. If the door is too unsteady, the rollers may be too low.[18]
- Generally, turning the adjustment screw clockwise will lower the rollers and turning the screw counterclockwise will raise them.
Things You’ll Need
Removing the Door
- Flat head screwdriver
- Putty knife
- Phillips head screwdriver or drill
- Folding table or work bench
Replacing the Rollers on a Vinyl Door
- Phillips head screwdriver or drill
- Glass door rollers
Replacing Rollers on an Aluminum Door
- Phillips head screwdriver or drill
- Glass door rollers
- Hammer or rubber mallet
- Wood block
References
- ↑ https://www.youtube.com/watch?v=QWm2YG_jNAc&feature=youtu.be&t=51
- ↑ https://www.thisoldhouse.com/how-to/how-to-fix-sliding-door
- ↑ https://www.thisoldhouse.com/how-to/how-to-fix-sliding-door
- ↑ https://www.thisoldhouse.com/how-to/how-to-fix-sliding-door
- ↑ https://www.youtube.com/watch?v=QWm2YG_jNAc&feature=youtu.be&t=96
- ↑ https://www.youtube.com/watch?v=LGSgOXywYto&feature=youtu.be&t=164
- ↑ https://www.youtube.com/watch?v=LGSgOXywYto&feature=youtu.be&t=225
- ↑ https://www.youtube.com/watch?v=QWm2YG_jNAc&feature=youtu.be&t=136
- ↑ https://www.swisco.com/guides/view35
- ↑ https://www.milgard.com/sites/default/files/u/u45061/how_to_install_a_vinyl_sliding_patio_door_roller.pdf
- ↑ https://www.youtube.com/watch?v=LGSgOXywYto&feature=youtu.be&t=164
- ↑ https://www.swisco.com/guides/view35
- ↑ https://www.youtube.com/watch?v=LGSgOXywYto&feature=youtu.be&t=225
- ↑ https://www.youtube.com/watch?v=LGSgOXywYto&feature=youtu.be&t=227
- ↑ https://www.youtube.com/watch?v=LGSgOXywYto&feature=youtu.be&t=265
- ↑ https://www.swisco.com/guides/view35
- ↑ https://www.youtube.com/watch?v=LGSgOXywYto&feature=youtu.be&t=320
- ↑ https://www.swisco.com/guides/view35
About This Article
The right way to replace sliding glass door rollers depends on whether you have a vinyl or aluminum door. The first step, regardless of what kind of door you have, is removing the door from the track. Then, if you have a vinyl door, unscrew the old rollers and slot in the new ones, before screwing them into place. Alternatively, if you have an aluminum door, take out the screws around the rollers and use a hammer and a wooden block to remove the bottom panel from the door. Then, take out the old rollers and slide in the new ones, before reinstalling the bottom panel. Once you've replaced the rollers for either a vinyl or an aluminum door, fit the door back onto the tracks when you're done. For more information on replacing sliding glass door rollers, like how to identify what rollers you need, read on!


