This article was co-authored by Marc Sigal. Marc Sigal is the Founder of ButlerBox, a dry cleaning and shoe care service based in Los Angeles, California. ButlerBox places custom-designed, wrinkle-resistant lockers in luxury apartment buildings, class A office buildings, shopping centers, and other convenient locations so you can pick up and drop off items 24 hours a day, 7 days a week. Marc has a BA in Global and International Studies from the University of California, Santa Barbara.
There are 7 references cited in this article, which can be found at the bottom of the page.
This article has been viewed 30,078 times.
Some suede shoes are so comfortable that you're tempted to wear them every day. It takes a toll on the fabric. One day, your shoes may catch on something and rip, but don't throw them away just yet! Suede, a type of fuzzy leather, can't truly be restored to its original state. However, fabric glue is a subtle way to fit torn halves back together. If your shoe is missing some material, patch it instead. Many tears are fixable at home, although hiding all the damage is tough sometimes. Take your favorite shoes to a professional cobbler to make them strong and stylish again.
Steps
Gluing Suede Back Together
-
1Select a flexible contact adhesive that will last long-term. Use a shoe adhesive or fabric glue if you have them. These products work on all sorts of different materials, including tough ones like suede. The real benefit is that they don't stiffen up like superglue and hot glue, so the tear won't reappear just because you happen to move the wrong way in your shoes.[1]
- Superglue and hot glue can be used, but the repair won't hold as long as it normally would.
- If you’re unsure about which product to get, check the label. Make sure it is listed as effective on suede or leather.
- Glue works very well on small or clean tears. It can also be used to glue the sole back on. If you notice a big gap of missing suede, use a patch instead.
- Look for different adhesives online and at craft supply stores.
-
2Spread a shoe adhesive along the edges of the tear. Pick your glue, then apply a small amount of it to each half of the suede. Spread it out uniformly so it doesn't squirt out when you secure the material back together. You can use the bottle's tip to spread it around. Apply the glue on top of one side of the tear and beneath the other one.[2]
- Another way to apply the glue is with a small cotton swab. You could also use your finger, but put on a rubber glove so you don’t get sticky.
Advertisement -
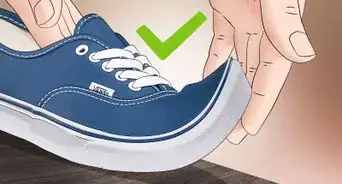
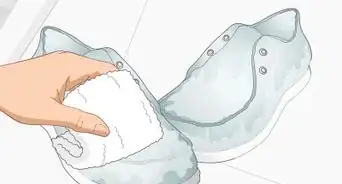
3Pull the suede’s flaps back together again. Take one flap and pull it over the other. Join the edges together so they have little to no overlap. Then, press down firmly to keep the suede stuck together. Some of the glue may come out from underneath the flaps, so wipe it up with a paper towel before it has a chance to solidify.[3]
- Shape the suede carefully back into its original form. If you pull the suede too tightly, the shoe may not fit properly or feel as comfortable as it used to.
-
4Use fabric tape to hold the suede together while it dries. Keeping the suede pressed together is a little tricky due to the shape of the shoe, but a fabric-safe tape can help. Make sure all the excess glue is gone, then place the tape over the tear. If you’re careful, none of the glue will be on the suede’s surface, so the tape won’t get stuck in place. Keep the torn suede flat and pressed together to maintain the shoe's shape.[4]
- You could also try fitting a clamp over the repaired area. Fitting a clamp is often difficult due to the shape of the shoe, but you won’t have to deal with sticky tape if you’re able to use one.
- If you notice a lot of excess glue that might cause the tape to stick in place, try stuffing the shoe full and then placing a solid weight on top of the repair. Make sure the shoe can support the weight without losing its shape!
- If you’re unable to find a way to keep the torn suede together, glue it and leave it to air dry. There is a chance the repair will come undone as the glue dries, but your shoe won’t be at risk of further damage and can be glued back together a second time.
-
5Allow the glue to dry for up to 24 hours. The exact amount of drying time needed varies a little depending on the glue, so check the manufacturer's recommendation for specifics. To ensure the repair holds, give it as much time as possible before wearing the shoe again. Keep the torn suede pressed together the entire time. Once it has dried, remove the tape to check the results.[5]
- In general, fabric glue takes about 4 hours to dry. Some types of shoe adhesive take up to 72 hours to dry. You can speed up the process with a handheld dryer on its lowest setting.
- Wait about 48 hours before wearing your shoe or exposing it to water. The suede can easily pull apart if the glue hasn’t finished curing.


Filling in Gaps with Suede Patches
-
1Purchase a suede repair kit with patches and glue. Repair kits have everything you need to fix a tear. Make sure the kit includes a suede patch matching the color of your shoe. Compare any available pictures with your shoe to get as close of a match as possible. Unless you are using an adhesive patch, you will also need fabric glue and a subpatch made from a different material.[6]
- Try going to a fabric store, especially an online store, to find a wider variety of patch colors. Most stores will have detailed descriptions and pictures you can use to help match the patch to your shoe.
- Commercial subpatches are often made of vinyl, but you could repurpose denim or other types of fabric. You could also cut a patch from an old piece of suede.
- Patching kits are available online. You can also buy the components separately. Use them to fill in gaps of missing suede or whenever you’re unable to simply glue a tear back together.
- If you’re looking for a simple solution, get a stick-on adhesive patch instead. Adhesive patches cover tears well but tend to be more noticeable and less permanent than glued patches.
-
2Trace a subpatch and cut it to fit inside the shoe. If you’re using a subpatch, hold it over the shoe. Try to press it flat against the torn area you're planning on covering. Outline the tear in pencil so you know how to cut the subpatch to fit the shoe. Making the patch a little bigger than the tear is fine, and you can trim it down with fabric scissors.[7]
- The subpatch is meant to fit behind the actual patch to keep it level with the existing suede.
- If you’re unable to fit a subpatch on the shoe, you might be able to complete the repair with only a suede patch.
-
3Cut the new suede patch to match the subpatch. Place the subpatch on top of the suede to use as an outline. Try holding them together with a fabric clamp or pins. When you're ready, cut around the subpatch to trim the suede to size. Make sure the new patch is the perfect size to cover the gap on your shoe.[8]
- If you aren’t using a subpatch, try to cut the suede patch to bridge any gaps in the shoe. It usually needs to be at least 1 in (2.5 cm) wider than the tear to maintain the shoe's shape.
-
4Place the subpatch under the tear and secure it with fabric glue. Depending on where the tear is, fitting the subpatch can be a little tricky. Have some tweezers on hand if you need to squeeze it into a tight spot. Spread a small but even amount of glue across the subpatch, then gently spread apart the suede. Fit the subpatch behind the tear, pressing it firmly against the back of the torn suede.[9]
- Some shoes have a secondary material underneath the suede. If this backing is intact, you can also mount the subpatch to it.
- If you’re using an adhesive patch, you won’t need glue. Peel off the paper backing, then place the patch over the suede to cover the tear.
-
5Glue the suede patch to the subpatch and shoe. Spread glue across the back of the patch, then press it onto the suede. Try to make it level with the old suede around the tear so it looks as natural as possible. Spread glue on both the back of the patch and the torn suede flaps. Secure everything together by pressing the patch onto the subpatch, then tucking the torn suede onto the new patch and subpatch as well.[10]
- Blend the patch in as best you can. If you cut it to the precise size to fill in the tear, the old suede won’t overlap it very much, making it look more like a natural part of the shoe.
- Sewing suede is possible if you are able to poke consistently-spaced holes around the edges of the material. It’s difficult, tedious work that leaves very visible stitches, so it isn’t recommended.
-
6Wait up to 48 hours for the glue to finish drying. Make sure the patch is positioned correctly and looks great on your shoe before letting the glue dry. Then, apply fabric tape as needed over the edges of the suede to keep the patch in place. Use a paper towel to wipe up any excess glue around the tear so the tape doesn’t get stuck to your shoe. Once the glue has had plenty of time to dry, peel off the tape and try on your repaired shoe.[11]
- If the patch’s color looks off, you can use a suede dye to refresh it. Rub the dye onto the patch with a brush. Keep in mind, though, that the patch may still stand out unless you dye the entire shoe the same color.


Things You’ll Need
Gluing Suede Back Together
- Flexible contact adhesive like fabric glue
- Fabric tape or clamp
Filling in Gaps with Suede Patches
- Suede patch
- Subpatch made of vinyl or alternative material
- Flexible contact adhesive like fabric glue
- Fabric scissors
- Fabric tape
- Fabric clamp or pins


References
- ↑ https://www.ramleathercare.com/leather-suede/repairing-rips-and-cuts-in-leather/
- ↑ https://www.ramleathercare.com/leather-suede/repairing-rips-and-cuts-in-leather/
- ↑ https://www.ramleathercare.com/leather-suede/repairing-rips-and-cuts-in-leather/
- ↑ https://www.loctiteproducts.com/en/know-how/fix-stuff/leather-glue.html
- ↑ https://www.loctiteproducts.com/en/know-how/fix-stuff/repairing-a-shoe.html
- ↑ https://www.thecreativefolk.com/fix-hole-suede-boots/
- ↑ http://www.soles2dance.com/v/vspfiles/downloadables/instructions/Instructions_SUEDE-DIY.pdf
- ↑ https://www.thecreativefolk.com/fix-hole-suede-boots/
- ↑ https://bootmoodfoot.com/repair-leather-shoes-with-torn-leather/
About This Article