This article was co-authored by Art Fricke. Art Fricke is a home renovation and repair specialist and the owner of Art Tile & Renovation based in Austin, Texas. With over 10 years of experience, he specializes in bathroom and kitchen renovations. Art focuses on a single contractor approach to customized renovation work, and performs projects such as installing custom tile showers, fixing tiled shower leaks, replacing cracked tiles, and installing floor and wall tile.
There are 7 references cited in this article, which can be found at the bottom of the page.
wikiHow marks an article as reader-approved once it receives enough positive feedback. This article received 16 testimonials and 93% of readers who voted found it helpful, earning it our reader-approved status.
This article has been viewed 666,004 times.
Removing wall tiles is different, and more difficult, than removing floor tiles because wall tiles are typically set very close together, with minimal grout lines. This means that it takes more care to remove a wall tile without damaging the surrounding tiles.
Steps
Preparing for Removal
-
1Protect yourself and your surroundings. Wear wrap-around safety goggles, a long sleeved shirt, pants, and work gloves to protect yourself from sharp tile fragments, even if you plan to avoid breaking them. Clear the surrounding area and lay down cloth or tarp to protect fragile surfaces and make cleanup easier.[1]
- Protect ceramic shower pans and bathtubs from falling tiles by covering them with cardboard.[2]
- Cover any drains as well, such as by putting tape over them.
-
2Decide where to remove the grout. The rest of this section is dedicated to removing grout, which somewhat reduces the chance of breaking the tiles, and makes them much easier to remove. While removing more grout will always help, most people save time and only remove it in the most important areas:
- When removing a single tile, remove the grout on all sides of it to avoid damaging the others around it.
- If you are removing an entire wall of tiles, just make sure to remove grout next to the ceiling and floor.
Advertisement -
3Heat the grout (optional). Wall grout is typically easy to remove, but a heat gun or blow dryer can soften hard grout if necessary.[3] If you're only managing to scrape away tiny amounts a time, spend thirty seconds warming up the grout line and try again.
-
4Scrape the grout away with a utility knife. This method takes a while, but comes with a low risk of damaging the surrounding tiles. Fit your utility knife in a sturdy holder if you have one, and run it carefully and repeatedly around the tile or tiles you plan to remove.[4]
- An ordinary grout saw typically does not work for wall tiles, because of lug spacers that connect adjacent tiles underneath the grout.
-
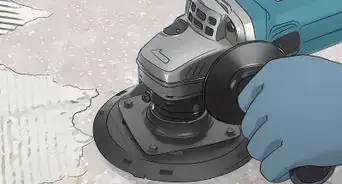
5Try a rotary grinder instead. A dremel or other small rotary grinder can remove grout faster than a knife, but can break tiles much more easily if your hand slips. Set the tool to the lowest setting and move it slowly along the grout line. If you have firm control over the tool and the tiles don't crack when you nick them, you can consider increasing the speed of the rotor.
- You may need to purchase an extra-small head attachment in order to fit between the tiles.
-
6Remove grout until the spacer lugs are visible. You don't need to remove every speck of grout, but get rid of most of it to make tile removal feasible. At minimum, scrape away grout until the metal spacer lugs are visible.[5]
Removing Tiles
-
1Try to locate a loose tile. If you plan to remove a whole wall of tiles, try tapping the edge of each one with a chisel for signs of looseness. The first tile is much harder to remove than the rest, so it's worth taking some extra time to see if you can get lucky. If you locate one, use either of the methods below to remove it.[6]
- Your best bet is in areas where you've removed the grout, and areas with signs of water damage.
-
2Chisel tiles away from the wall. This approach should let you save more of your tiles for reuse, unless the tiles are unusually well-adhered or a relatively recent installation. Give it a try by inserting a chisel, putty knife, or other flat tool in between the tile and the wall, almost parallel to the wall.[7] [8] Tap the handle of the tool with a hammer until the tile comes away from the wall. You may need to pry it off in two or three places if firmly attached.
- If the tiles break instead of coming away, try an air chisel instead.
- Have an assistant wearing leather gloves catch the tiles as they come away, before they fall.
- The first tile is generally much harder than the rest. Take your time to tap out the first one, then attack the exposed edge of the next tile. Make sure to be very careful near the edges because the tile will chip easily.
- If you're only trying to replace 1-2 tiles because they're cracked, use masking tape or duct tape to tape off the tiles you want to remove. Then, tap the tiles with a chisel, starting in the middle and working your way out. Once you get some of the tile pulled away, use your chisel to get behind the tile and tap it sideways to remove the rest.[9]
-
3Break the tile if necessary. If your tiles are set directly into the mortar, you'll probably need to give up on saving it and crack it into pieces. Start by using a hammer and chisel to make a hole in the center of the tile, then chisel the cracked tile pieces away, being careful not to damage the surrounding tiles.
- Eye protection is especially important for this method.
- Porcelain tiles will break into extremely sharp, glass-like shards. If this happens, consider breaking them from the side with a hammer and chisel instead, to reduce the number of fragments.
-
4Clear the area of any remaining setting material. Use a cold chisel to chip away the setting material until the exposed wall surface is fairly even.[10] You may not be able to remove all of the adhesive and grout, but you want to ensure that a new wall tile will sit flush with the surrounding wall tiles once it is installed.
-
5Get rid of spacer lugs before attempting to install a replacement tile. These are metal objects that may be left behind during removal. You can remove spacer lugs by snipping them off with utility clippers, breaking them off with pliers, cutting them with a utility knife or sanding them down with sandpaper.
Expert Q&A
Did you know you can get expert answers for this article?
Unlock expert answers by supporting wikiHow
-
QuestionHow do you remove wall tiles without damaging drywall?
 Art FrickeArt Fricke is a home renovation and repair specialist and the owner of Art Tile & Renovation based in Austin, Texas. With over 10 years of experience, he specializes in bathroom and kitchen renovations. Art focuses on a single contractor approach to customized renovation work, and performs projects such as installing custom tile showers, fixing tiled shower leaks, replacing cracked tiles, and installing floor and wall tile.
Home Renovation & Repair Specialist If you're demoing tile that was applied directly to drywall, it's nearly impossible to remove without ripping out the drywall, too. It's best to just rip it all out to the studs and replace the drywall, then retile it. However, if you're doing tile in a shower or another wet area, you should use concrete backer board, rather than drywall, because drywall will crumble after a few years in a moist environment.
References
- ↑ https://www.doityourself.com/stry/removing-ceramic-tile
- ↑ https://www.youtube.com/watch?v=OX3F7R4l3Gc
- ↑ http://www.naturalhandyman.com/qa/qaremovetile.html
- ↑ http://www.johnbridge.com/articles/wall-tile-replacement/
- ↑ http://www.johnbridge.com/articles/wall-tile-replacement/
- ↑ http://www.naturalhandyman.com/qa/qaremovetile.html
- ↑ https://www.doityourself.com/stry/removing-ceramic-tile
- ↑ http://www.askthebuilder.com/removing-ceramic-tile/
- ↑ Art Fricke. Home Renovation & Repair Specialist. Expert Interview. 1 July 2020.
- ↑ https://www.youtube.com/watch?feature=player_detailpage&v=7ML3wo4vYPI#t=412
- ↑ Art Fricke. Home Renovation & Repair Specialist. Expert Interview. 1 July 2020.
About This Article
To remove wall tiles, start by heating up the grout between the tiles with a blow dryer so it's easier to remove. Then, use a utility knife or rotary grinder to scrape away the grout until the spacer lugs between the tiles are visible. Next, use a chisel and hammer to pry the tiles off of the wall. If you're not planning on reusing the tiles, you can just break them apart with the chisel and hammer instead of pulling them off intact. To learn how to remove the spacer lugs from the wall, scroll down!

