This article was co-authored by Ryaan Tuttle. Ryaan Tuttle is a Home Improvement Specialist and the CEO of Best Handyman, Inc. in Boston, Massachusetts. With over 17 years of experience, he specializes in building home service businesses, focusing on creating scalable and efficient brands. With the help of his global team, the companies have achieved over 10+ million in sales and received recognition through magazine features, and enjoy partnerships with wikiHow and Jobber field service software. Boston Magazine and LocalBest.com have named Best Handyman Boston the Best Handyman in Boston. Ryaan holds Construction Supervisor and Home Improvement Contractor Licenses.
There are 9 references cited in this article, which can be found at the bottom of the page.
This article has been viewed 27,490 times.
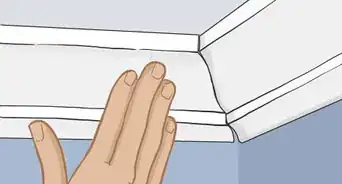
Crown molding is basically the equivalent of baseboard molding but is located where the wall meets the ceiling rather than where it meets the floor. If you want to remove crown molding for any reason, do so by prying it off gently using a hammer and a pry bar. If you plan to reinstall or reuse the molding elsewhere, remove the nails by pulling them through the backside to avoid damaging the face of the molding. Then, scrape away any paint or caulking stuck to the molding and repair any cracks or splits to salvage the molding for reinstallation.
Steps
Prying Crown Molding Off
-
1Place a drop sheet on the floor underneath the crown molding. Lay down a canvas drop cloth, tarp, or plastic sheet on the floor underneath where you will be removing the molding to protect the floor. This will catch any debris and make it easier to clean up after.
- If you don't have any kind of drop sheet, you could lay down some newspapers or pieces of cardboard as an alternative.
-
2Put on protective eyewear and work gloves. Wear a pair of safety glasses or goggles to protect your eyes from any falling debris as you remove the molding. Wear a pair of work gloves to protect your hands from scrapes and other accidents.Advertisement
-
3Score the edges of the molding with a utility knife. Use the tip of a sharp utility knife to carefully slice along the entire top and bottom edges of the crown molding where it meets the wall and the ceiling. This will cut through any paint and caulking that is filling the cracks between the crown molding and the wall and ceiling.[1]
- Caulking and paint both act like glues and will make it much more difficult to pry the molding off without damaging it or the wall or ceiling.[2]
- A box cutter works as an alternative to a utility knife.
Tip: You can use this same method to remove baseboard molding along the bottom of a wall.
-
4Cut any joints where pieces of crown molding meet using a utility knife. Use the tip of your utility knife to slice along the seams where pieces of crown molding meet in the corners and anywhere else where 2 pieces have a seam. This will cut through any caulking or paint at the seams so you can remove each piece of molding separately from the others that it touches.[3]
- It will be much easier to pry and loosen smaller sections of molding than a bunch of sections that are stuck together by paint or caulking.
-
5Hammer a pry bar underneath the bottom edge of the molding at 1 corner. Stick the thin edge of the pry bar against the crease where the bottom of the molding meets the wall in a corner. Carefully tap the pry bar into the crack by hitting the back flat end of it with a hammer.[4]
- This will begin to separate the molding from the wall so you can start to pry it off.
- If you don't have a pry bar, you can hammer another utensil like a putty knife under the edge of the molding to make a small gap, then use the backside of a claw hammer to pry the molding away.
-
6Use the pry bar like a lever to separate the crown molding from the wall. Start prying the crown molding off the wall using a lever motion with a straight pry bar.[5] Only pry it as far as it will easily come off so you avoid damaging the wall.[6]
- You can also use the backside of a hammer, the part for prying up nails, right next to the pry bar to get extra leverage.
- If you want to add extra protection for the wall, slip a scrap piece of wood or a rag between the back of the pry bar and the wall.
-
7Work your way down the section of crown molding using the same technique. Move the pry bar down the section of crown molding to wherever it is still stuck to the wall and hammer it underneath the bottom edge using your hammer. Keep using the pry bar like a lever to pry the molding away from the wall.[7]
- Once the molding is loose all the way along its length, you can use a larger, flatter pry bar to pry it further away from the wall and make it easier to remove.
-
8Use your hands to pull the molding off the wall once you have loosened it all. Use both hands to carefully pull the section of crown molding off the wall after you have pried it up as far as it will go along the whole length of it.[8]
- If you can’t pull the molding off the wall easily, use a pry bar or the back of your hammer in one hand to get more leverage while you pull on the molding with the other hand.
Salvaging Molding to Reuse It
-
1
-
2Use a pair of end cutting pliers to pull the nails through the back of the molding. Grab a nail tightly between the pincers of the end cutting pliers. Roll the pliers forward, away from you, while simultaneously pulling to pull the nail through and out.[11]
- End cutting pliers are also known as nippers, end cutters, or end cutting pincers.
Tip: Don’t try to hammer the nails out through the front from the backside. This is much more likely to damage the crown molding.
-
3Scrape off excess paint or caulking with a thin putty knife or utility knife. Use the flat edge of a thin putty knife or the blade of a utility knife to carefully scrape away any pieces of paint or caulking that are stuck to the back or the edges of the molding.[12]
- Pieces of paint or caulking can make reinstallation of the molding more difficult because it won’t sit flat against the wall and ceiling.
- You will also be able to see if there is any damage to the molding after you scrape away the excess paint and caulking.
-
4Fill any splits or cracks with a dab of wood glue and clamp the molding to dry. Squeeze a small bead of wood glue into any cracks or splits and wipe away the excess with a rag. Clamp the crown molding where it is damaged with a rubber clamp to hold the pieces together while the glue dries.[13]
- Use multiple clamps if there is a long split in the molding. Aim for 1 clamp every 10–12 in (25–30 cm) or so.
Things You’ll Need
Prying Crown Molding Off
- Utility knife
- Pry bar
- Hammer
- Protective eyewear
- Work gloves
- Drop sheet
Salvaging Molding to Reuse It
- End cutting pliers
- Thin putty knife or utility knife
- Wood glue
- Rag
- Rubber clamp
References
- ↑ https://www.youtube.com/watch?v=LsHlOTXulKo&feature=youtu.be&t=19
- ↑ [v161695_b01]. 6 October 2022.
- ↑ https://www.youtube.com/watch?v=LsHlOTXulKo&feature=youtu.be&t=81
- ↑ https://www.youtube.com/watch?v=LsHlOTXulKo&feature=youtu.be&t=81
- ↑ [v161695_b01]. 6 October 2022.
- ↑ https://www.youtube.com/watch?v=LsHlOTXulKo&feature=youtu.be&t=120
- ↑ https://www.youtube.com/watch?v=LsHlOTXulKo&feature=youtu.be&t=135
- ↑ https://www.youtube.com/watch?v=LsHlOTXulKo&feature=youtu.be&t=141
- ↑ [v161695_b01]. 6 October 2022.


