This article was co-authored by wikiHow Staff. Our trained team of editors and researchers validate articles for accuracy and comprehensiveness. wikiHow's Content Management Team carefully monitors the work from our editorial staff to ensure that each article is backed by trusted research and meets our high quality standards.
There are 7 references cited in this article, which can be found at the bottom of the page.
This article has been viewed 61,486 times.
Learn more...
Printed mugs make for wonderful gifts and mementos. If you want to print a photo on a mug yourself at home to make your own personalized mug, print out your image or text using a sublimation printer, place it on the mug, and then transfer the image using the heat of an iron. If you don’t have a sublimation printer or need to print a large number of mugs, hire a professional to print the photo onto the mug for you, or send your text or image to a printing company to transfer onto a mug. Enjoy using or gifting your personalized mug!
Steps
Printing on a Mug with a Sublimation Printer
-
1Print out your text or image on a sublimation printer to the correct size. A sublimation printer prints out your image using ink that can be transferred using heat. This printer also prints the image back to front so that the image isn’t mirrored when it is transferred to the mug. Open the file that contains the text or image that you want to print. Press “File,” select “Print Settings,” tap "Custom Size,” and then enter the height and width that you would like the image.[1]
- Always use sublimation paper in a sublimation printer, as regular paper won’t allow the ink to transfer onto your mug.
-
2Place the inked side of the print onto the mug. Place the print face down onto the mug in your desired position. Check that print is the right way up, as the ink is almost impossible to remove once it has adhered to the mug.[2]
- Images or text can be placed on the bottom, side, or handle of your mug.
- Mugs that have a smooth finish work best for this method, as bumpy finishes can make the print look uneven and patchy.
Advertisement -
3Secure the print in place with heat-proof tape. This ensures that the print looks sharp and clear on your mug. Place a strip of heat-proof tape on each of the edges of the print to hold it in place.[3]
- Try not to place the tape over the actual text or image. If possible, place the tape over the white space.
- Purchase heat-proof tape from a hardware store.
-
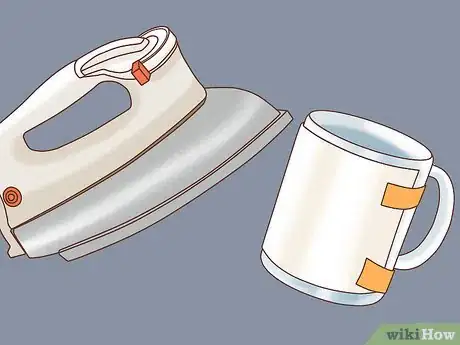
4Rub the iron over the back of the print until it goes slightly brown. Turn your iron onto a low-medium setting and wait for it to heat up. Once it is warm, gently rub it back and forth over the entire print until the paper has a light brown tinge and the image starts to show through the paper. Try to rub the iron over the print as evenly as possible. In order to do this, you will need to slowly swivel the mug around so that the iron touches the entire print.[4]
- If you want to print a large number of mugs commercially, consider purchasing an automatic mug press. This allows you to heat the sublimation print in the mug press, instead of using an iron.[5]
-
5Remove the tape and the print to reveal the new image on your mug. Carefully peel back the tape and then lift the printing paper away from your mug. Your freshly printed mug is ready to be used![6]
- Avoid placing your printed mug in the dishwasher, as this can damage the print.
Using a Printing Company to Print on a Mug
-
1Search for a custom printing website or shop. There are countless companies that offer mug printing services. Search online for “Custom Mug Printing” or approach your local print shop. Ask the printing company whether they provide the mug or if you need to provide it.[7]
- Most online mug printing companies don’t give you the option of printing on your own mug. If you want to print on a specific mug, it is best to take it to a print shop.
- VistaPrint, Shutterfly, and CafePress are inexpensive and popular online mug printing companies.
-
2Give the print company your mug design. Send the printing company a digital copy of your mug design. Most companies will require you to supply the image in a pdf, docx, or Indesign file. Email the image to the company at the highest resolution that your email provider allows, as this ensures that the image will be as clear as possible.
- The print company will adjust your image or text to fit onto the mug.
-
3Wait for the mug to be printed. If you take your mug to a print shop it will often only take a few hours to be printed. If you commission an online print company to print on your mug it will normally take 1-10 business days to be printed and delivered to you.[8]
Community Q&A
-
QuestionCan photo paper be used in photos on mugs?
 T. ChinsenTop AnswererThere is a wikiHow article on how to Make Photo Mugs . In essence, a transfer paper is needed to move the image from the paper and onto the mug. Photo paper is specifically made to give a clear image but is not designed to be transferred.
Things You’ll Need
Using a Sublimination Printer and Iron
- Sublimation printer
- Iron
- Heat-proof tape
- Mug
References
- ↑ https://youtu.be/VYXsTbWI-0c?t=19
- ↑ https://youtu.be/VYXsTbWI-0c?t=33
- ↑ https://youtu.be/VYXsTbWI-0c?t=53
- ↑ https://youtu.be/VYXsTbWI-0c?t=118
- ↑ https://youtu.be/fi1Pp-G5bC8?t=105
- ↑ https://youtu.be/VYXsTbWI-0c?t=133
- ↑ https://mashable.com/2009/09/05/sell-products-online/#ryd1sdbH1mqy
- ↑ https://mashable.com/2009/09/05/sell-products-online/#ryd1sdbH1mqy


